Settle By Store
Required POS Build: 10127
Settle By Store is a powerful feature that enables merchants with multiple TPNs under a single store to settle batches instantly for all TPNs at once or select specific ones to settle. This eliminates the need to manually locate and settle each TPN/device individually, saving time and improving efficiency.
Enabling Settle By Store for Merchants
To enable Settle By Store for the merchant’s payment terminal TPN, follow these steps:
-
Log in to the iPOSpays portal using an ISO account.
-
Navigate to S.T.E.A.M → Edit Parameters.
-
Use the search box at the top of the screen to find and select the merchant’s payment terminal TPN..
-
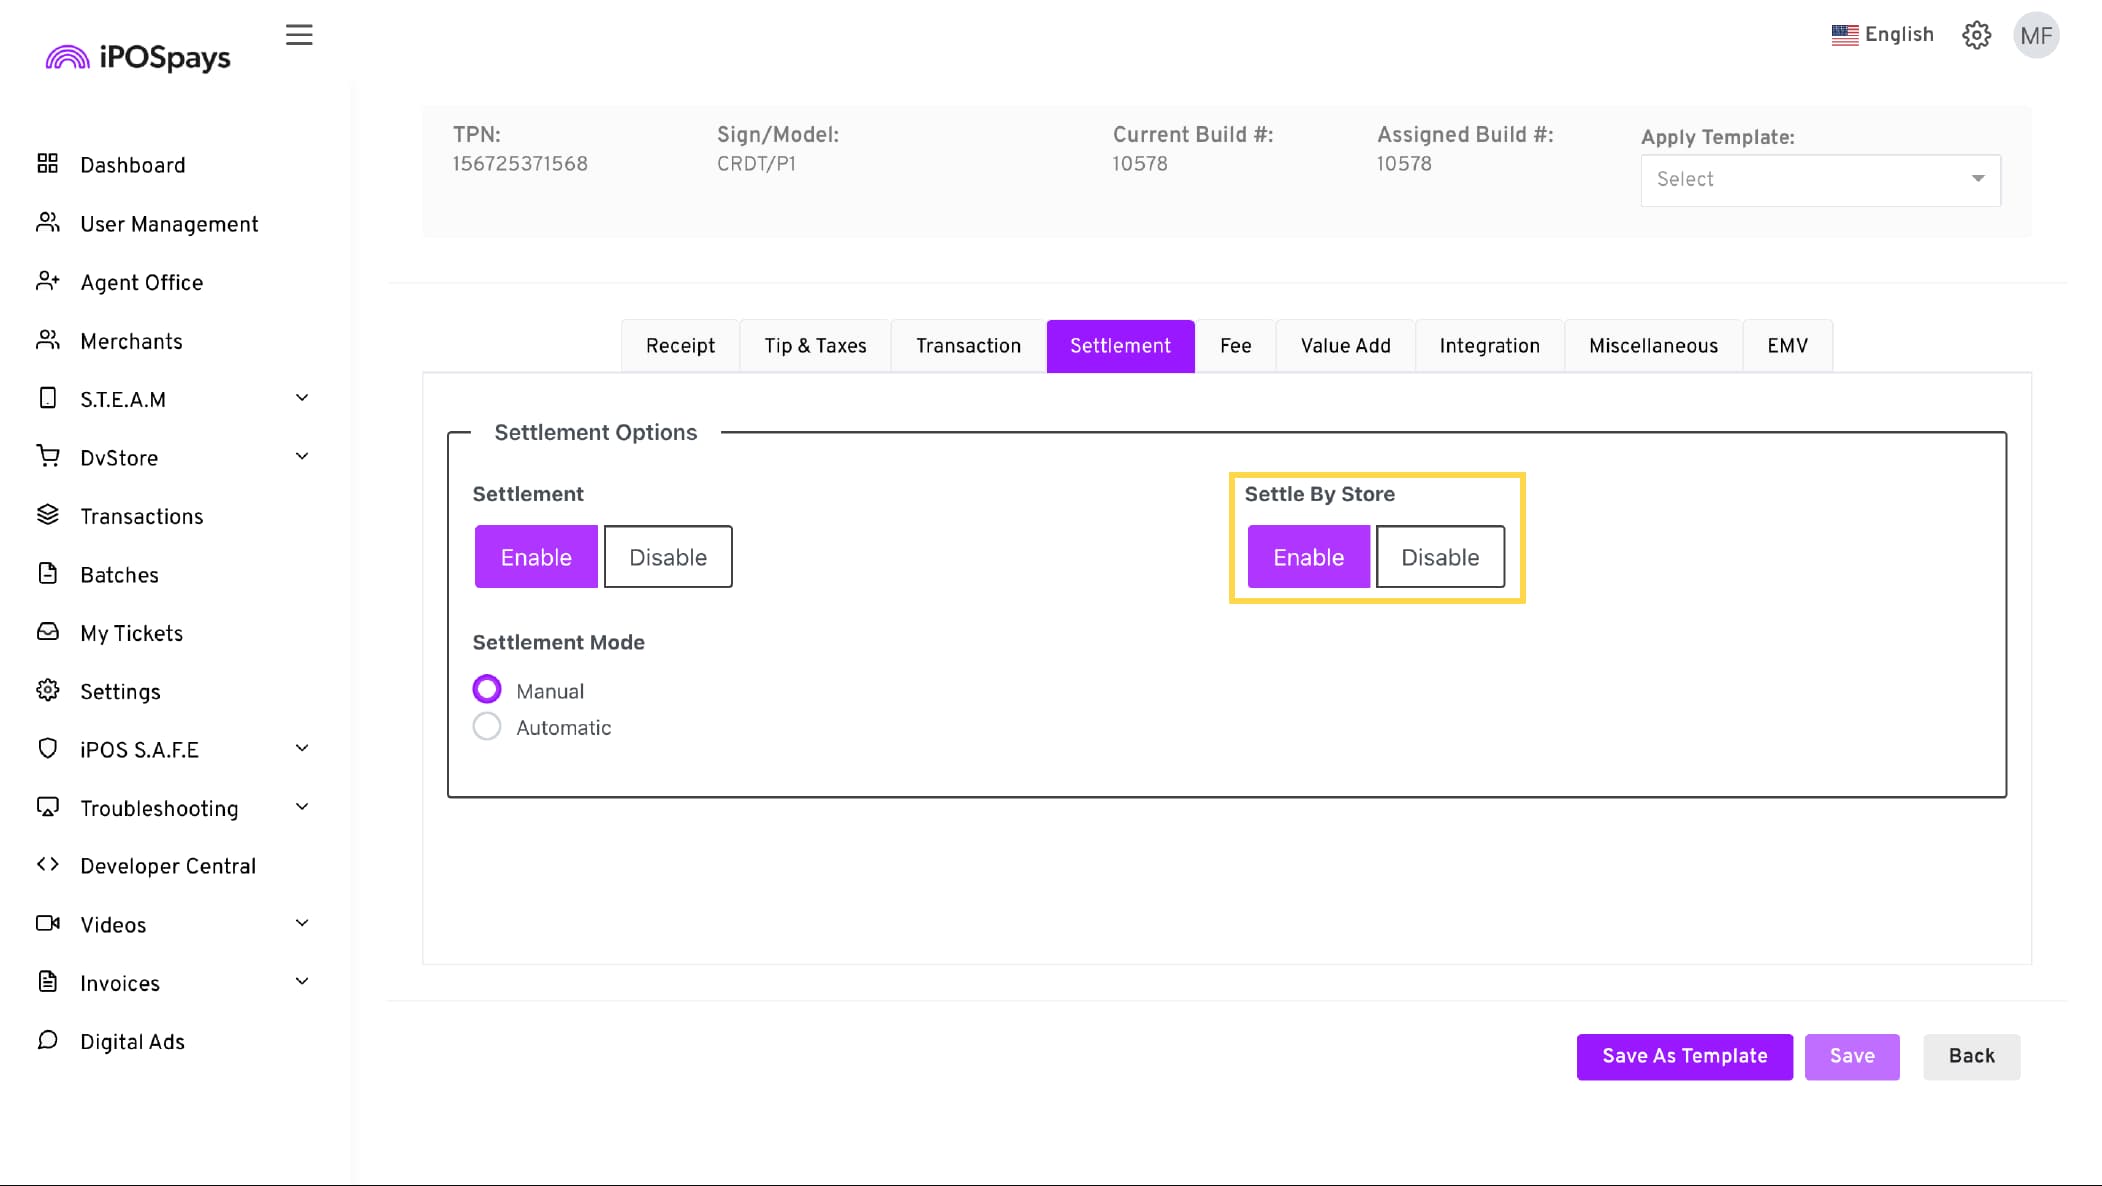
Click on Edit Parameter → Settlement → Enable/Disable Settle By Store.
-
Follow these steps on all the TPNs you wish to enable this feature for within the store.
Using Settle By Store in CloudPOS
This feature is available by default for CloudPOS TPNs and does not require ISOs to enable any additional options for it to function.
-
Log in to the iPOSpays portal using a merchant account.
-
Navigate to Batches.
- If the merchant has multiple stores, use the search box to find and select the specific merchant store.
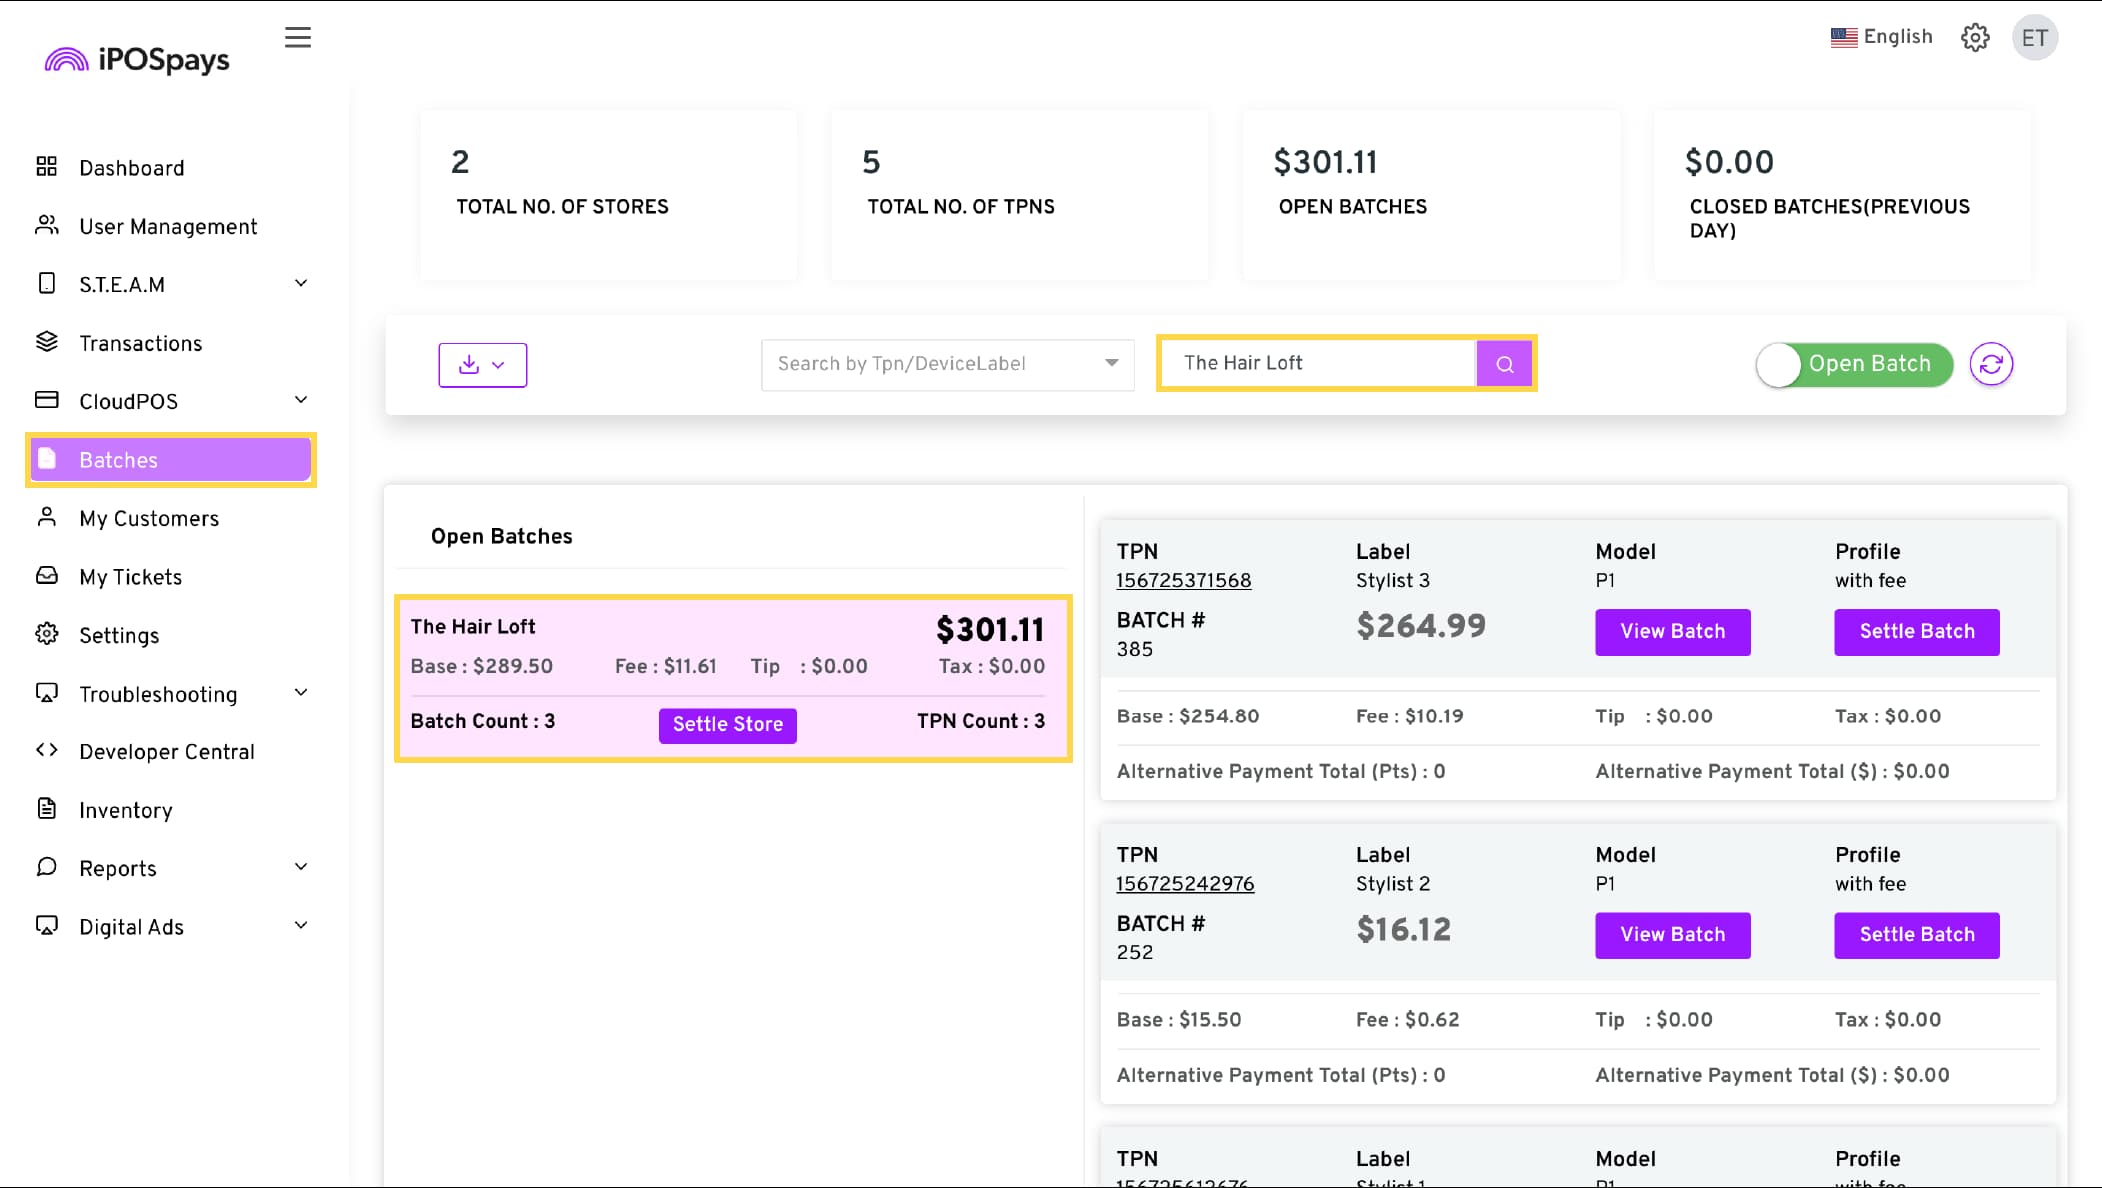
- Click Settle Store → A tab will appear displaying the TPNs linked to the store.
-
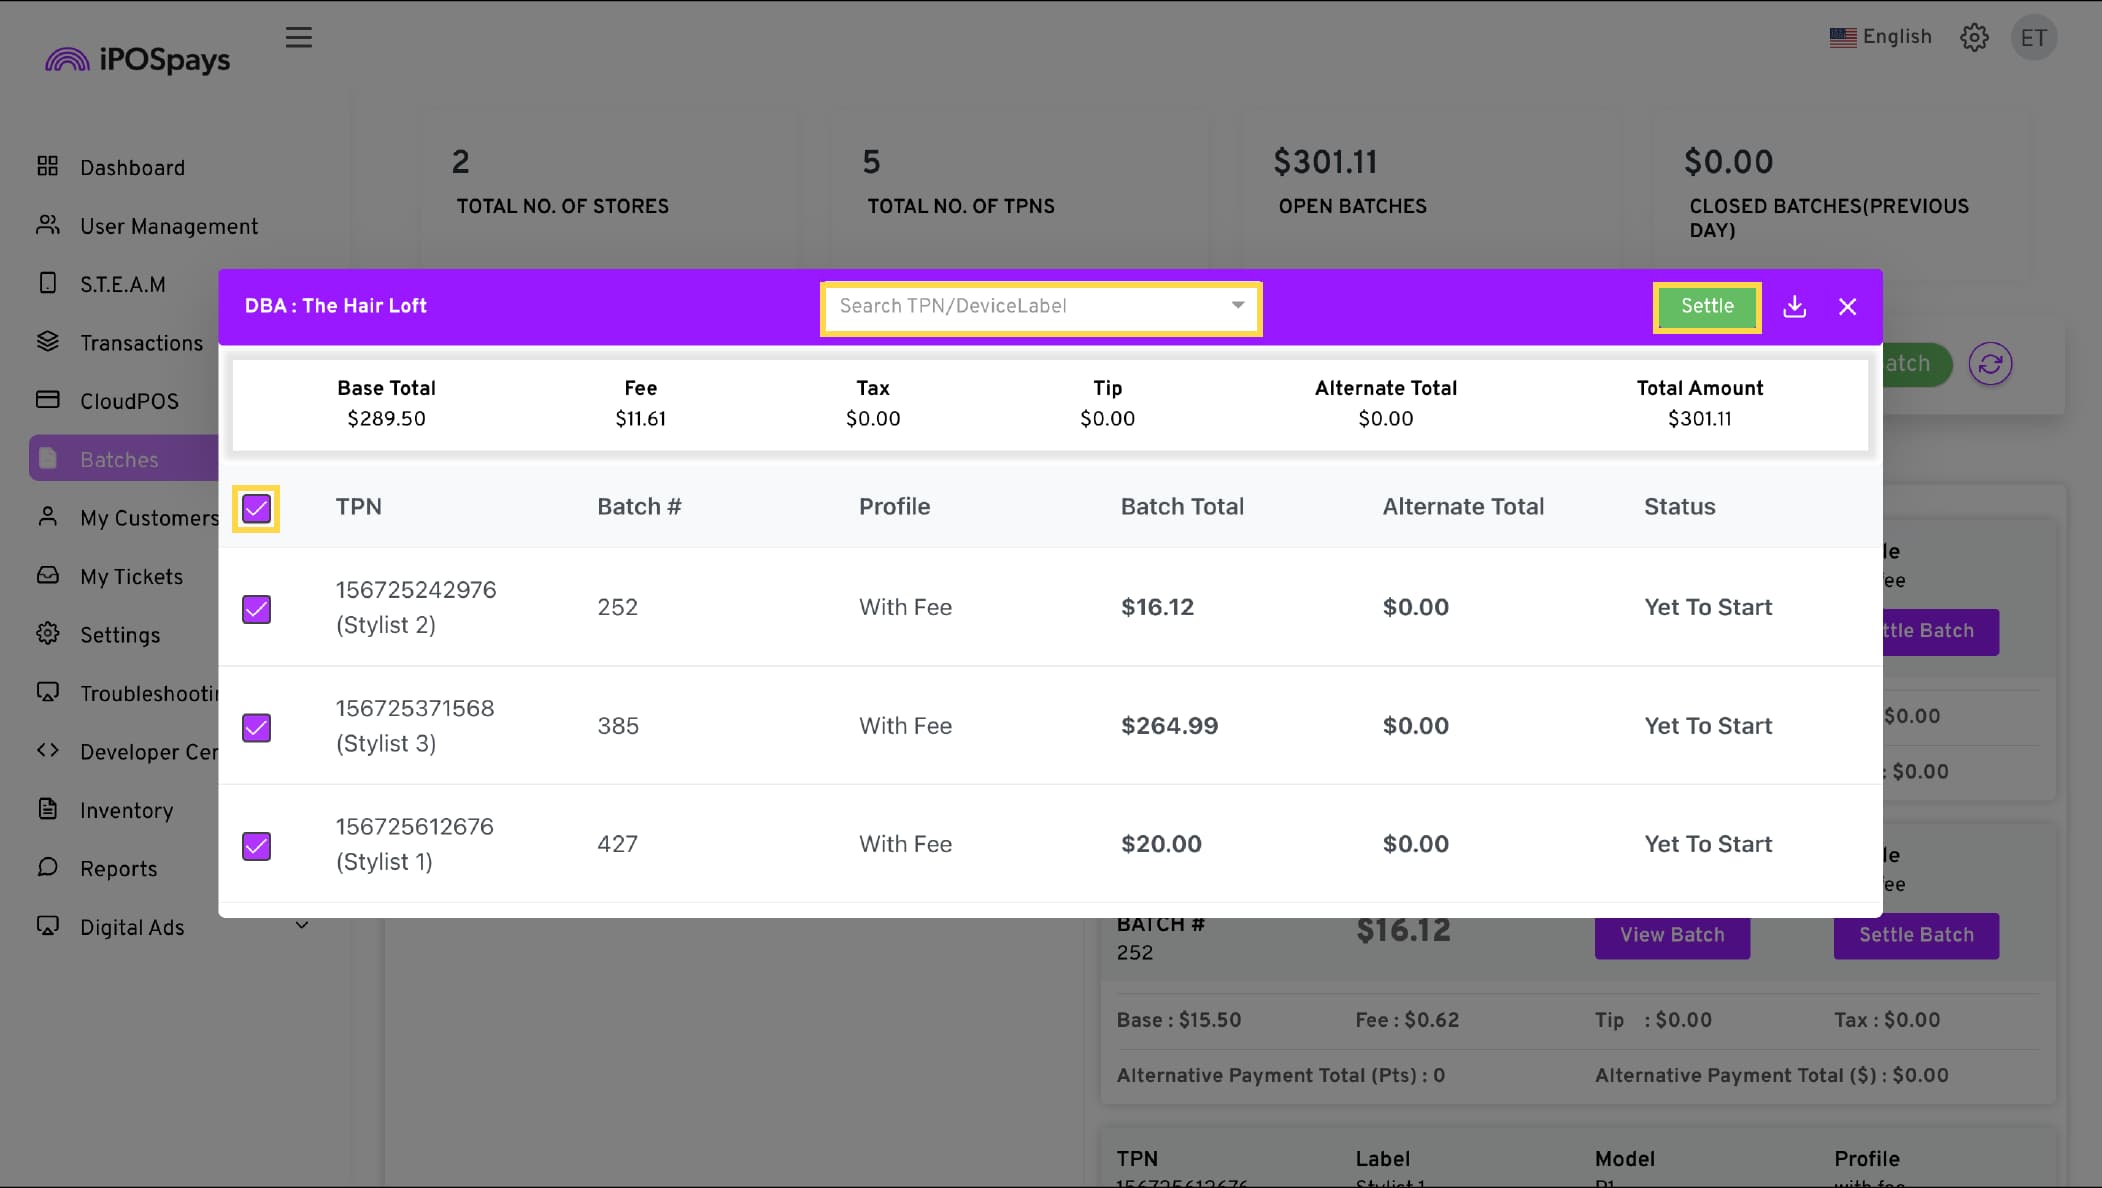
Check/uncheck the TPNs you want to include in the batch settlement.
-
Click Settle to finalize the process.
-
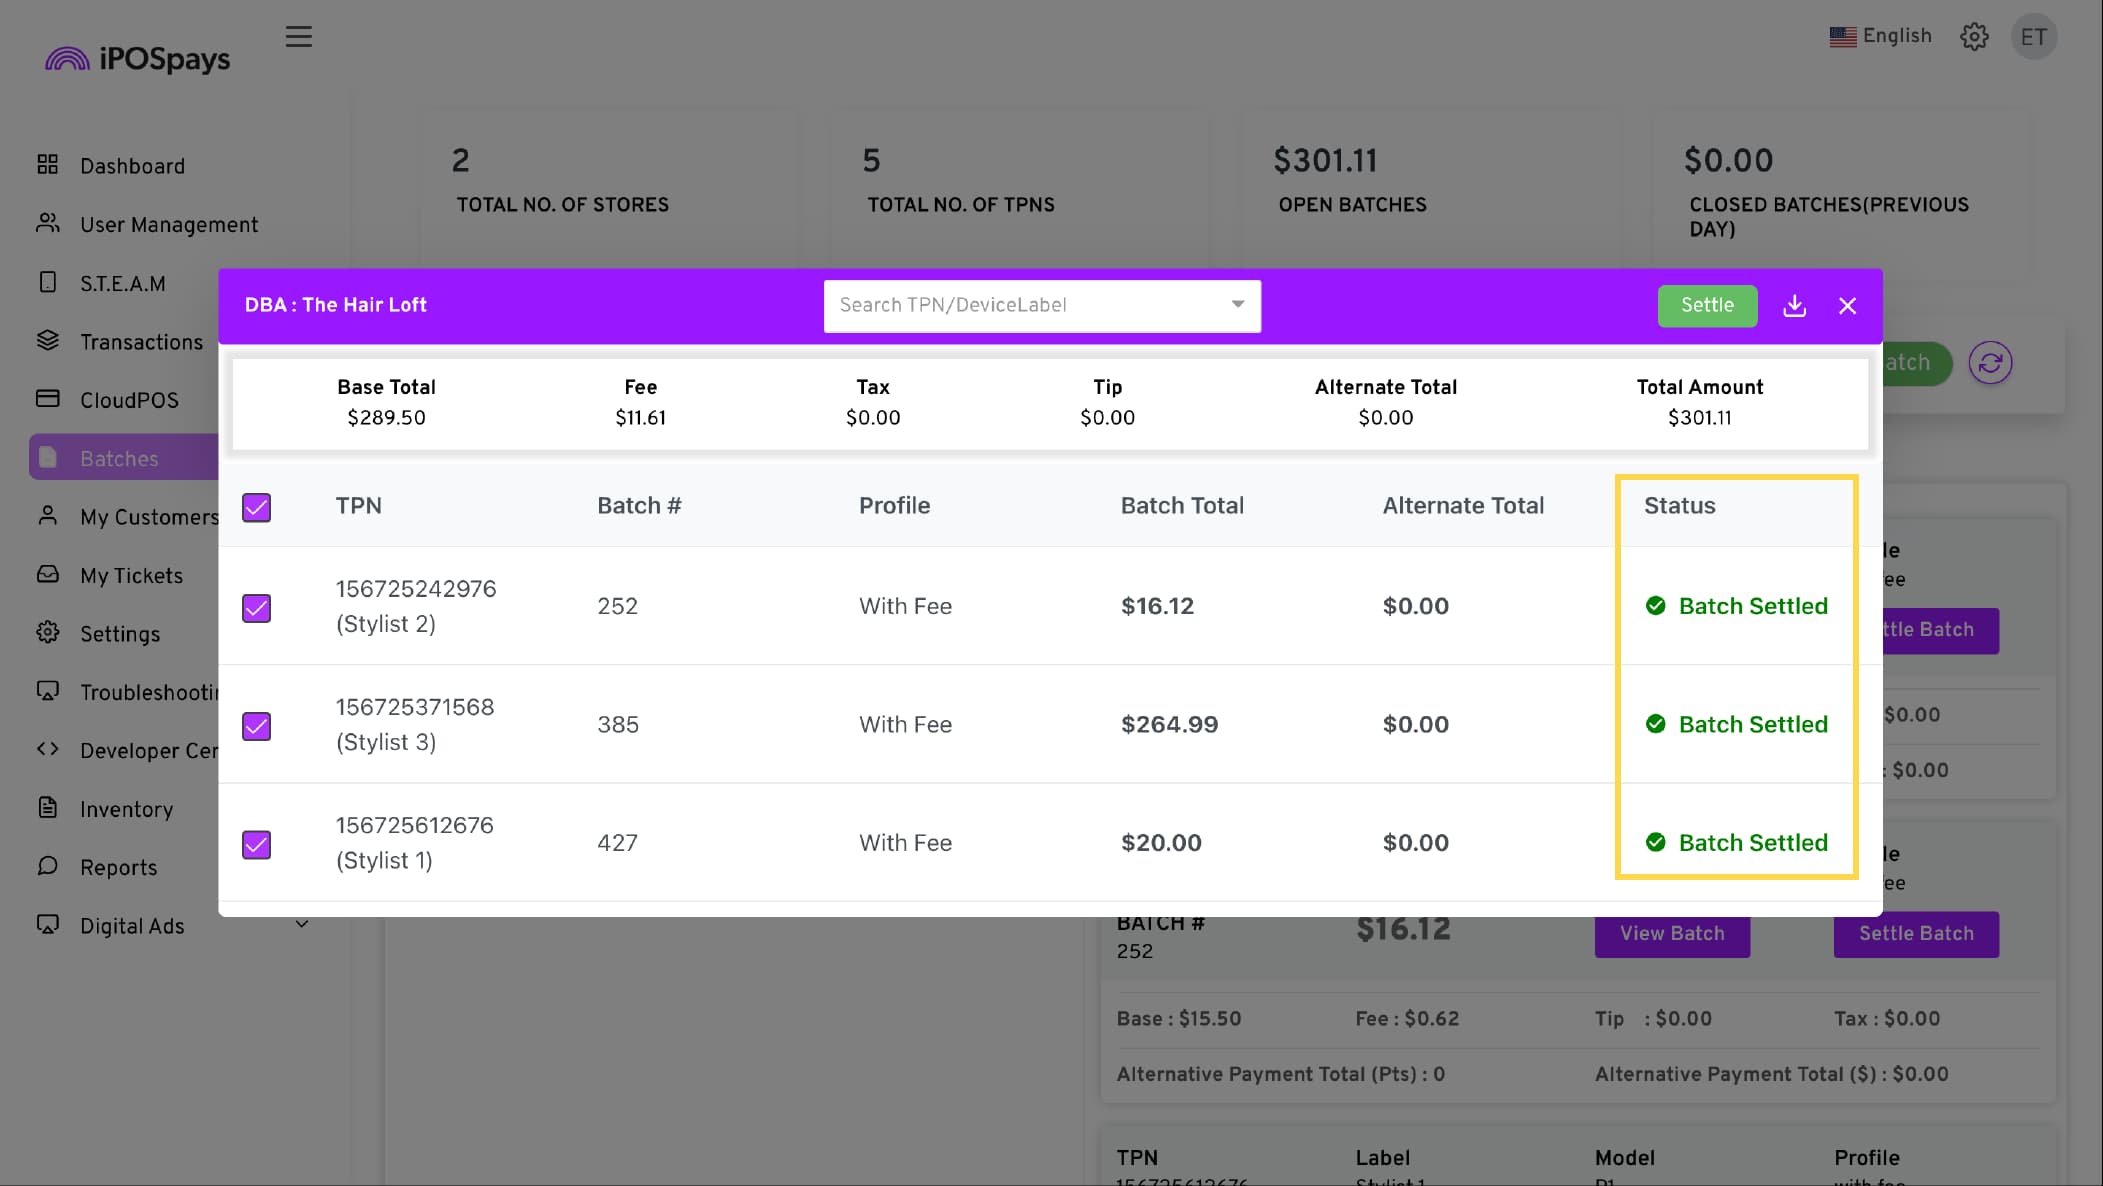
The batch status will update from Yet to Start to Batch Settled.
Using Settle By Store on a Payment Terminal
-
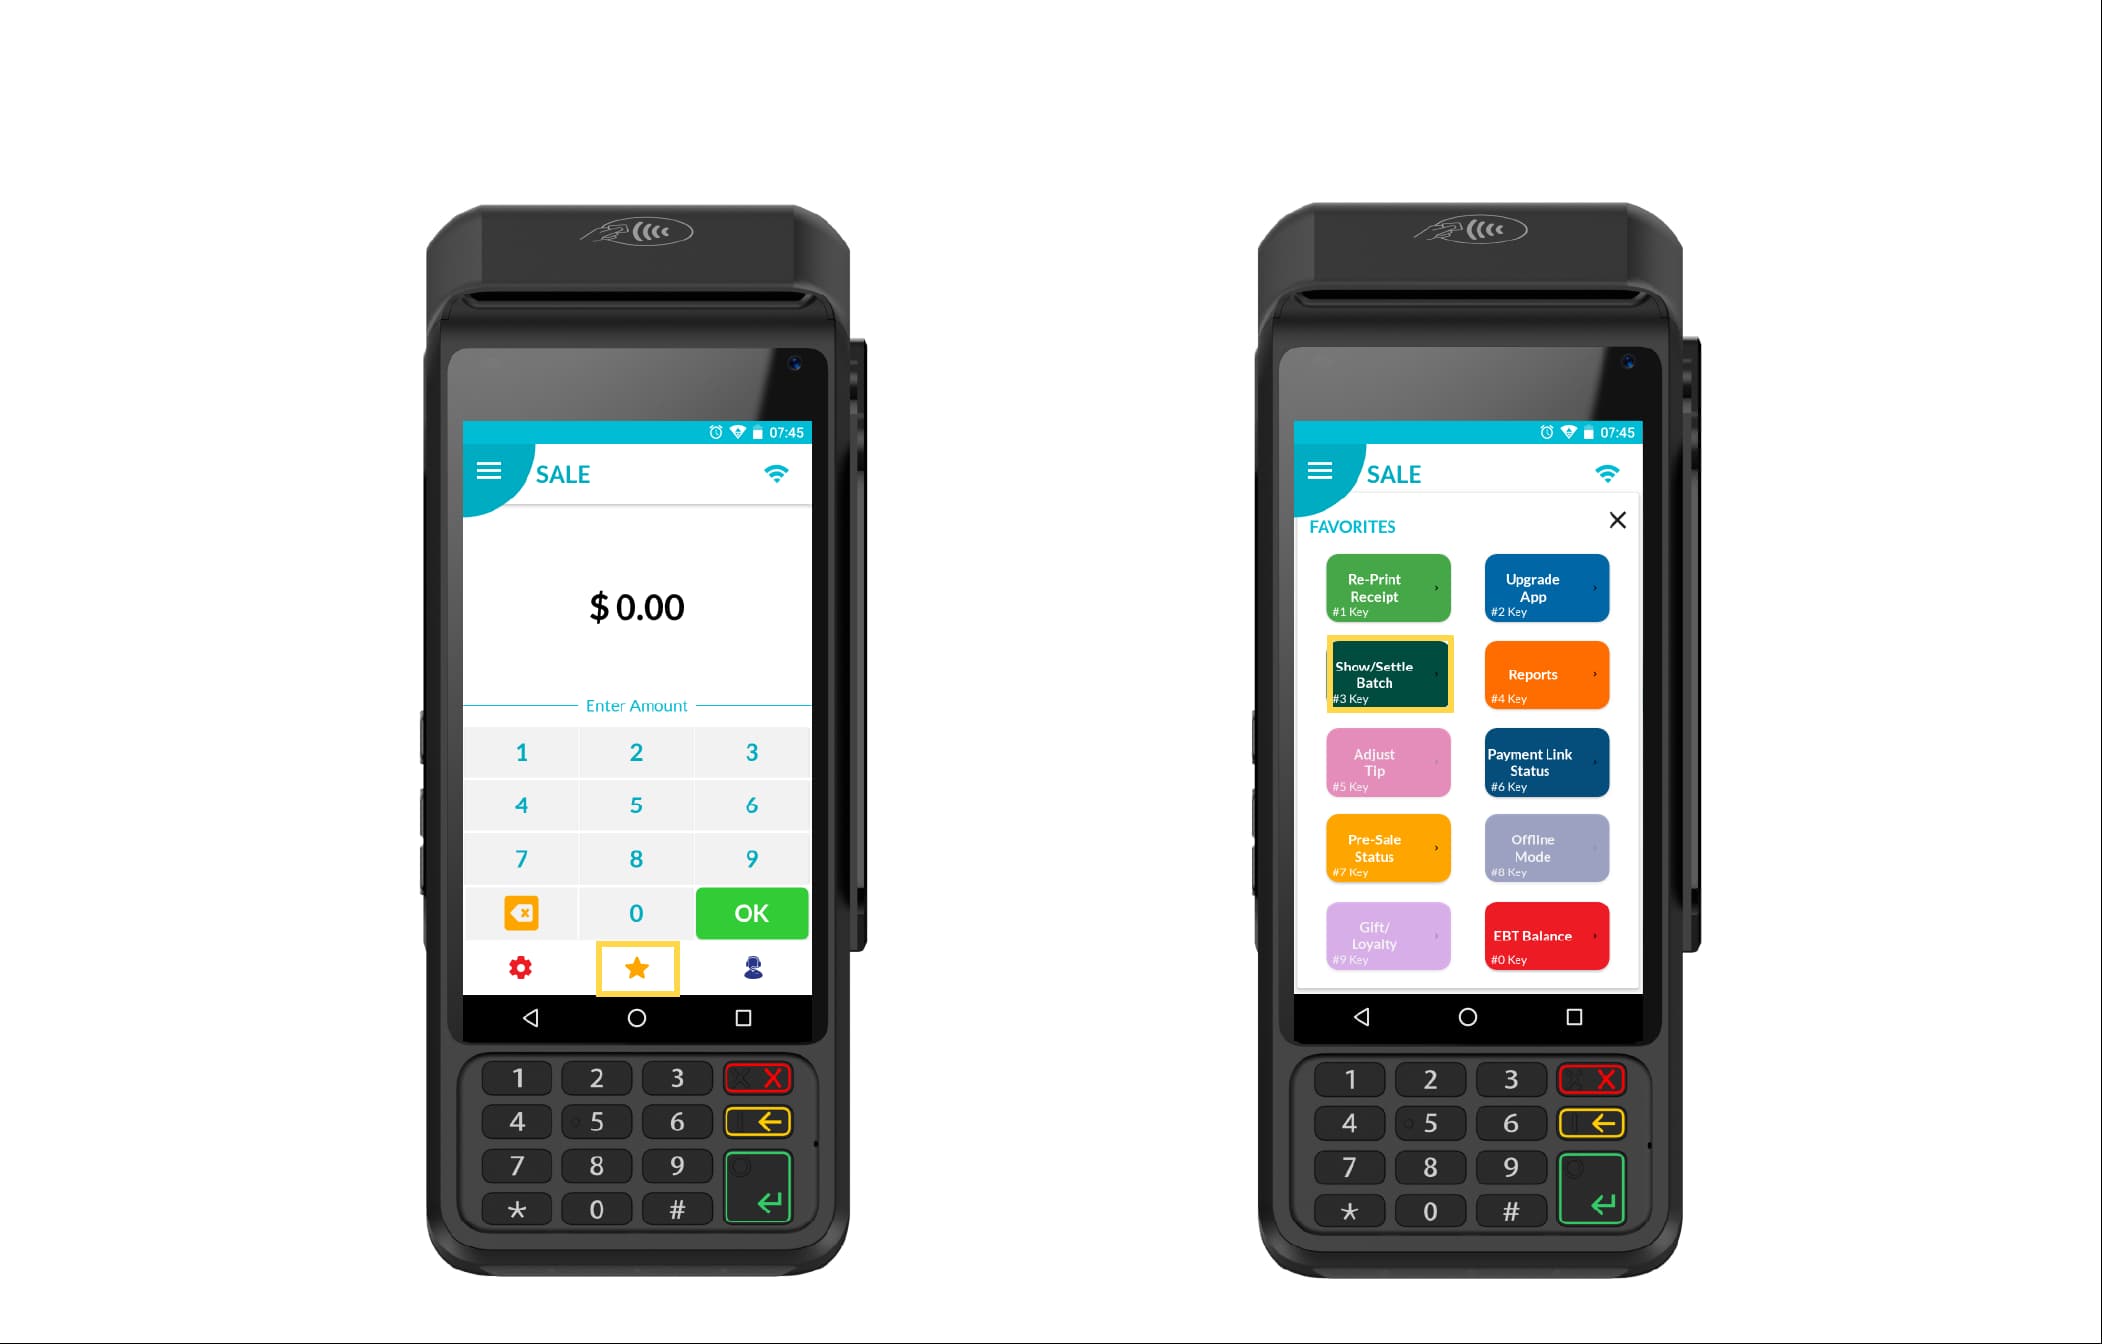
From the idle payment screen, tap ☆ to access Favorites.
-
Select Show/Settle Batch.
-
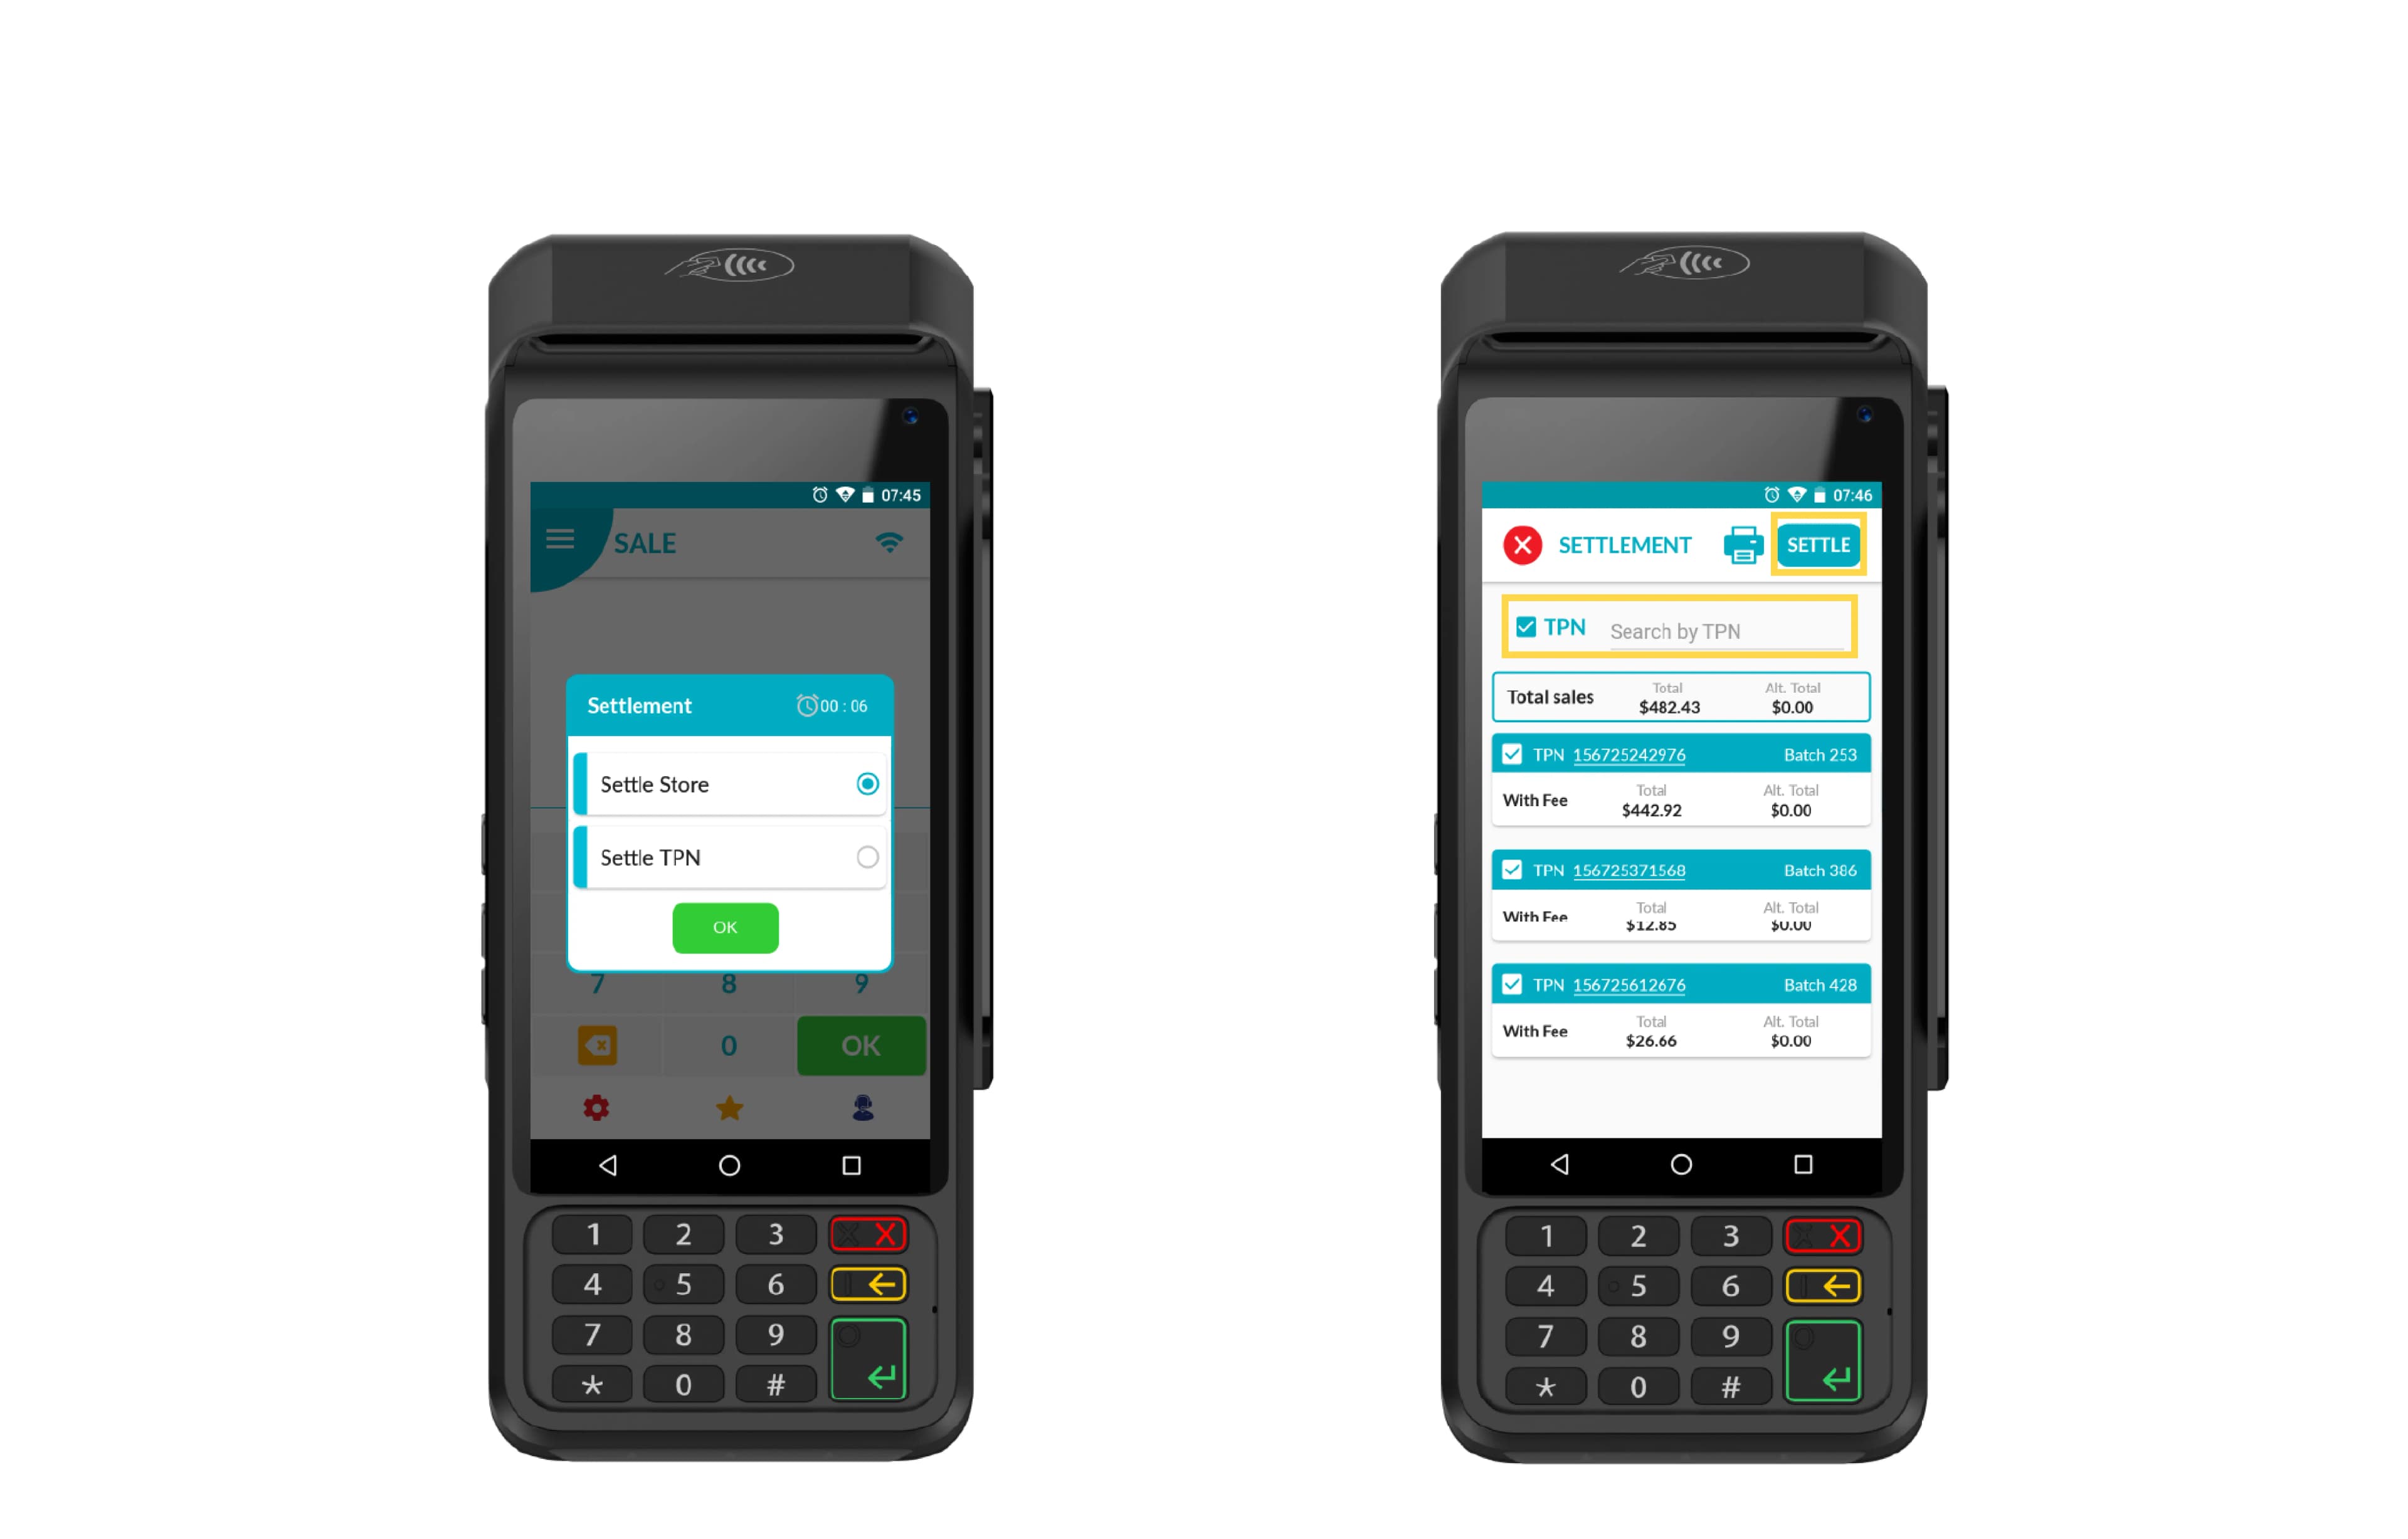
A prompt will appear with two options:
-
Settle Store: Settles the batch for all TPNs linked to the same store.
-
Settle TPN: Settles the batch for the specific TPN registered to the payment terminal.
-
-
Choose Settle Store → Tap OK.
-
Select all TPNs or choose specific ones using the search box, then tap Settle to process the batch settlement.
-
To print the batch report for the selected TPNs, tap the print icon at the top of the screen.