New Pockyt Integration on Dejavoo Terminals
In this release, we are introducing Pockyt integration for merchants using CloudPOS and Dejavoo payment terminals powered by iPOSpays. Pockyt is a third-party provider that allows merchants to accept payments through:
-
PayPal (Digital Wallet)
-
Venmo (Digital Wallet)
This gives merchants additional ways to accept payments, including digital wallets and alternative payment methods.
Feature Compatibility
-
Minimum Required POS Build: 10145
-
Supported Processors: Not applicable
-
Supported Fee Types: Not Applicable
-
Supported Terminals: Dejavoo P series
Where is it Available?
-
CloudPOS and POS terminals
-
Send Payment Link and Generic Hosted Payment Page
Supported Transaction Types
-
Sale
-
Refund
-
Void
Prerequisites & Requirements
-
The merchant must be registered with Pockyt to obtain credentials. Contact your Dejavoo sales executive for assistance.
-
The merchant must have a valid CloudPOS or Standalone P Series TPN and be onboarded as a merchant admin on iPOSpays.
How to Enable This Feature on iPOSpays
Step 1 – Enable Pockyt for Merchant
-
Log in to the iPOSpays portal with an ISO account.
-
Go to the Merchants module and search for the target merchant.

- Click on the DBA → Edit Merchant → Integrations → Pockyt → Save.
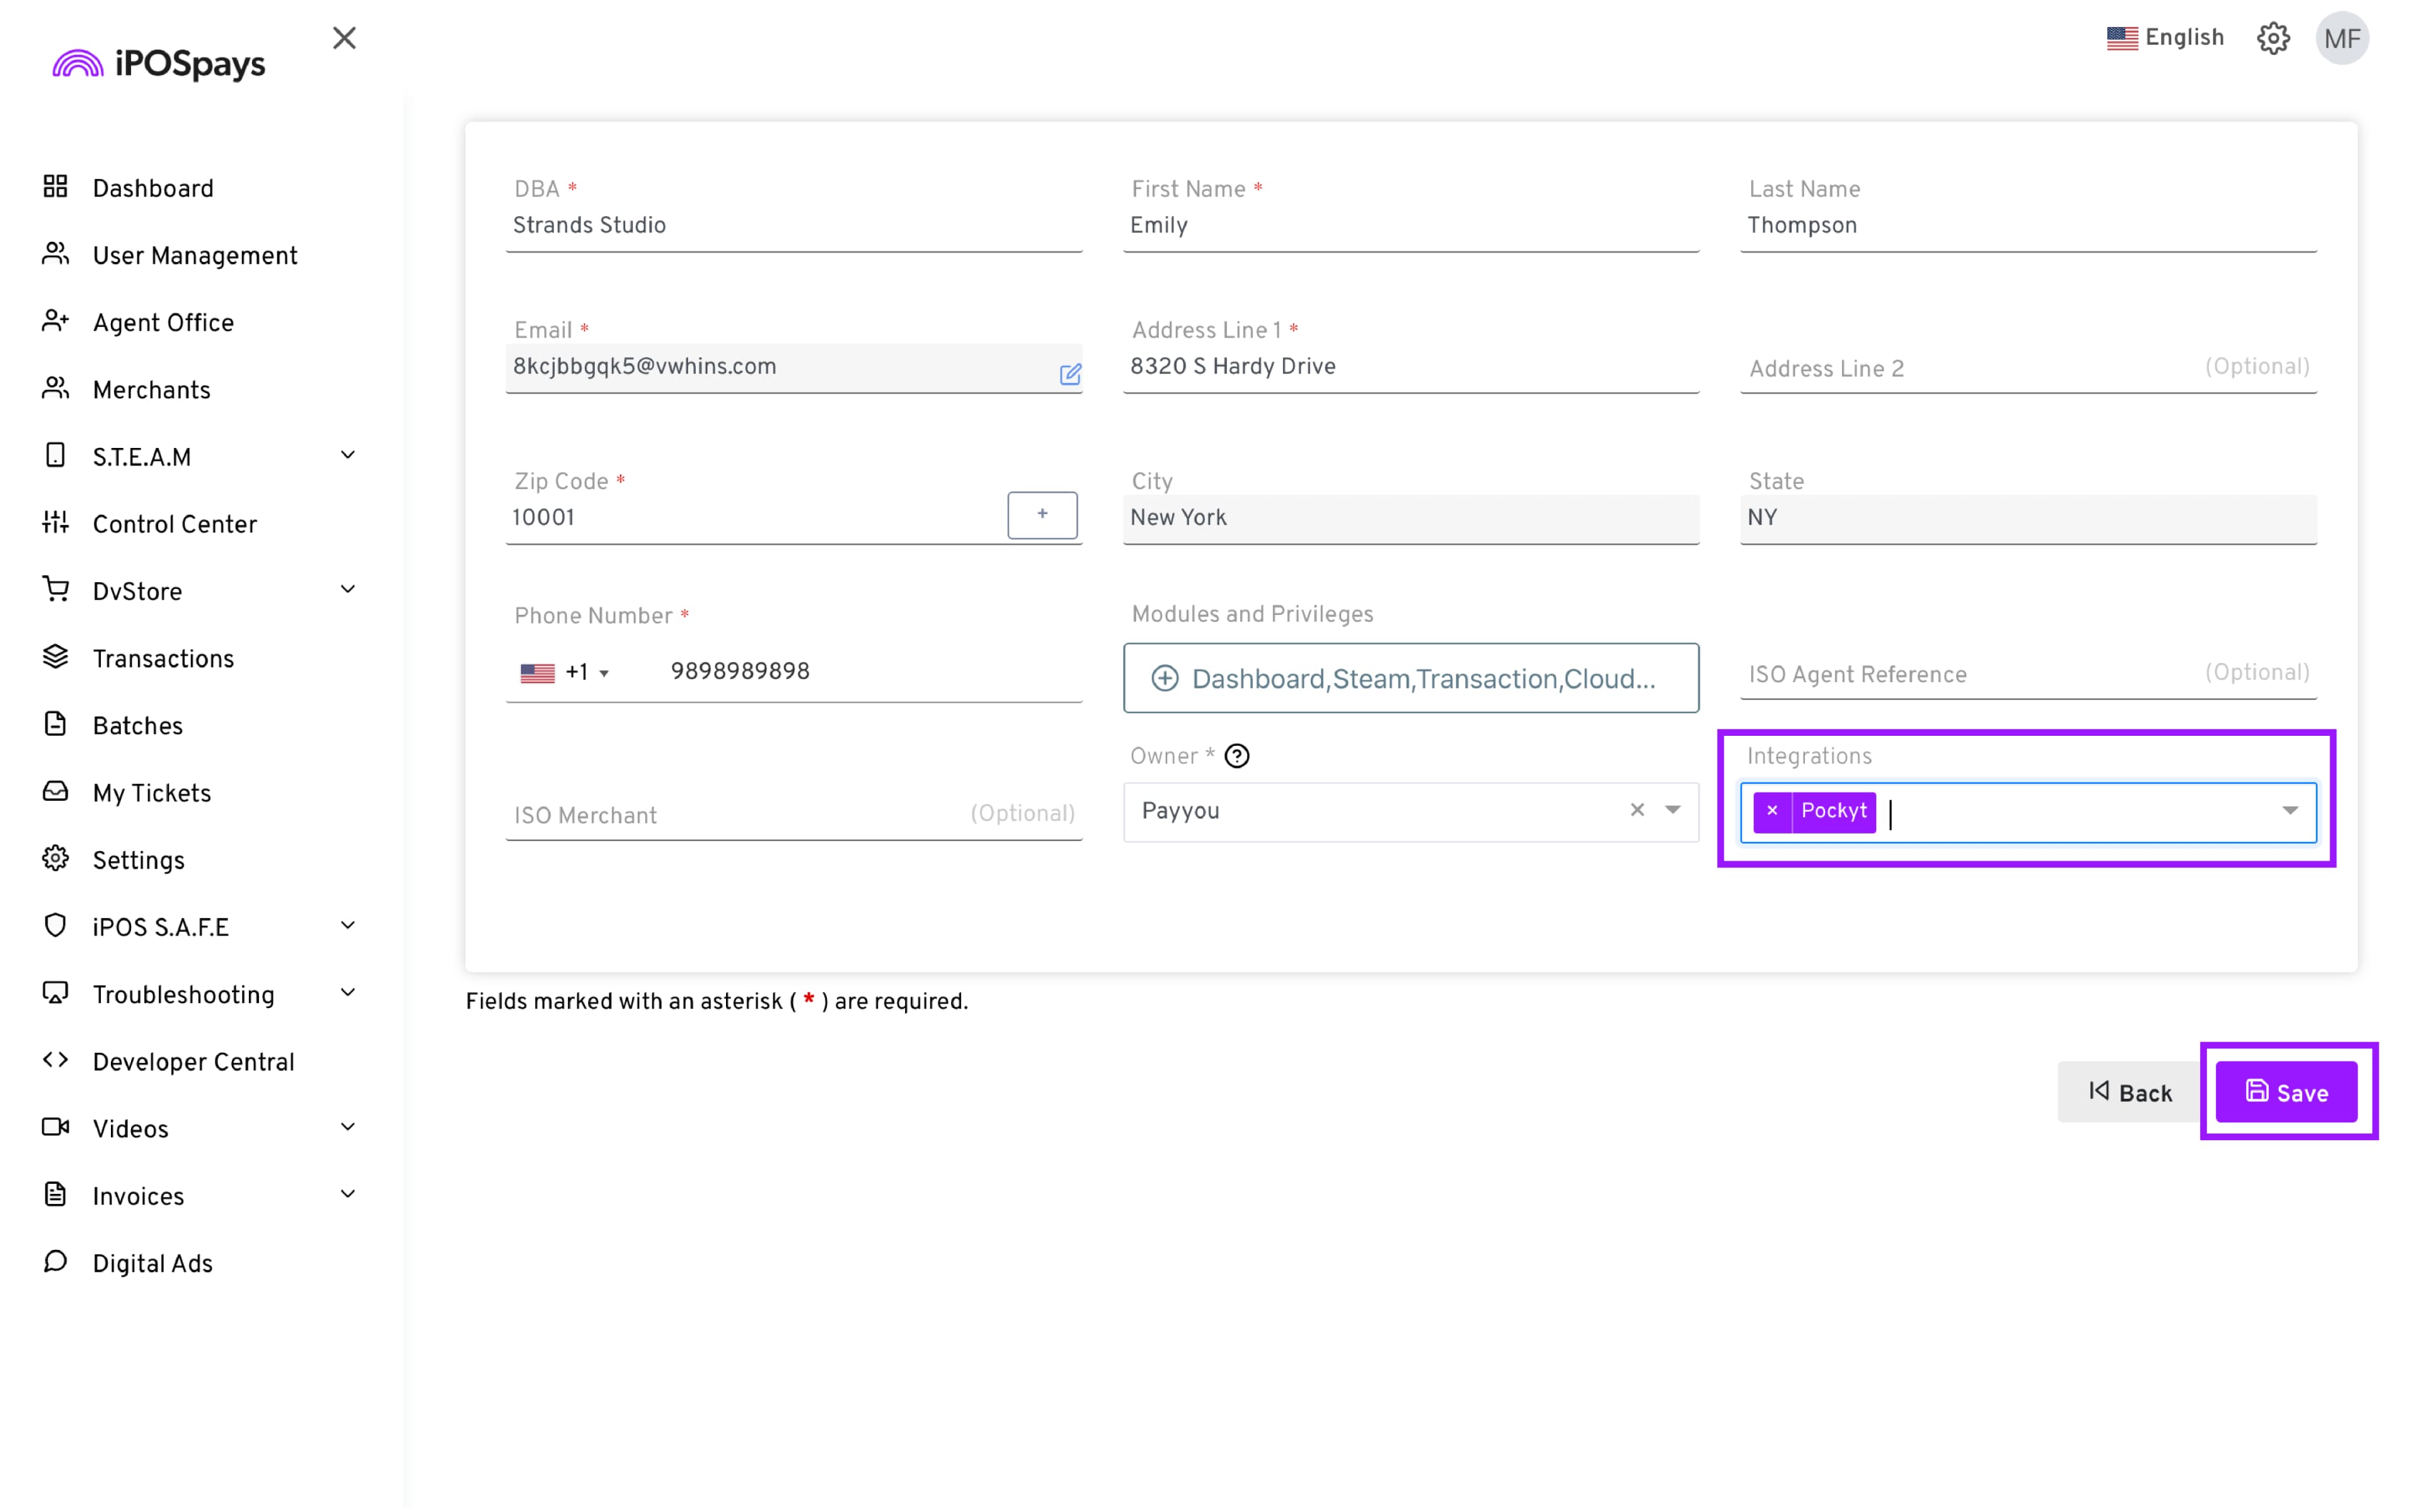
- Provide the merchant with their Pockyt credentials (Merchant ID, Store ID, Store Token).
Step 2 – Merchant Configuration
-
Log in to the merchant portal.
-
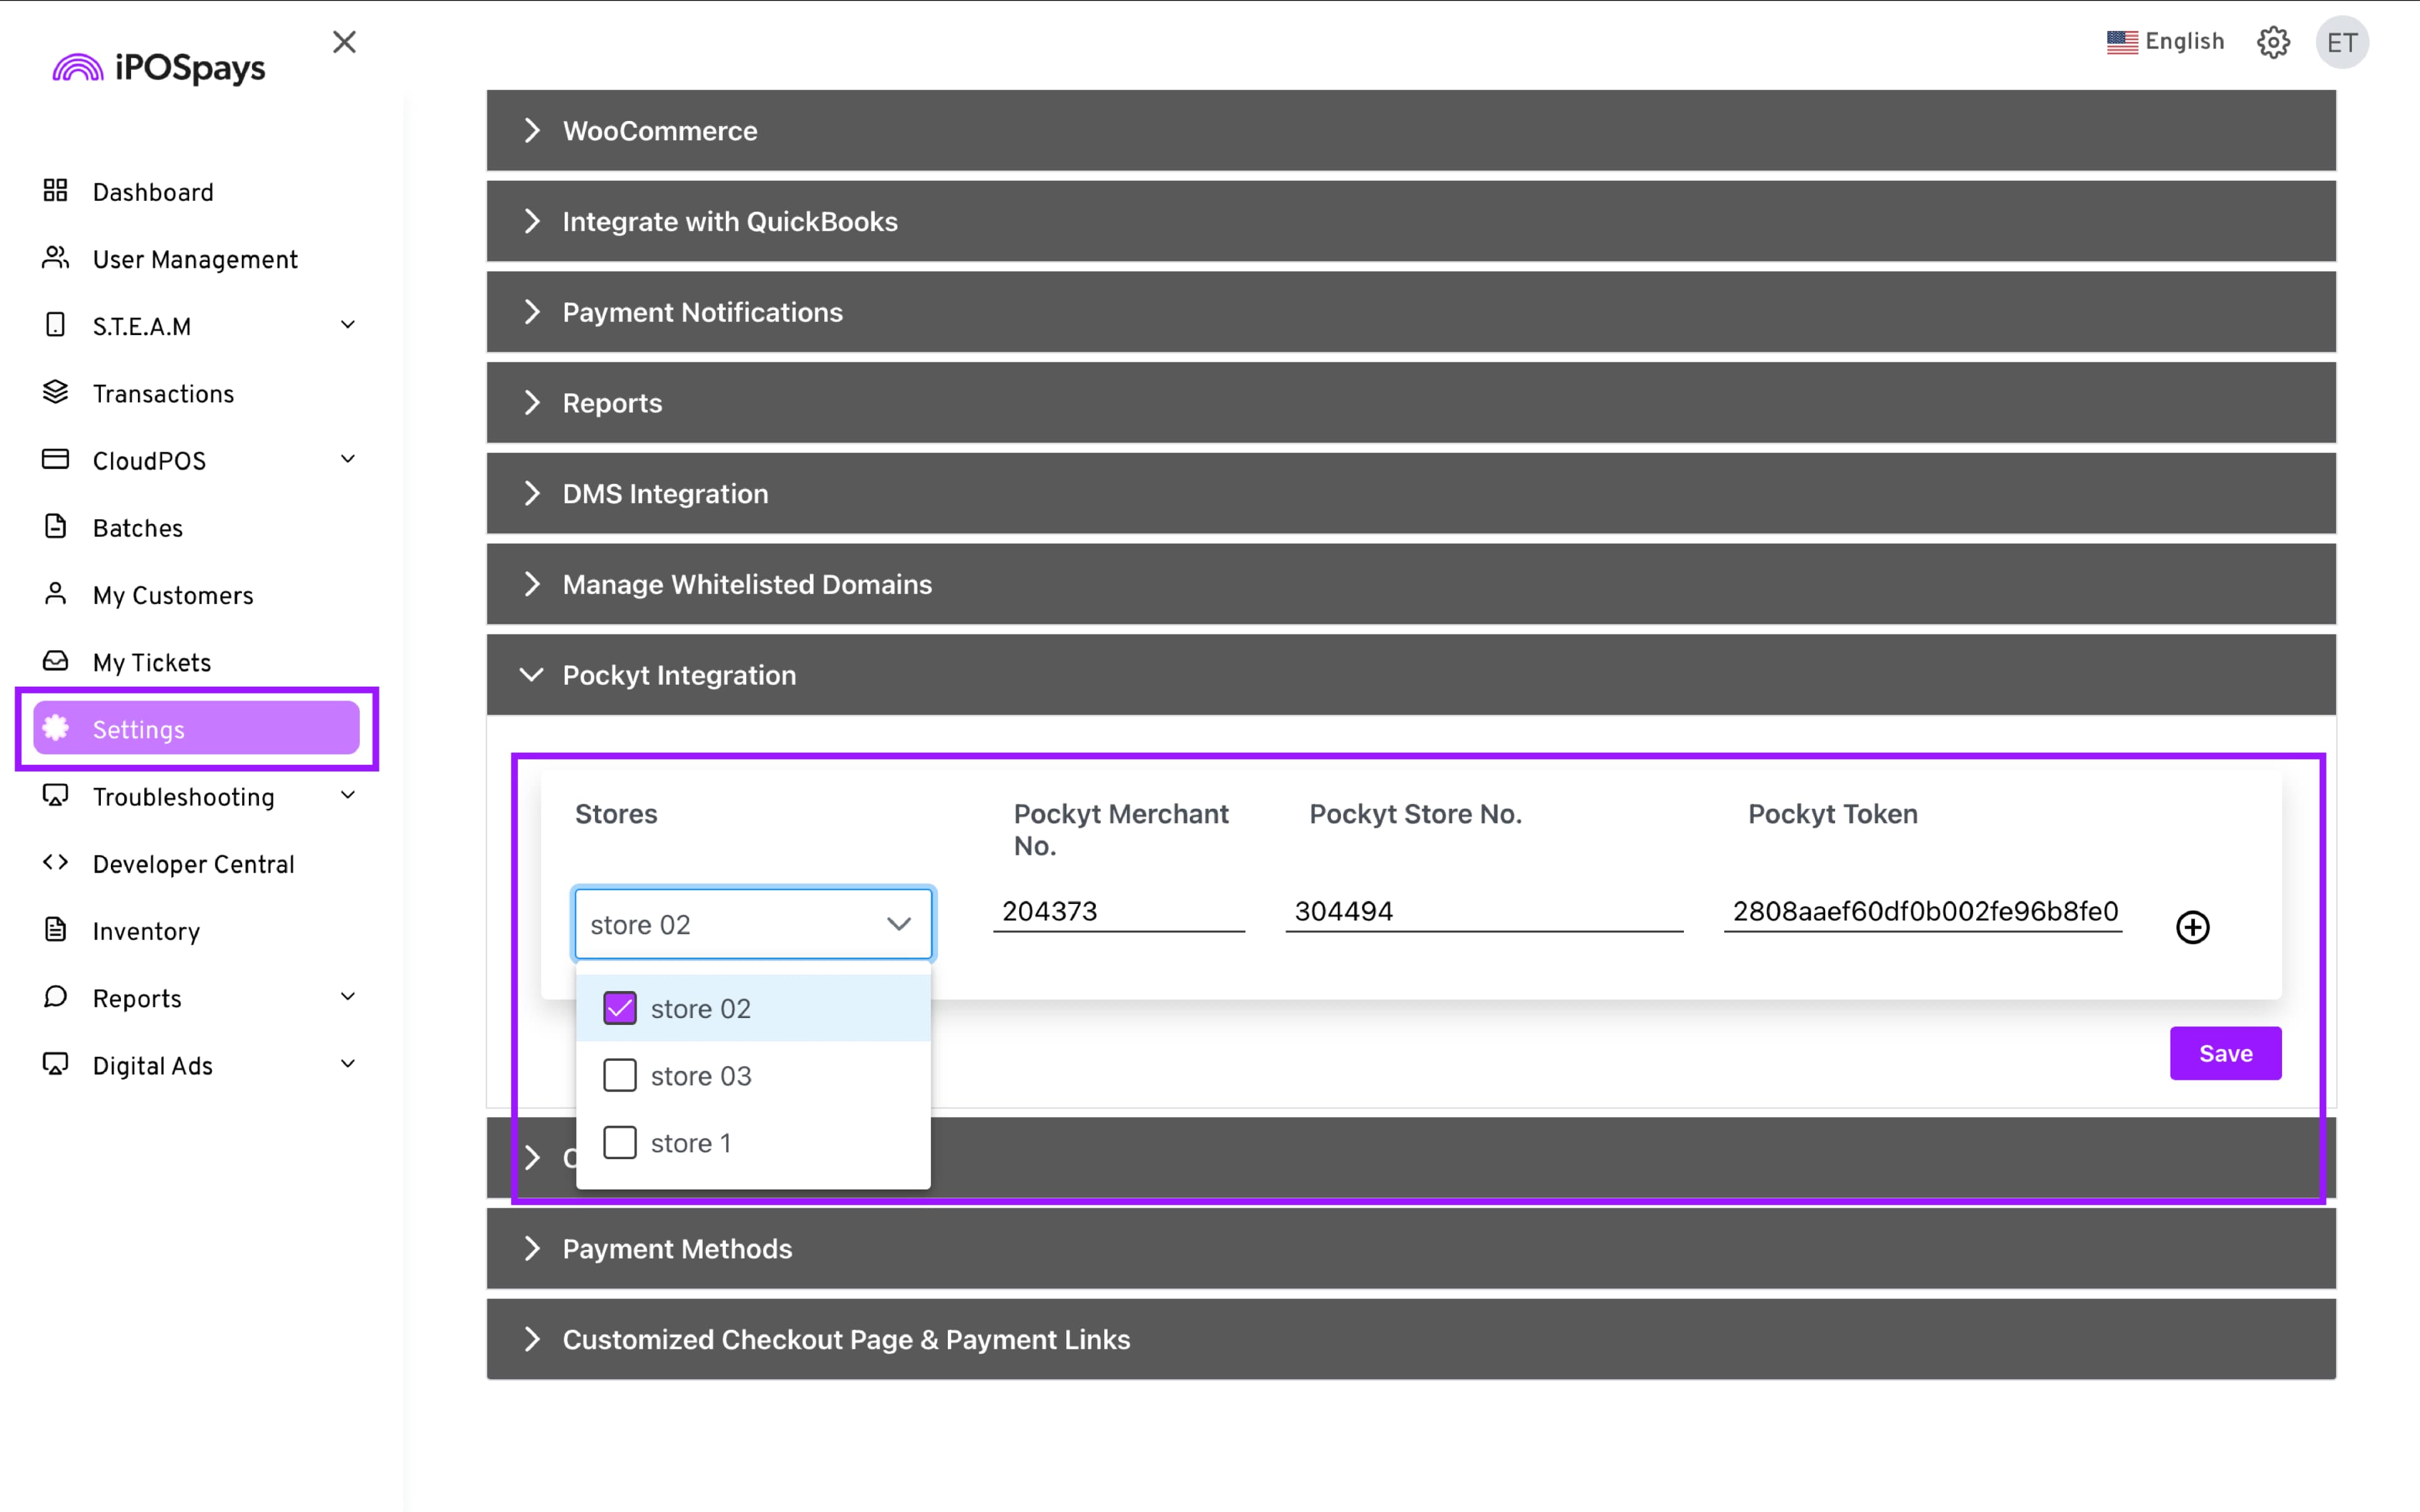
Go to Settings → Pockyt Integration.
-
Enter the required credentials.
-
Optionally, click ⊕ to add multiple stores and assign unique credentials.
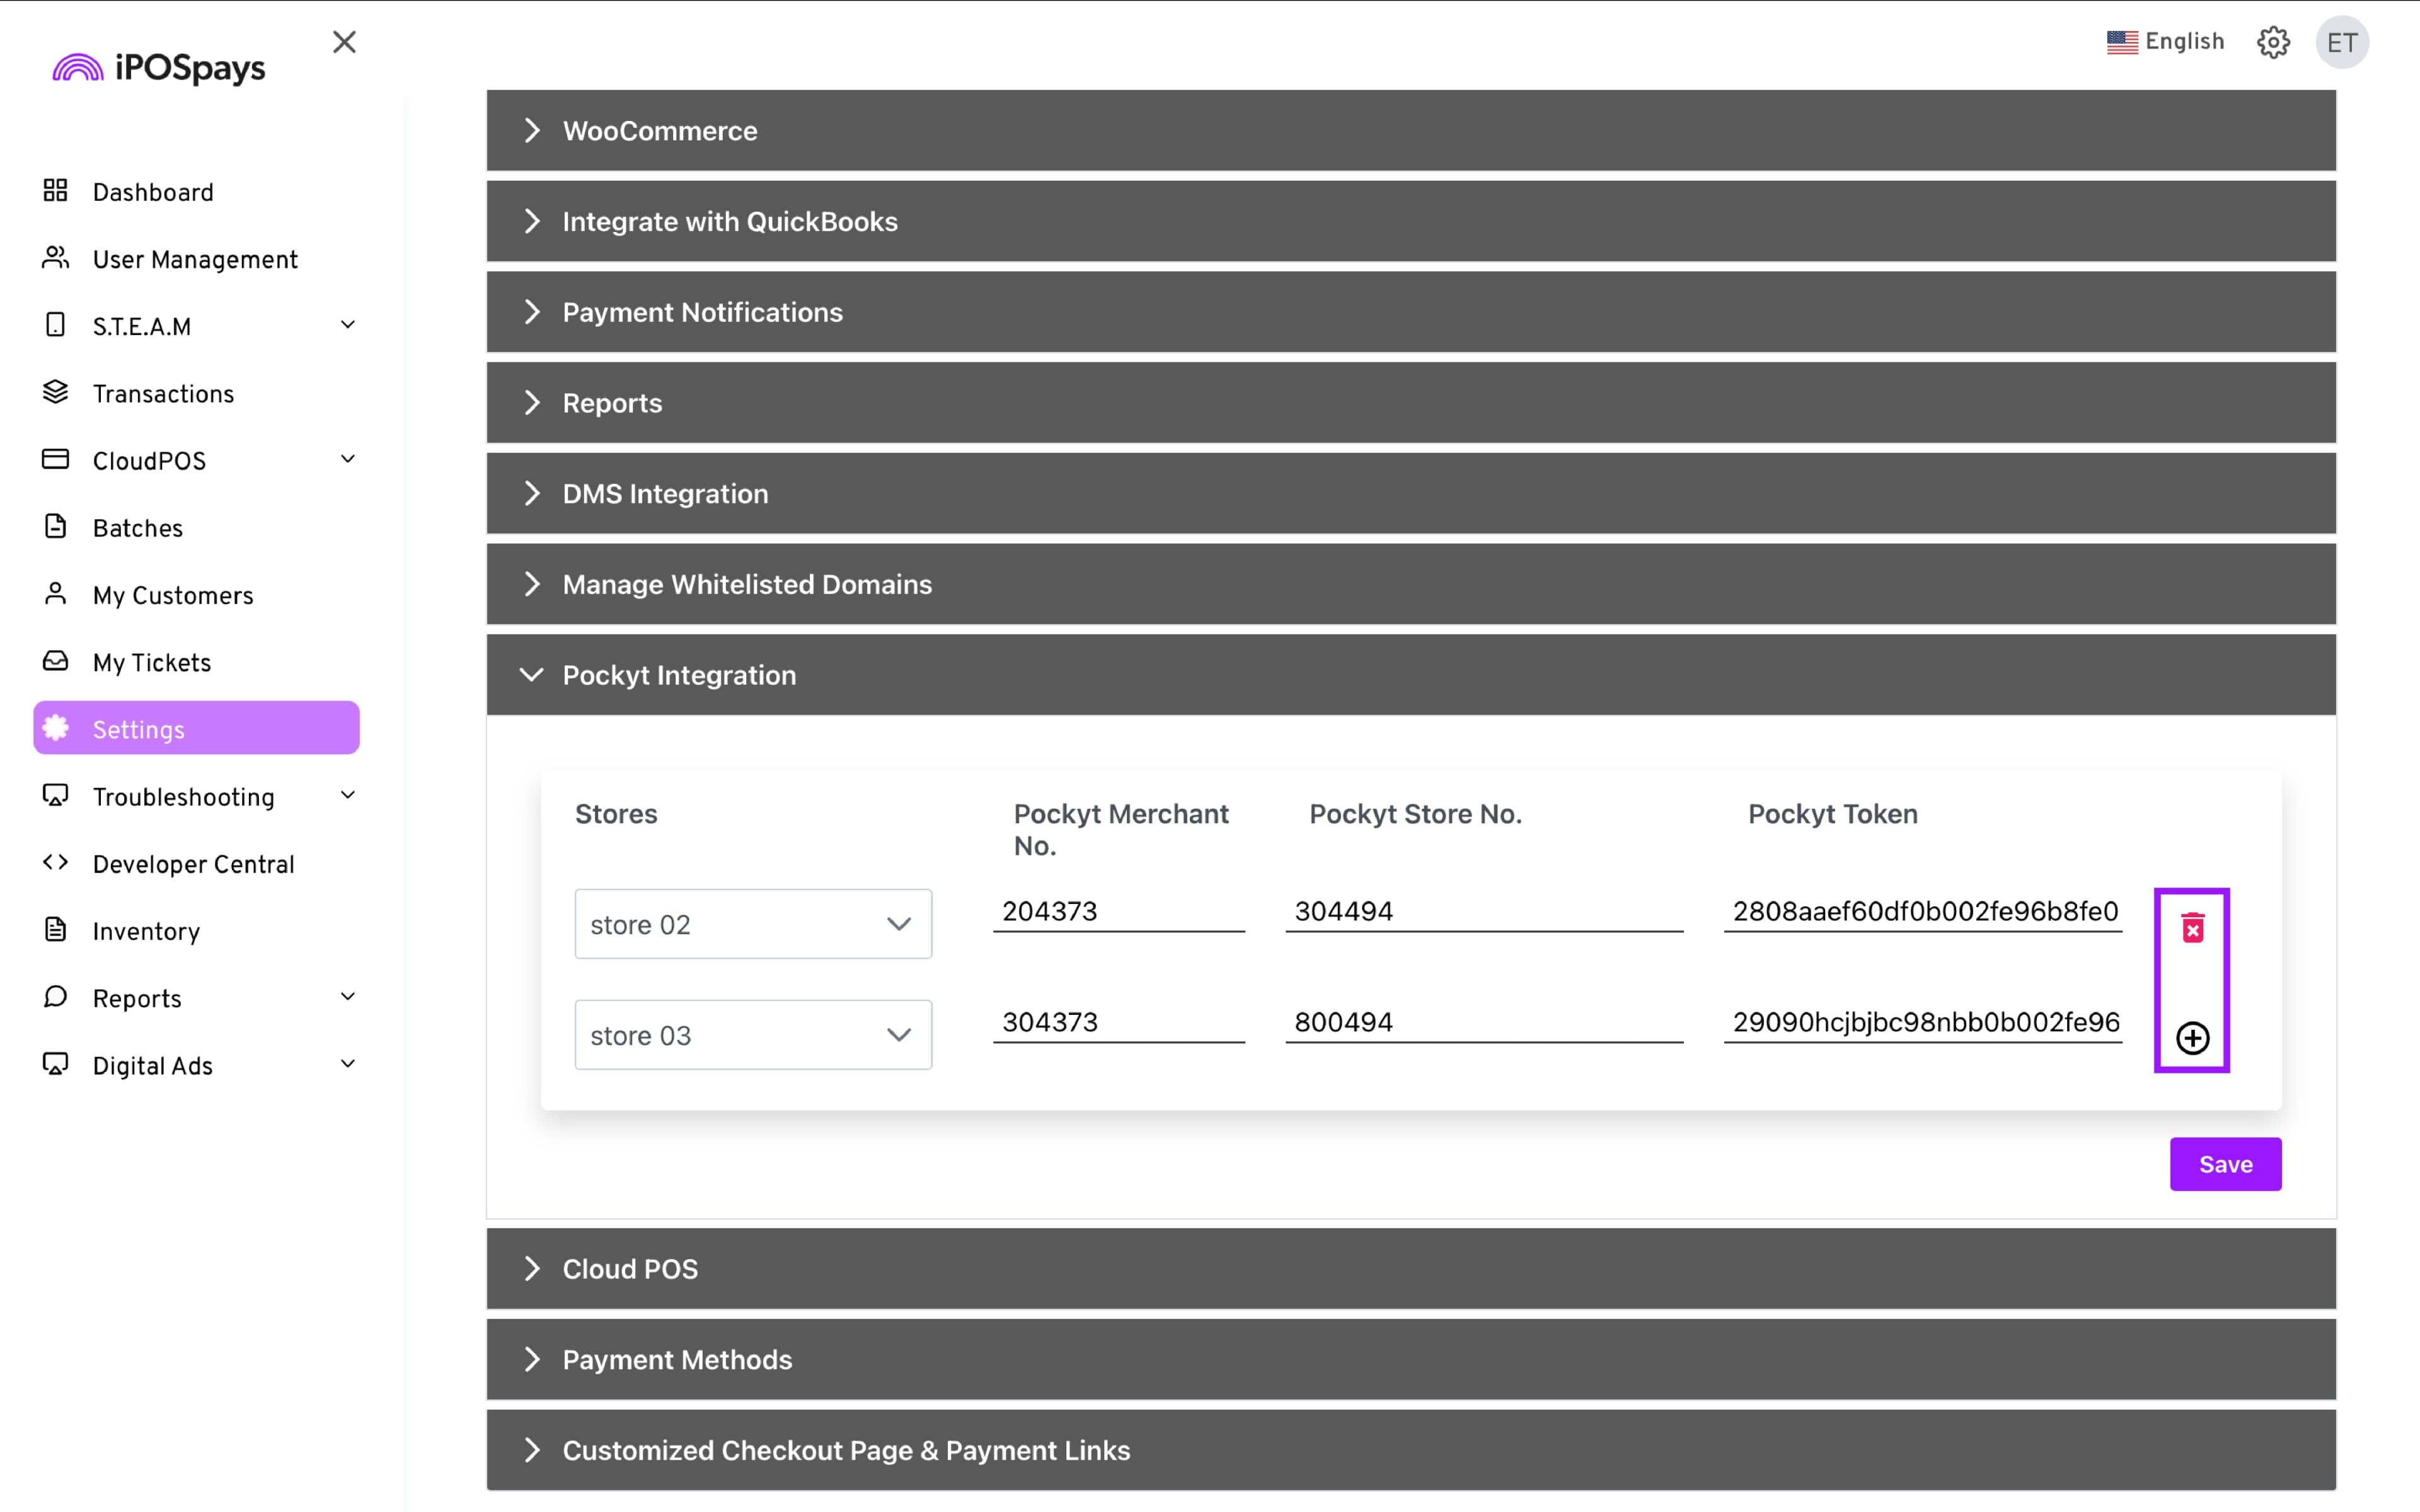
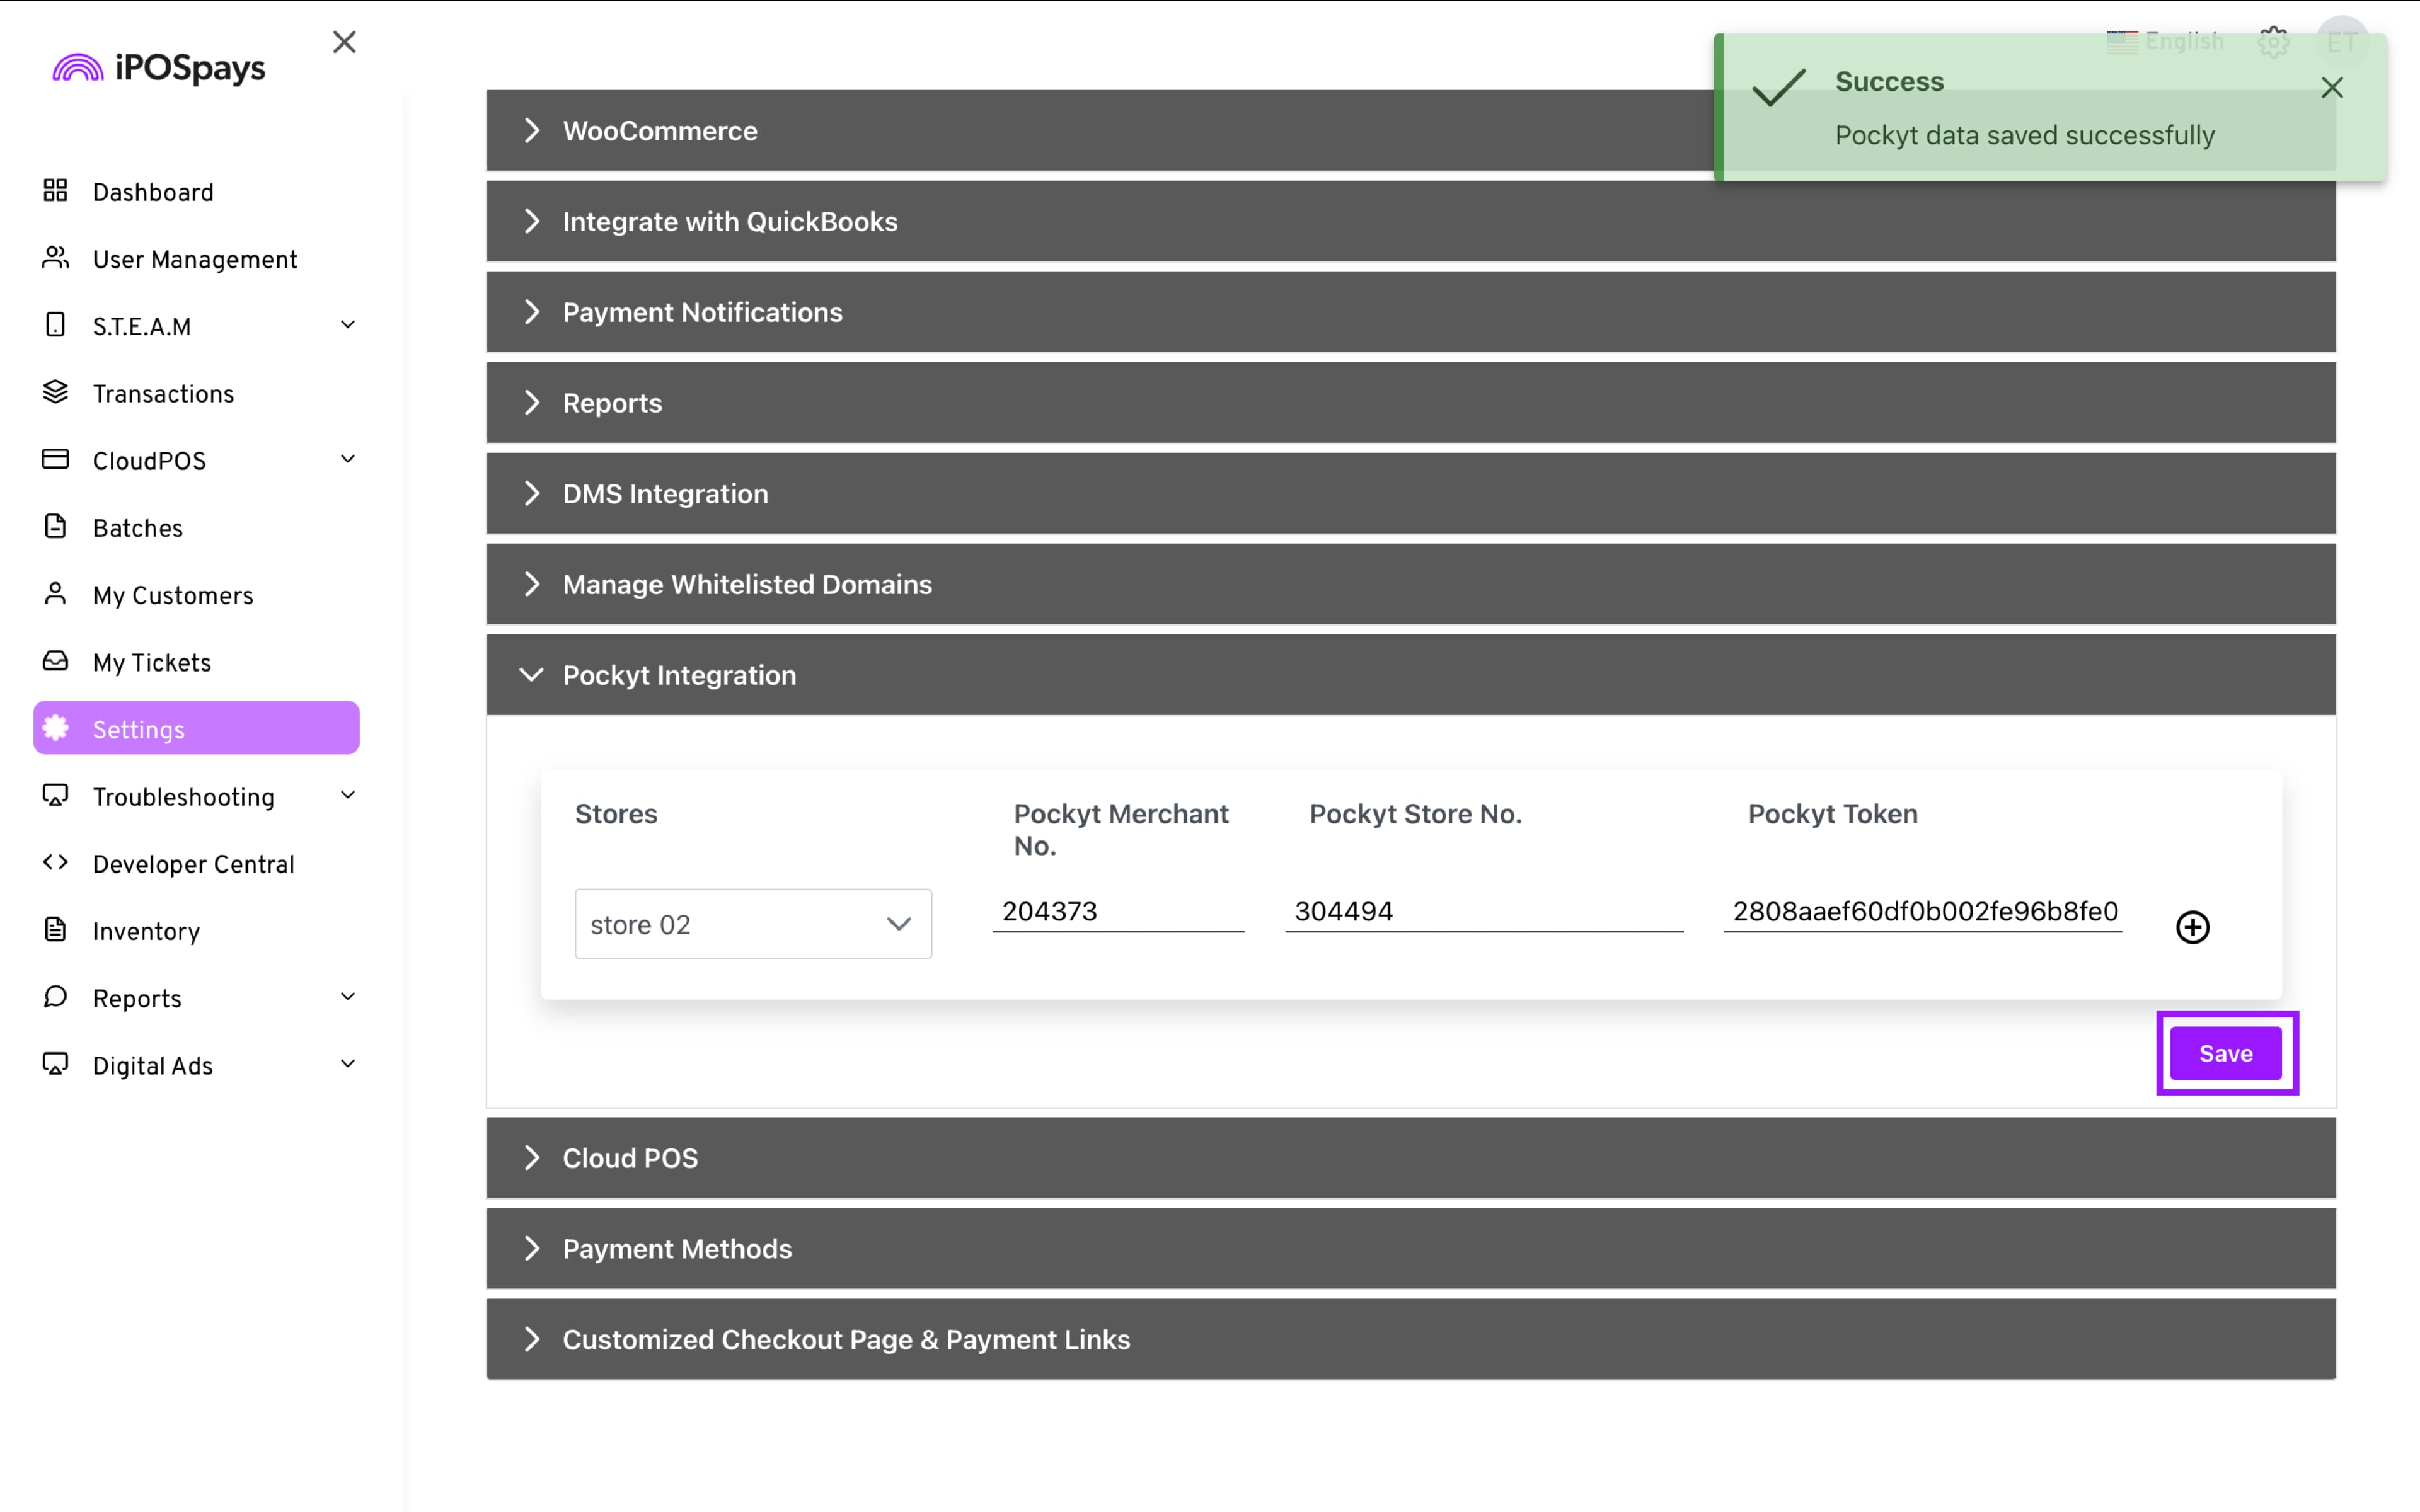
- Click Save for the changes to take effect.
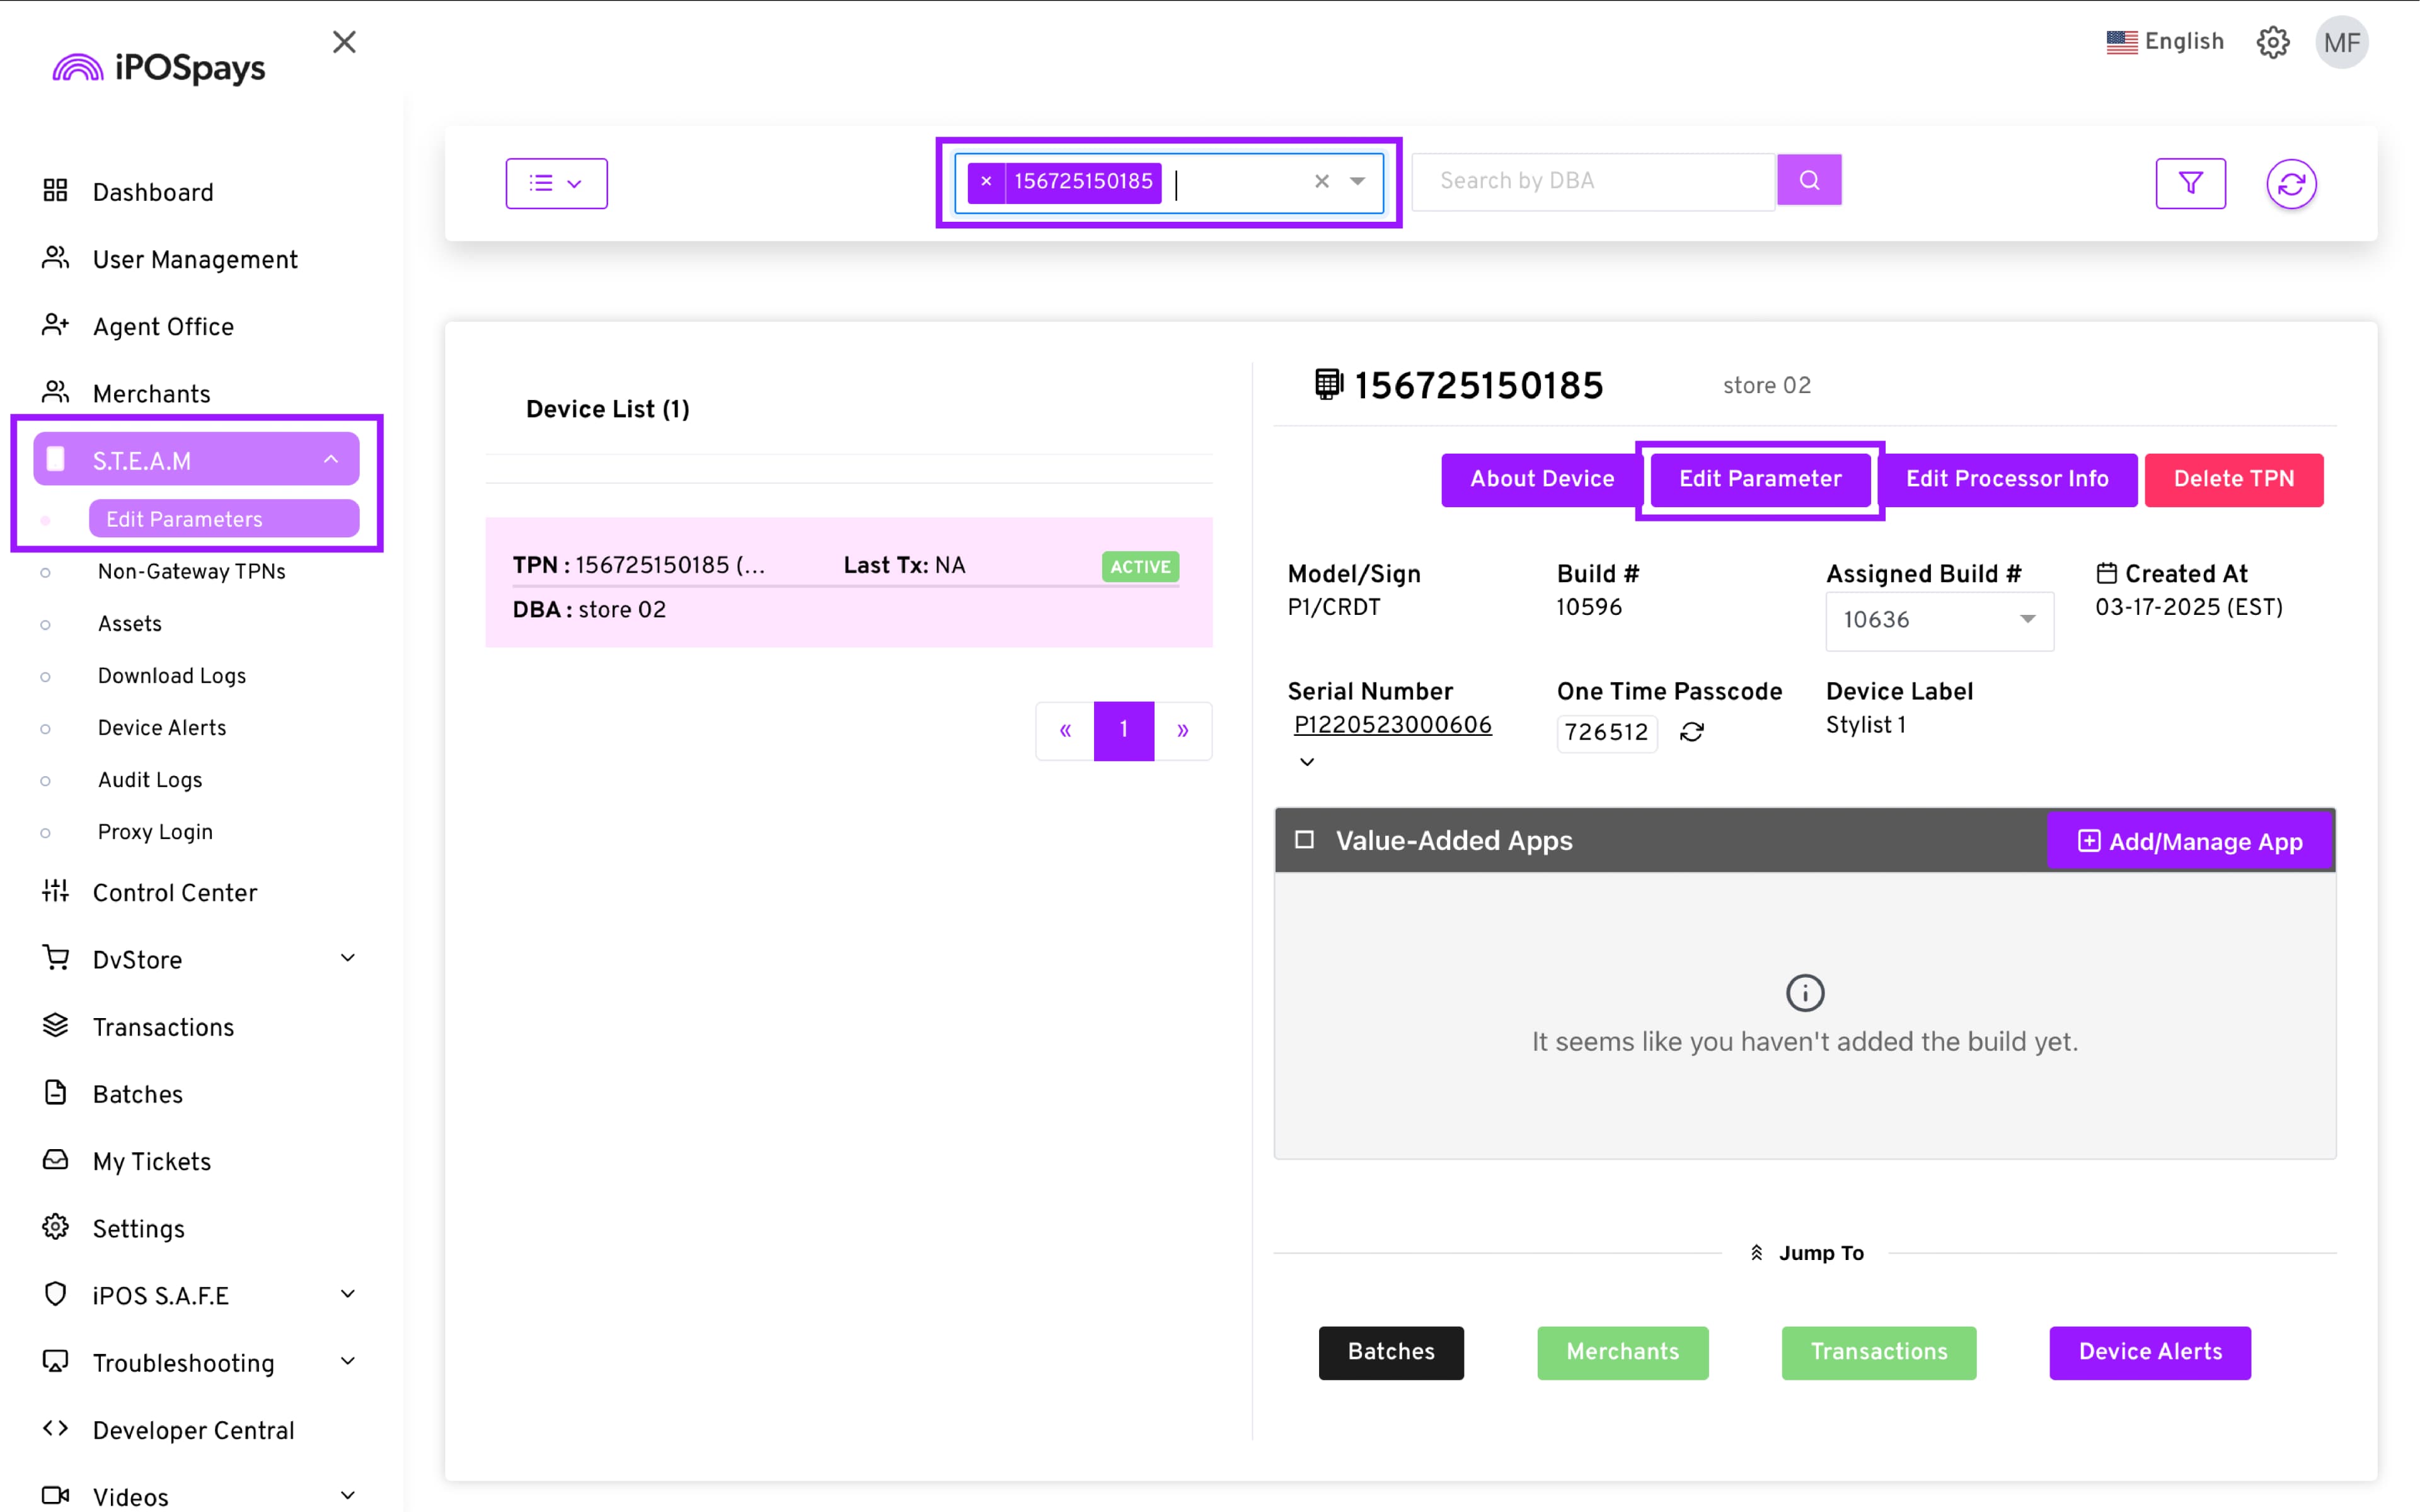
Step 3 – Enable in Terminal Parameters
-
Log in to the iPOSpays portal using ISO credentials.
-
Go to S.T.E.A.M → Edit Parameter.
-
Search and select the target TPN → Edit Parameters.
- Under Integrations, enable Pockyt and select payment methods (PayPal or Venmo).
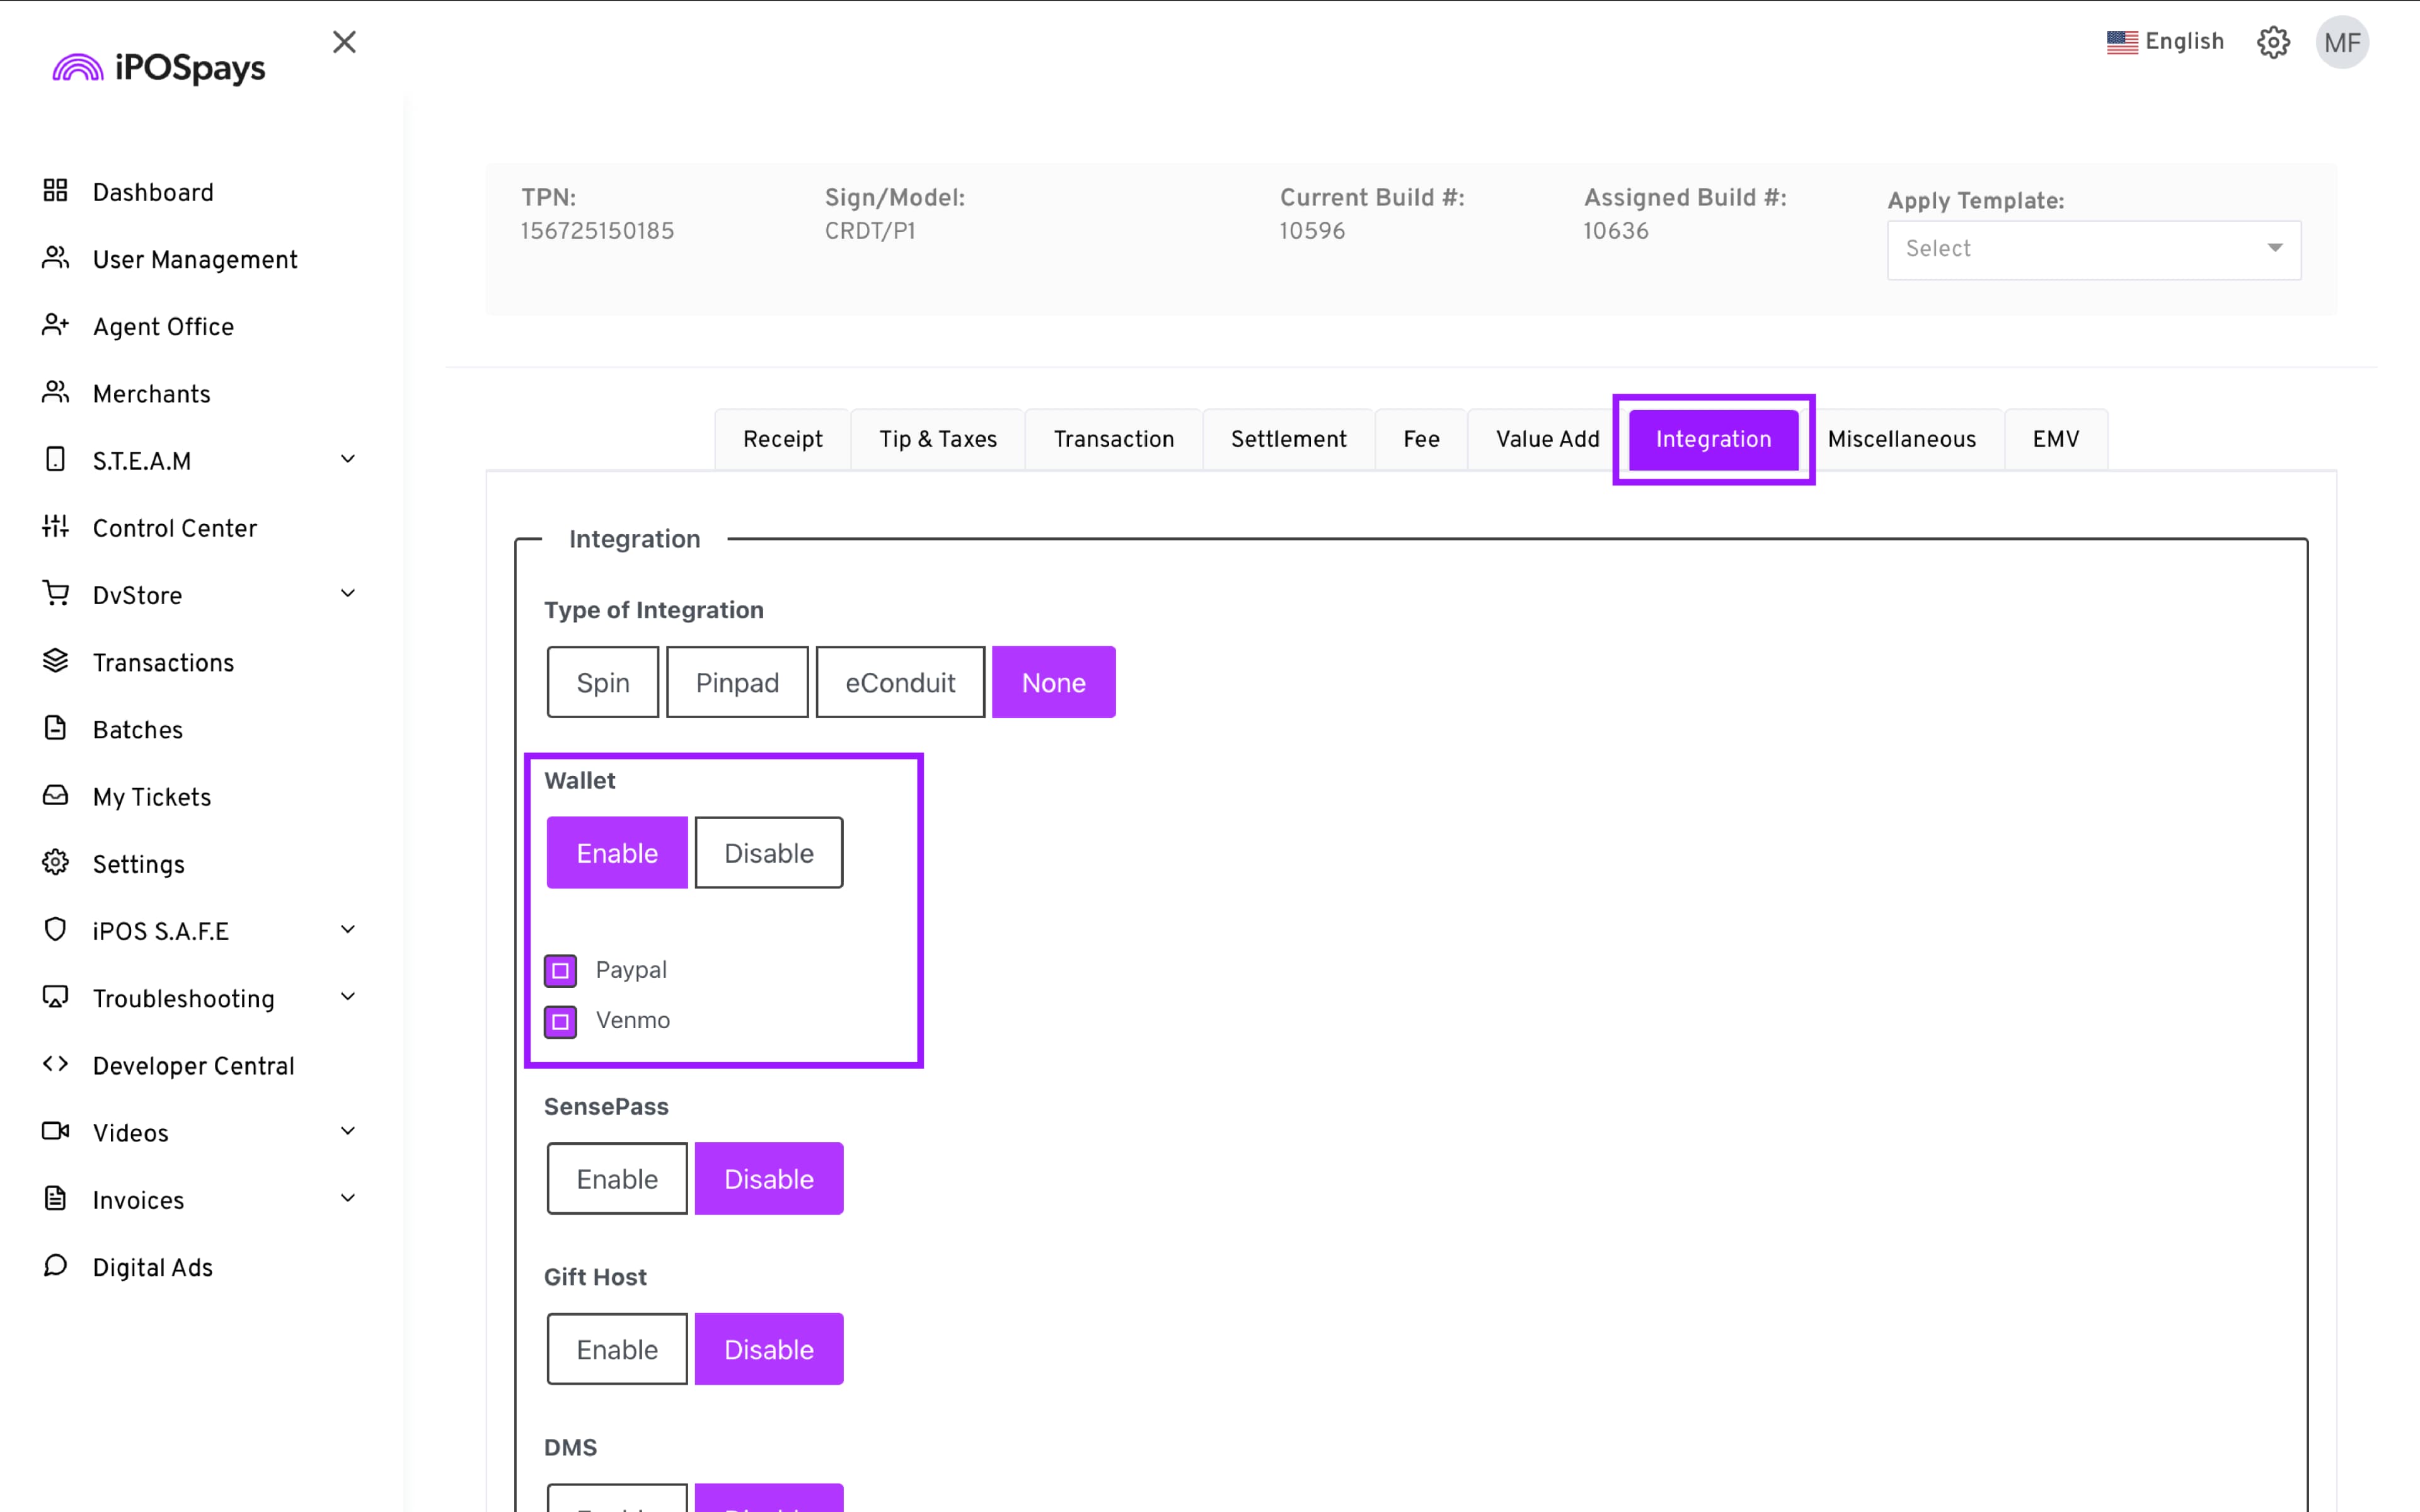
- Click Save and perform a parameter update on the terminal.
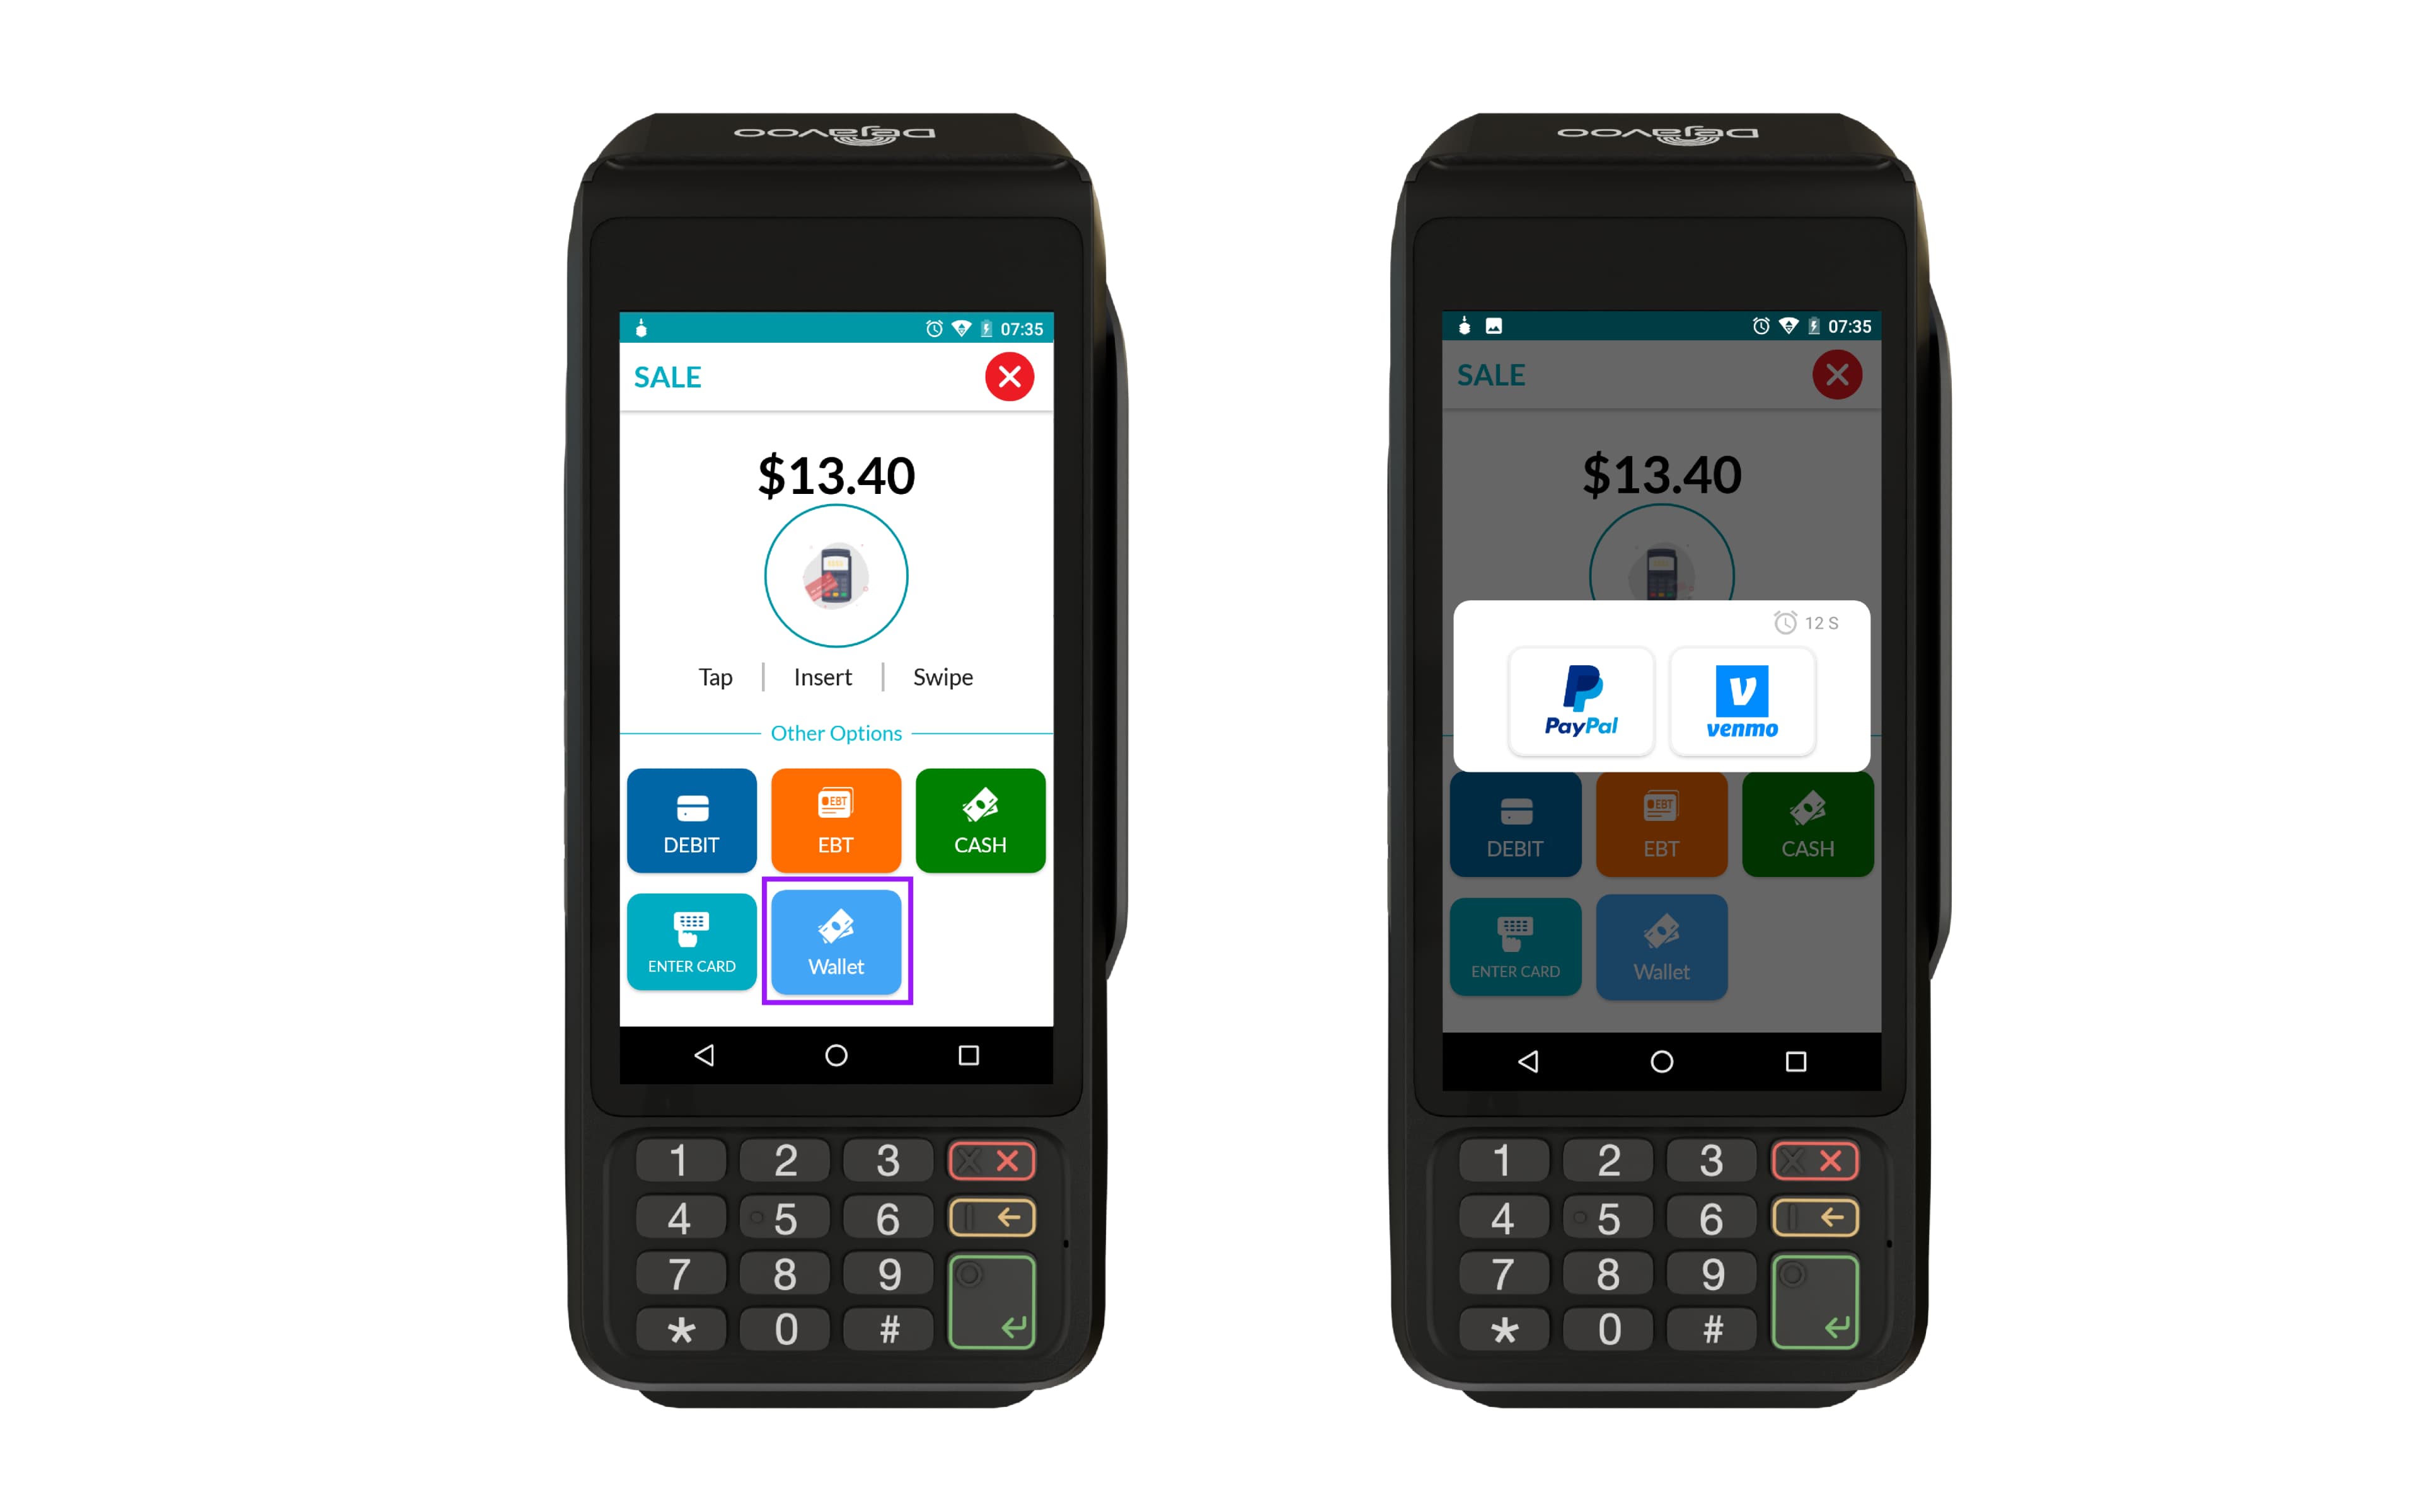
How to Use
On Payment Terminals
-
Enter the transaction amount on the idle screen and tap OK.
-
If tipping is enabled, the customer will be prompted to add a tip.
-
Transaction breakdown appears; note that PayPal and Venmo do not incur fees.
-
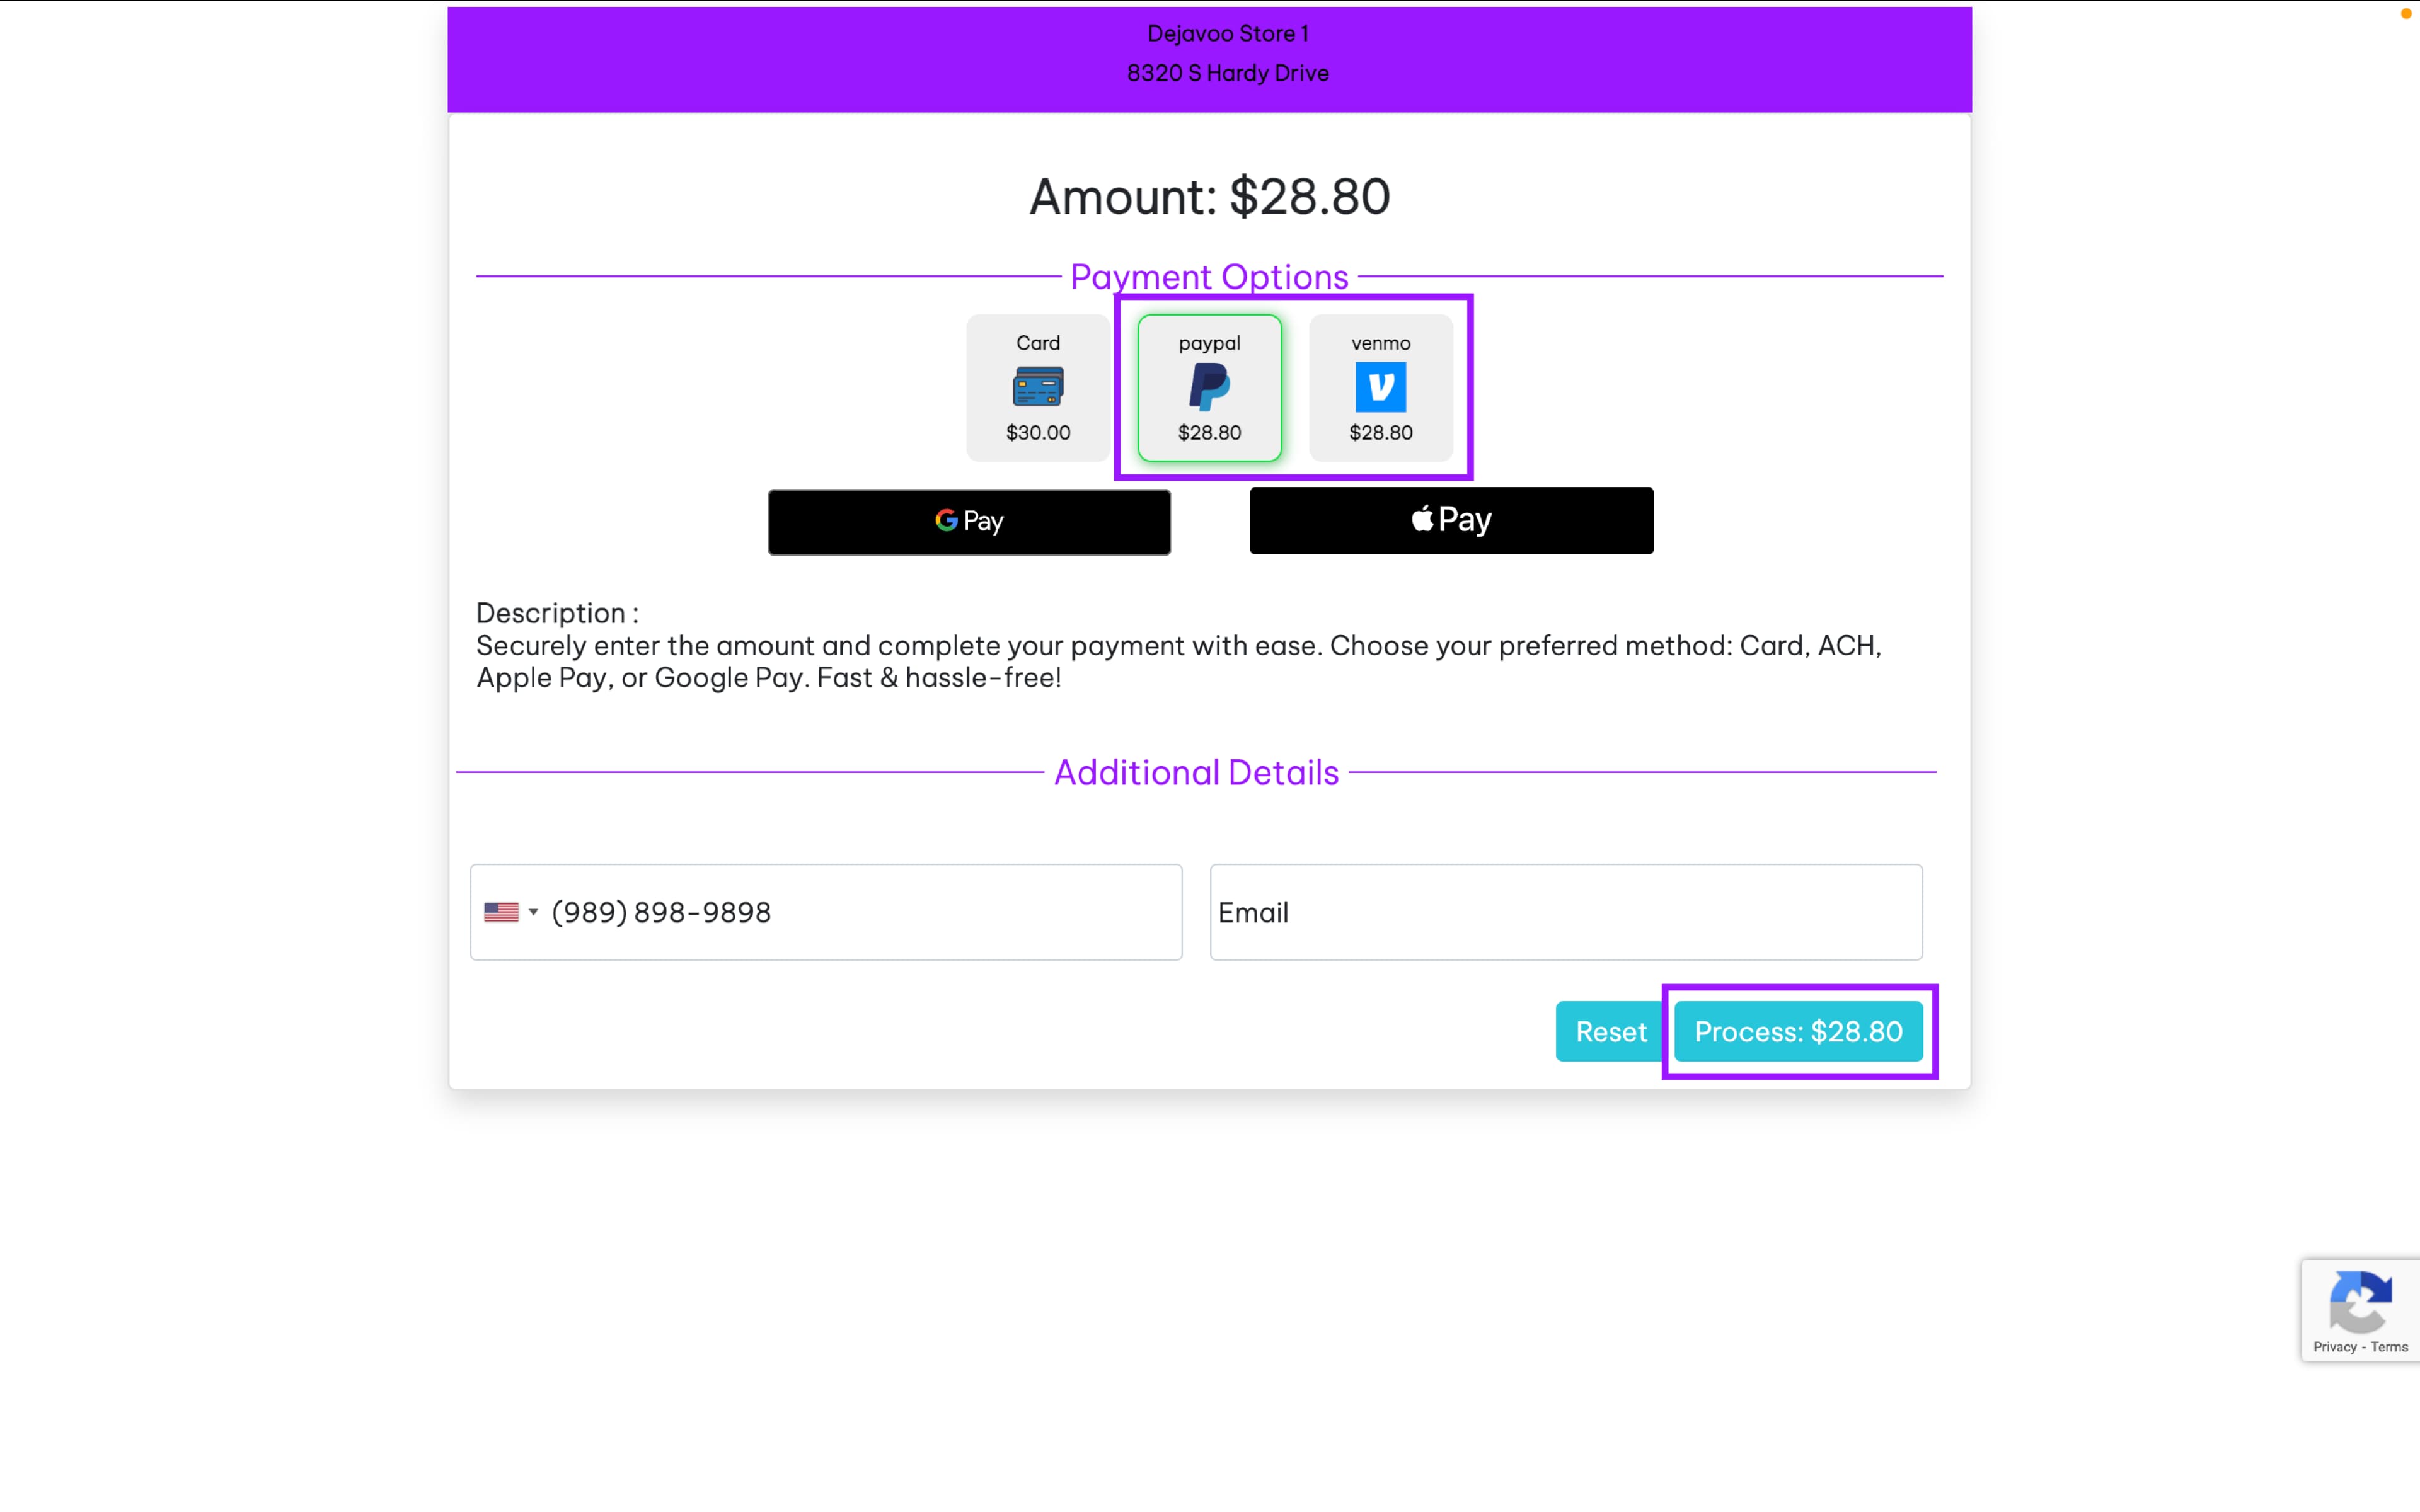
On the Sale screen, select Wallet → choose PayPal or Venmo.
- Terminal displays a QR code or webview.
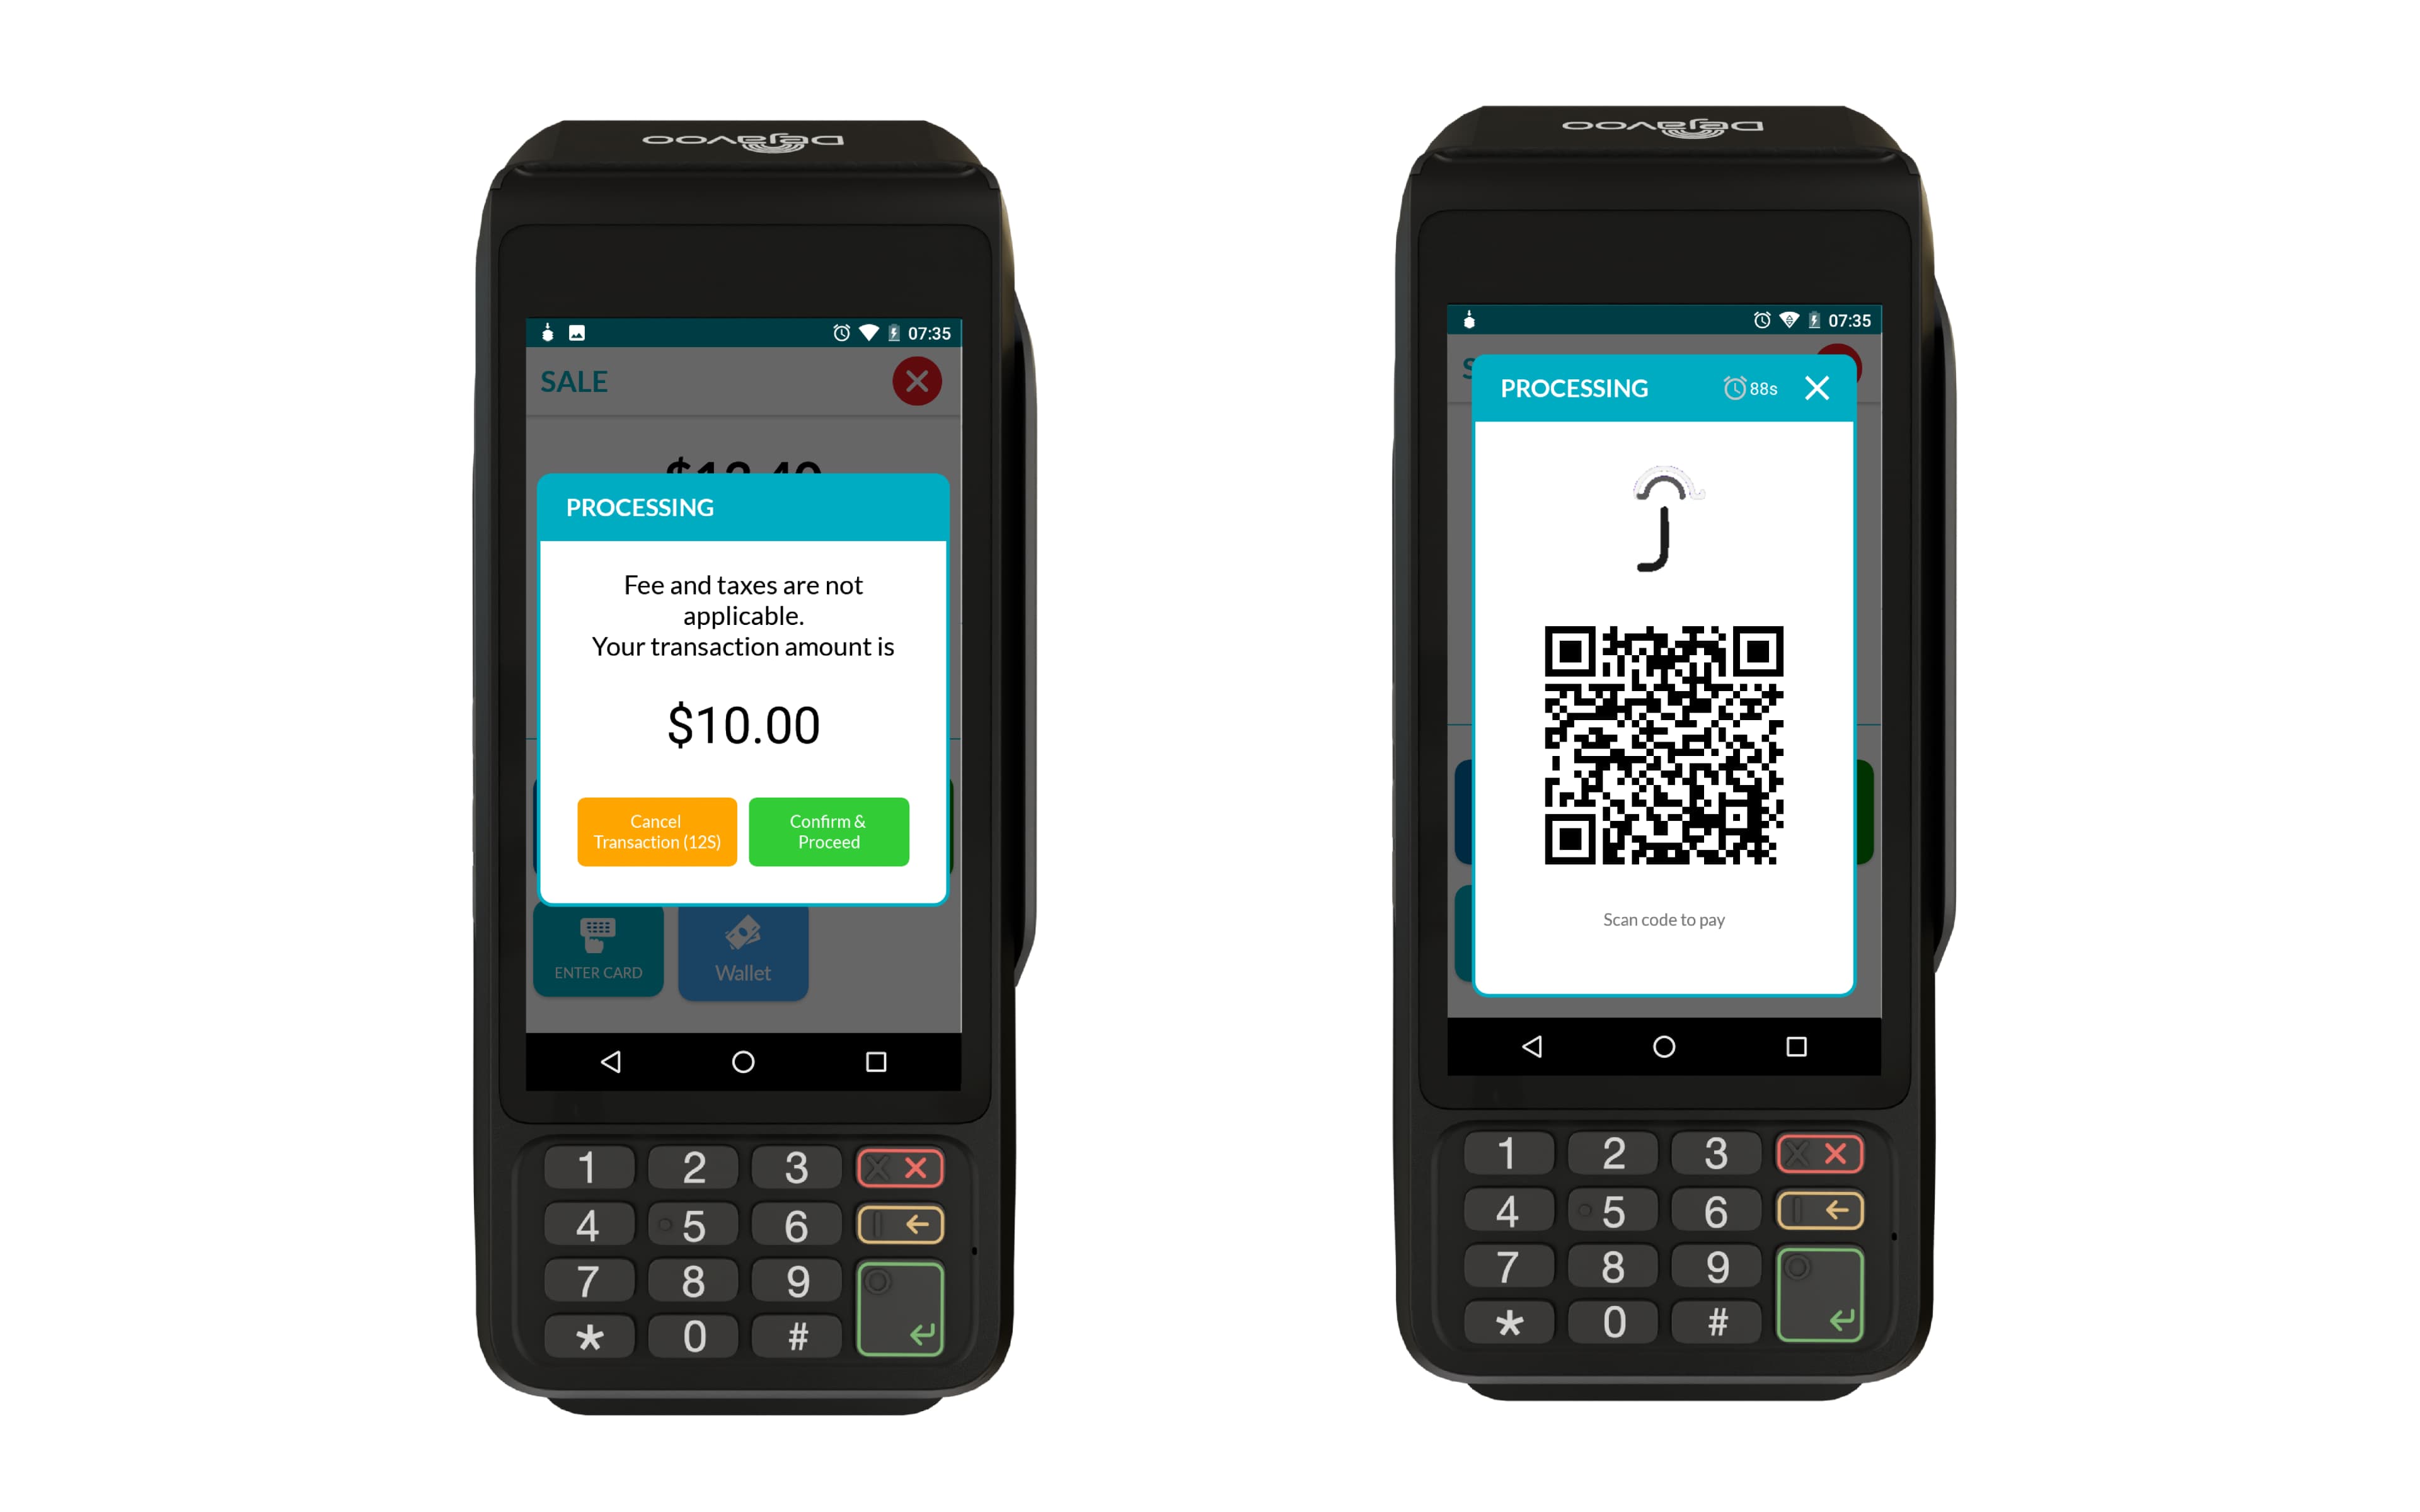
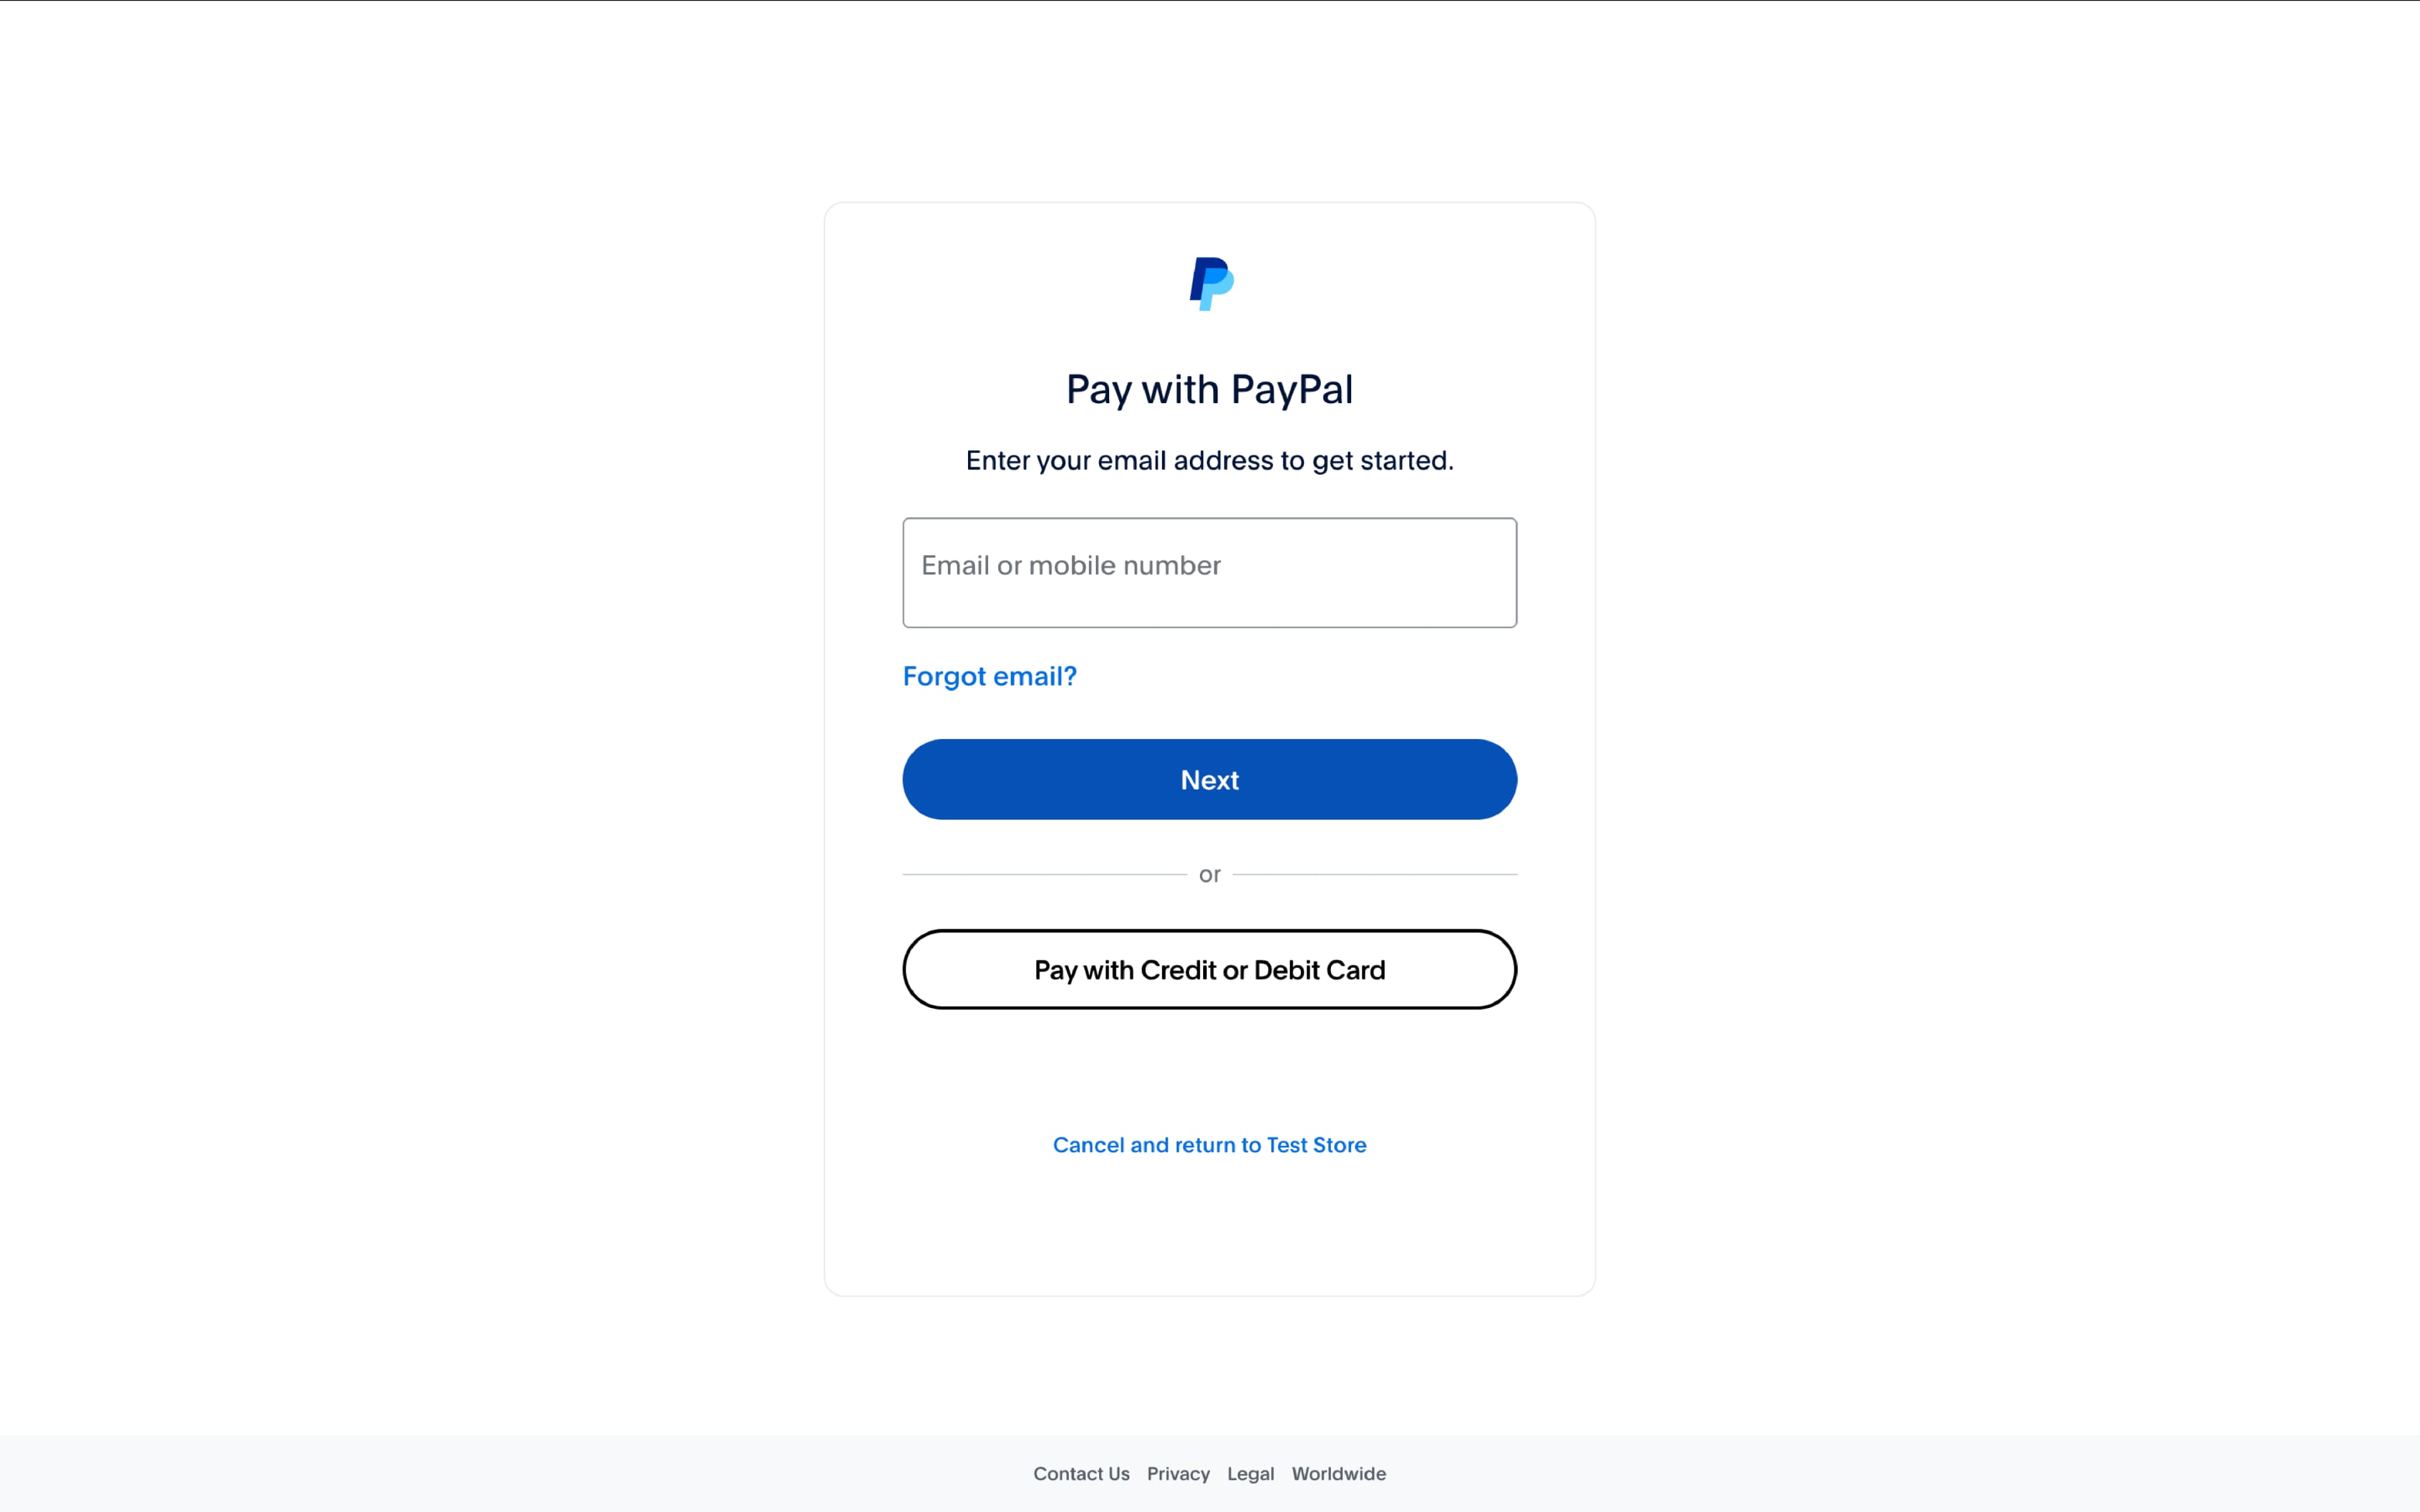
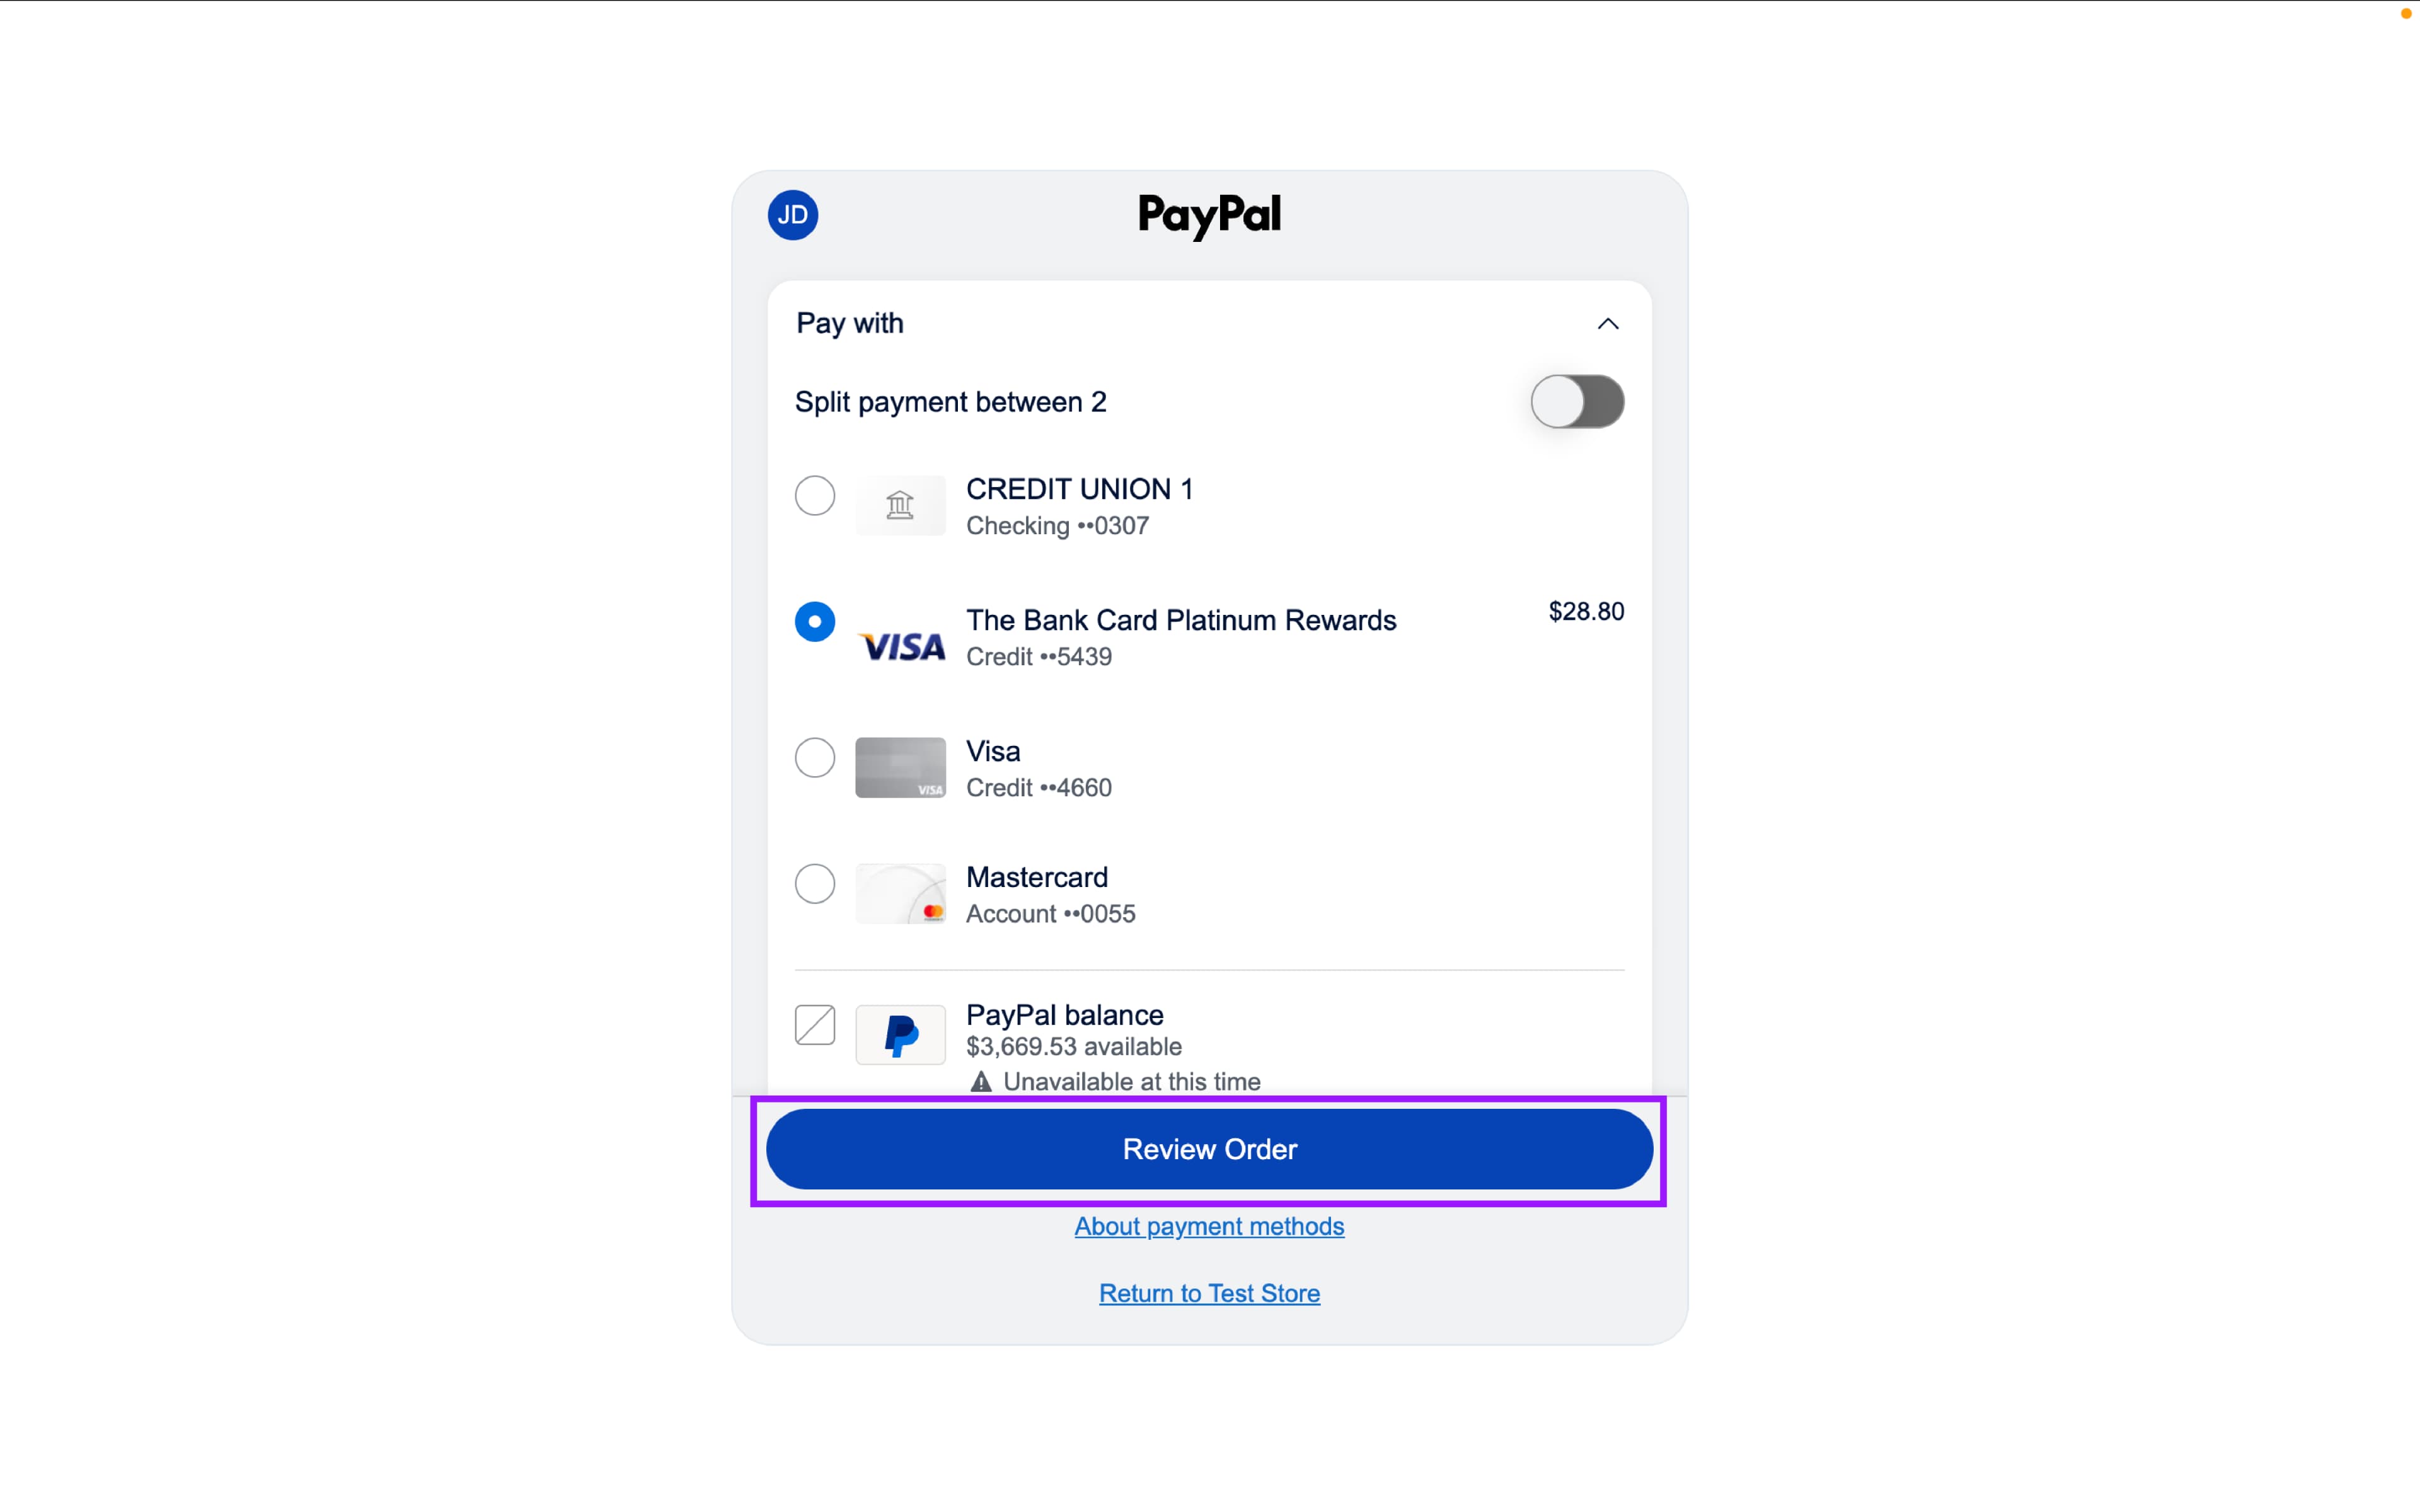
- Customer completes payment:
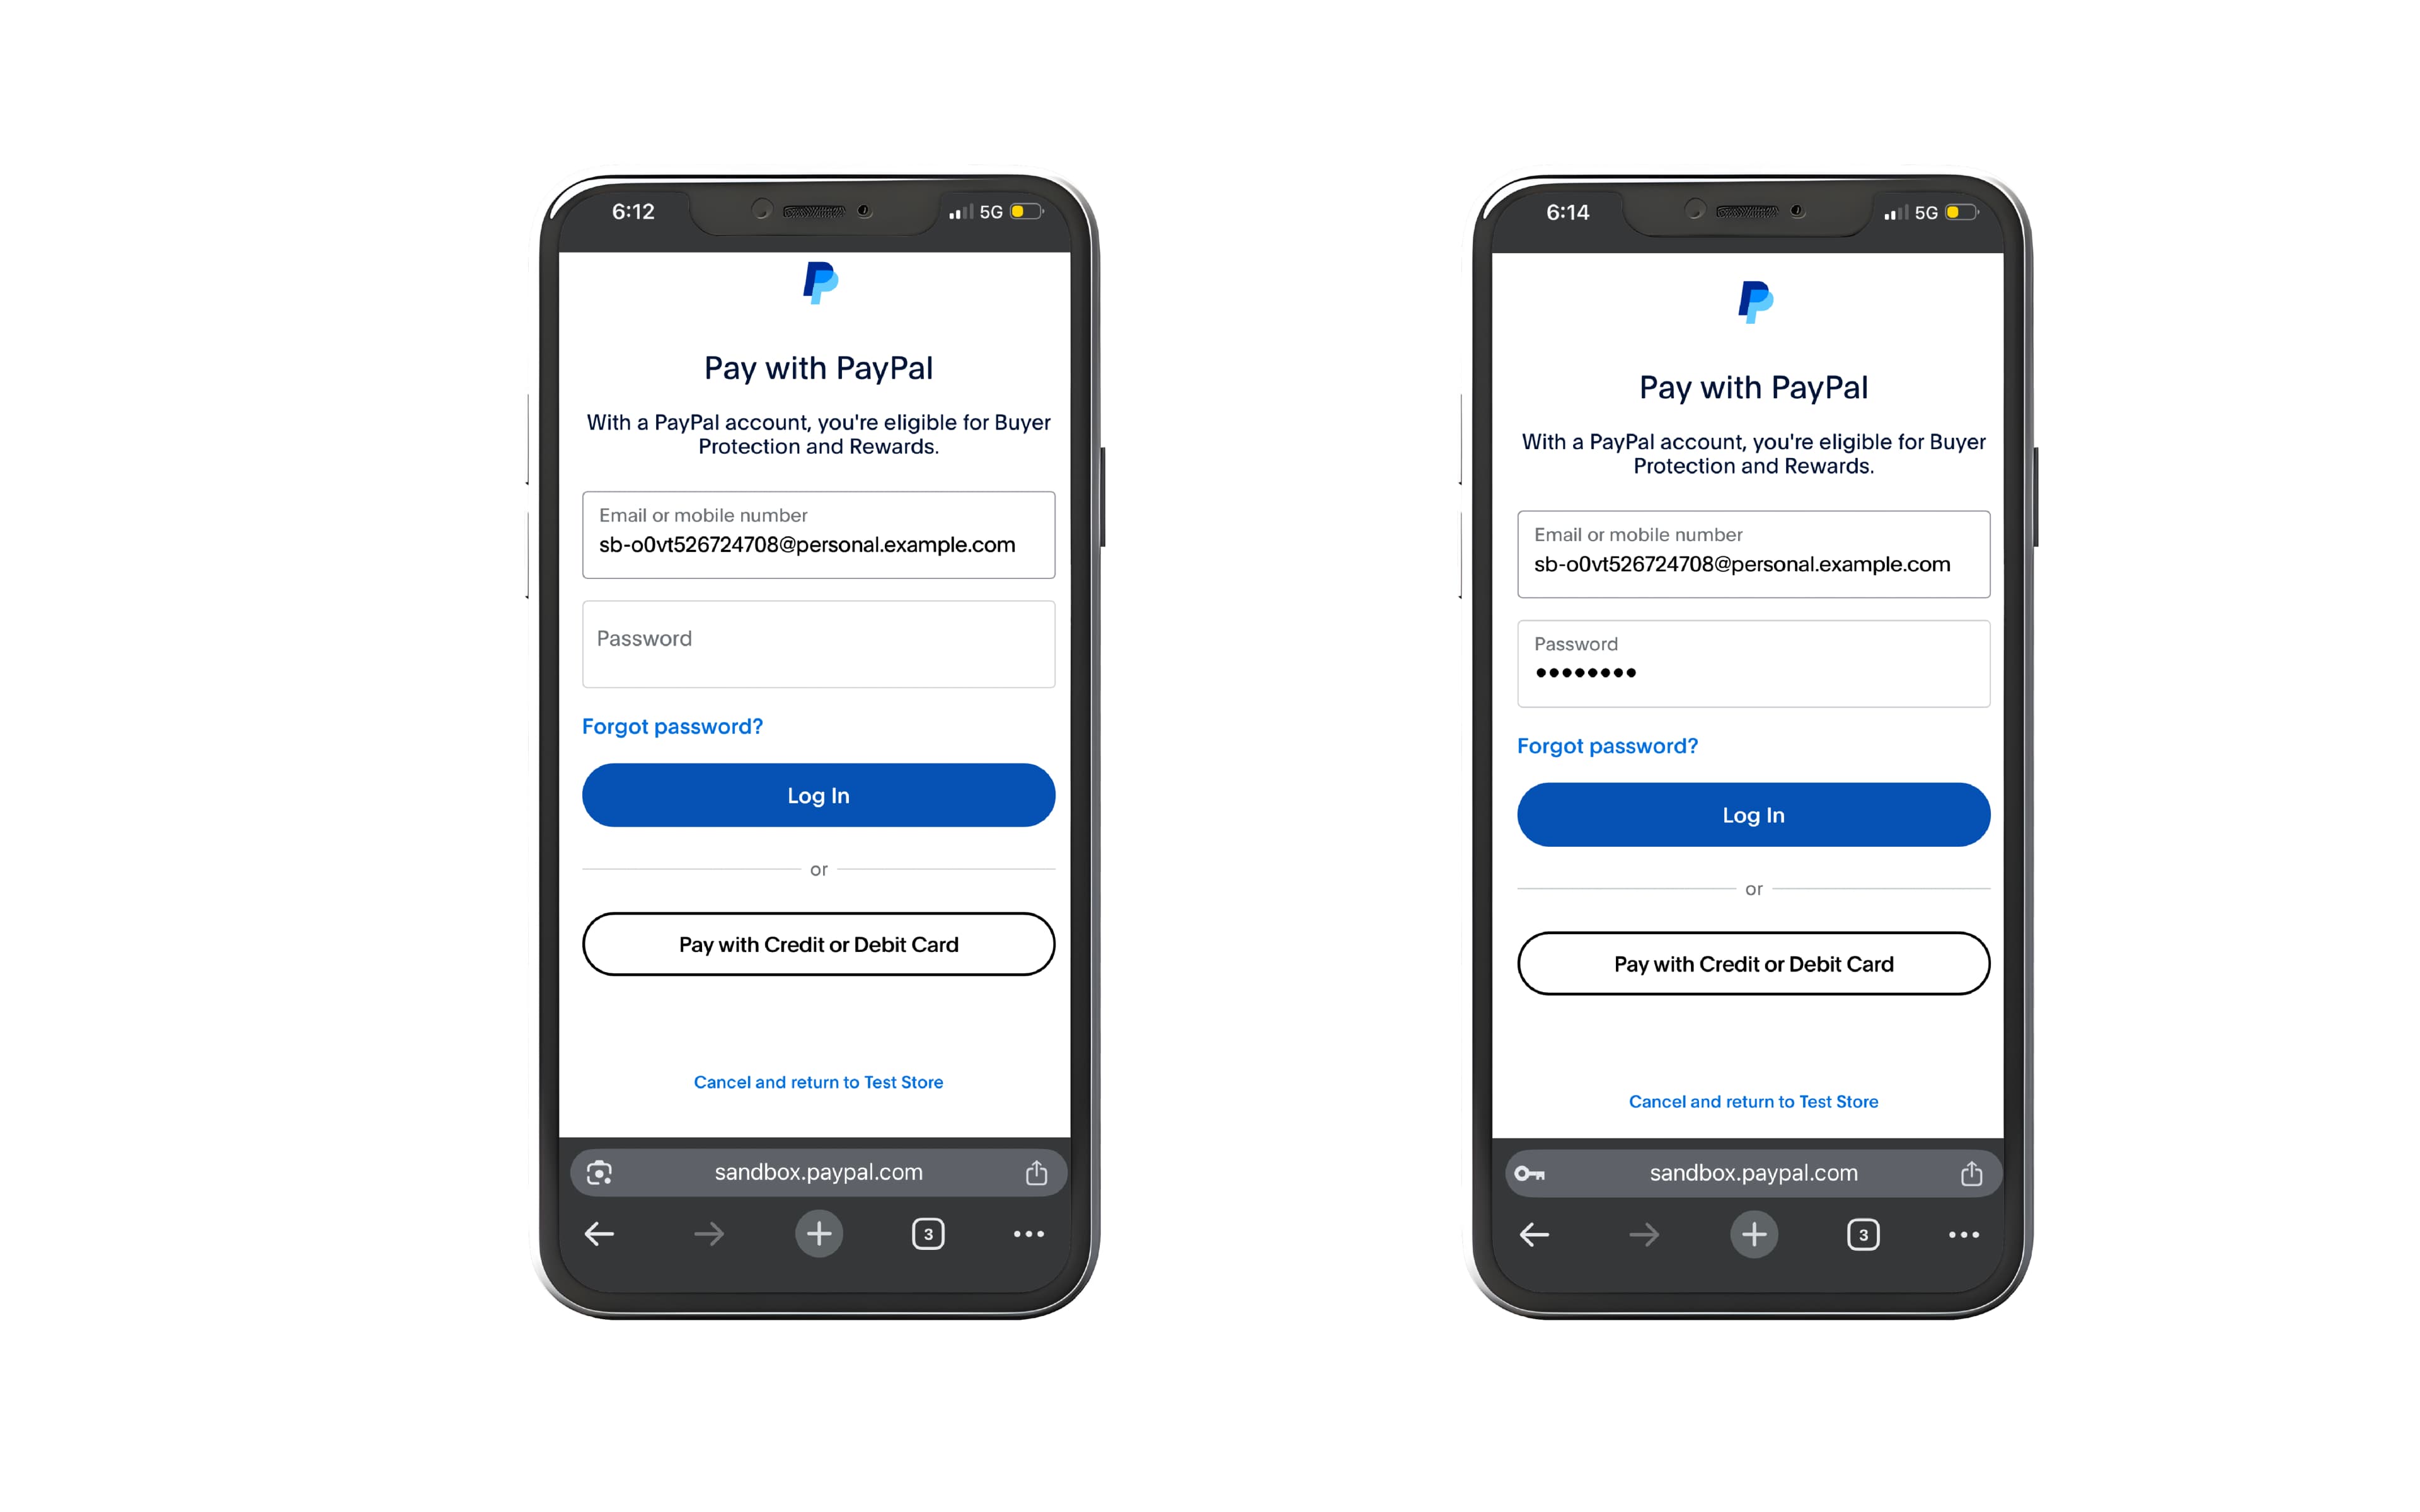
- Scan QR code → open browser → choose wallet → complete payment

- Or pay directly in the webview
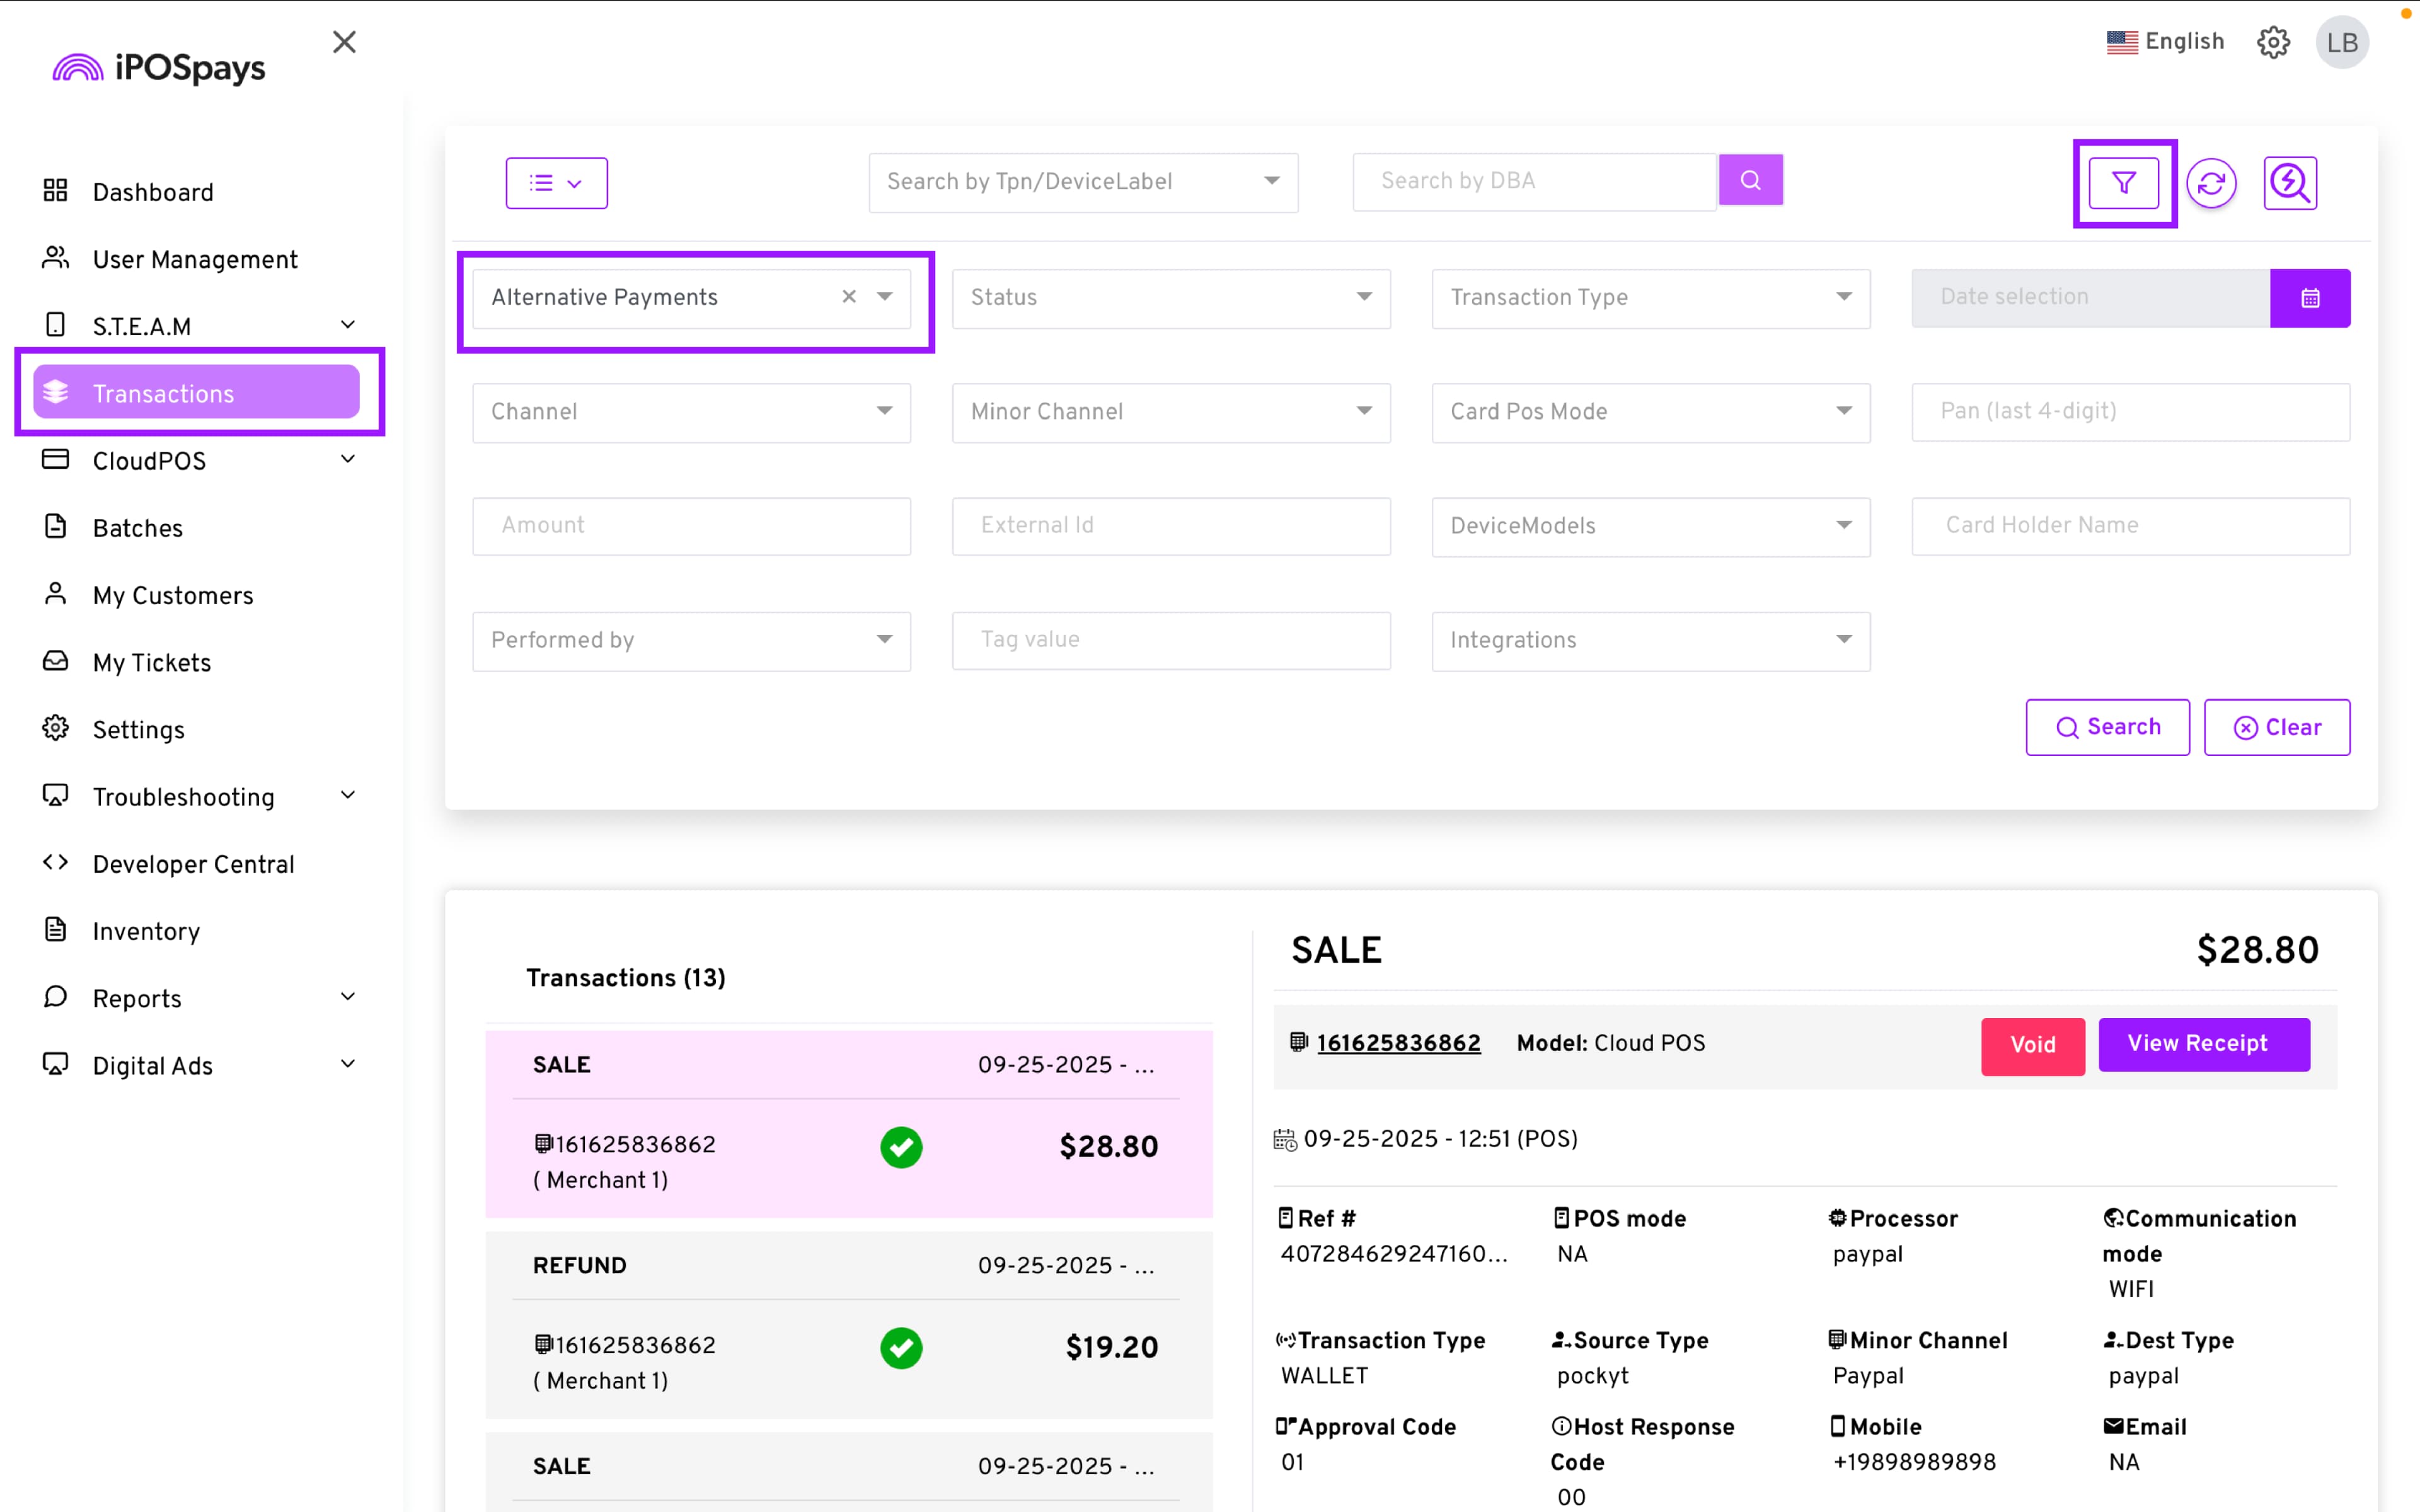
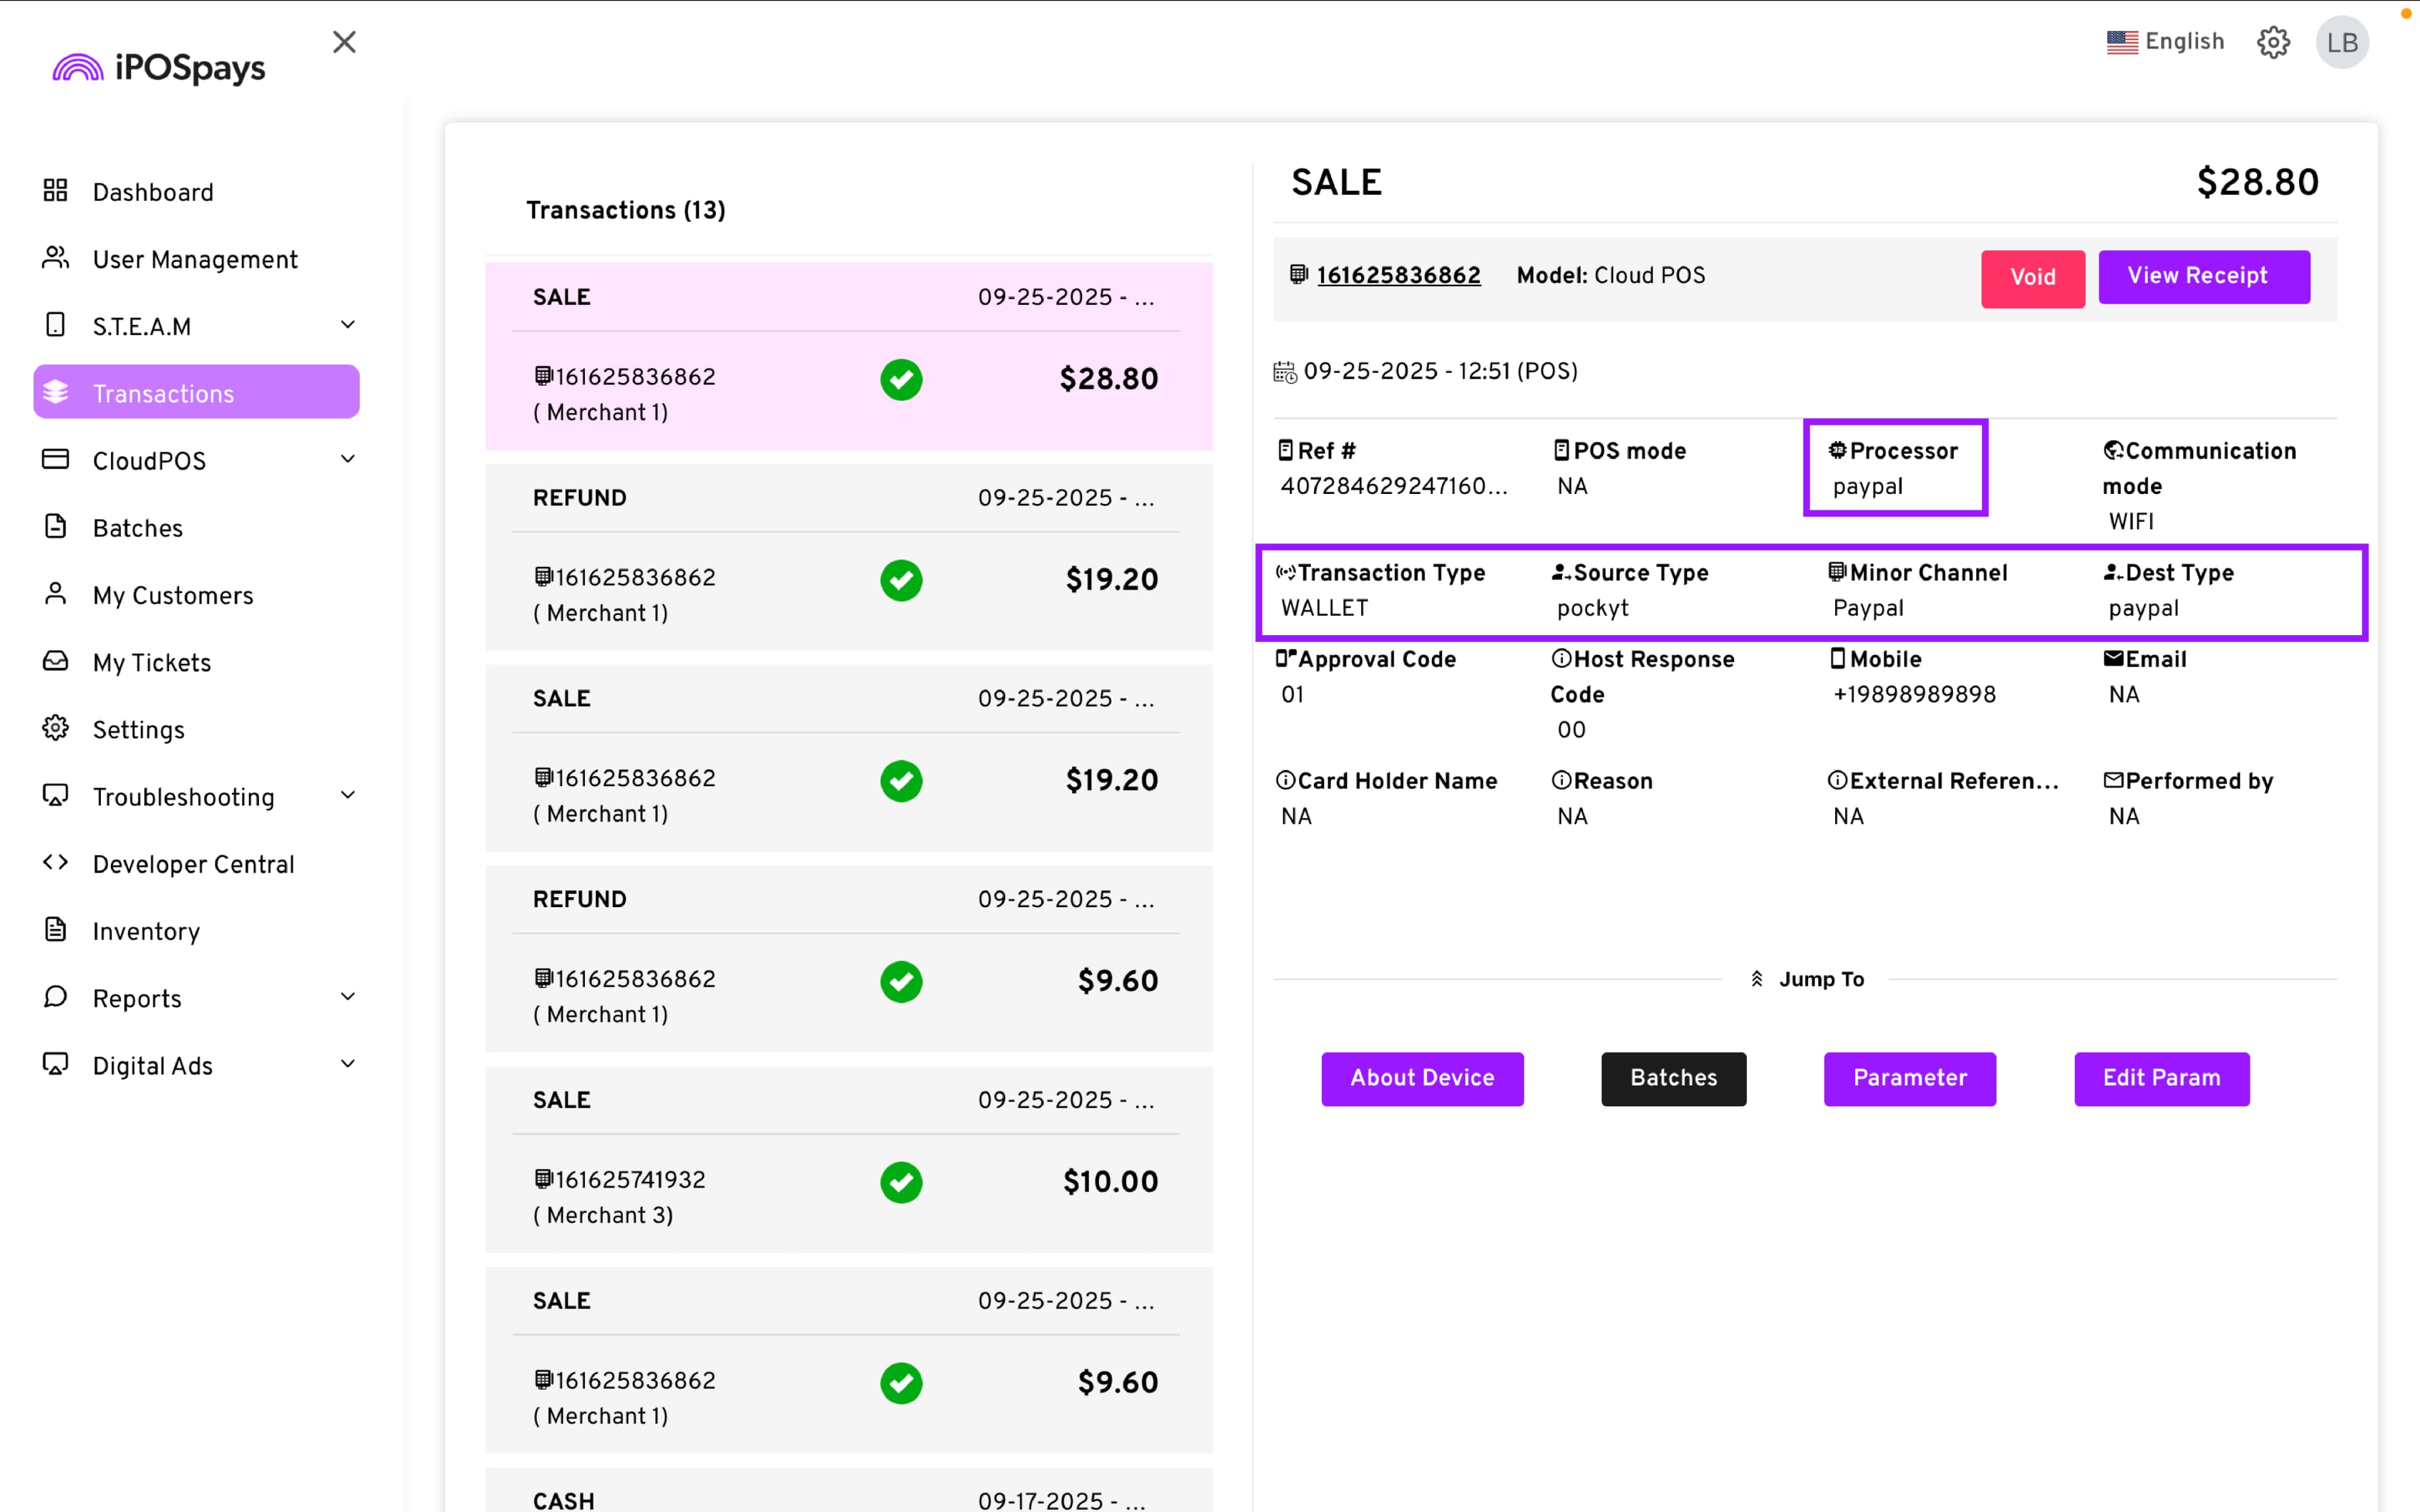
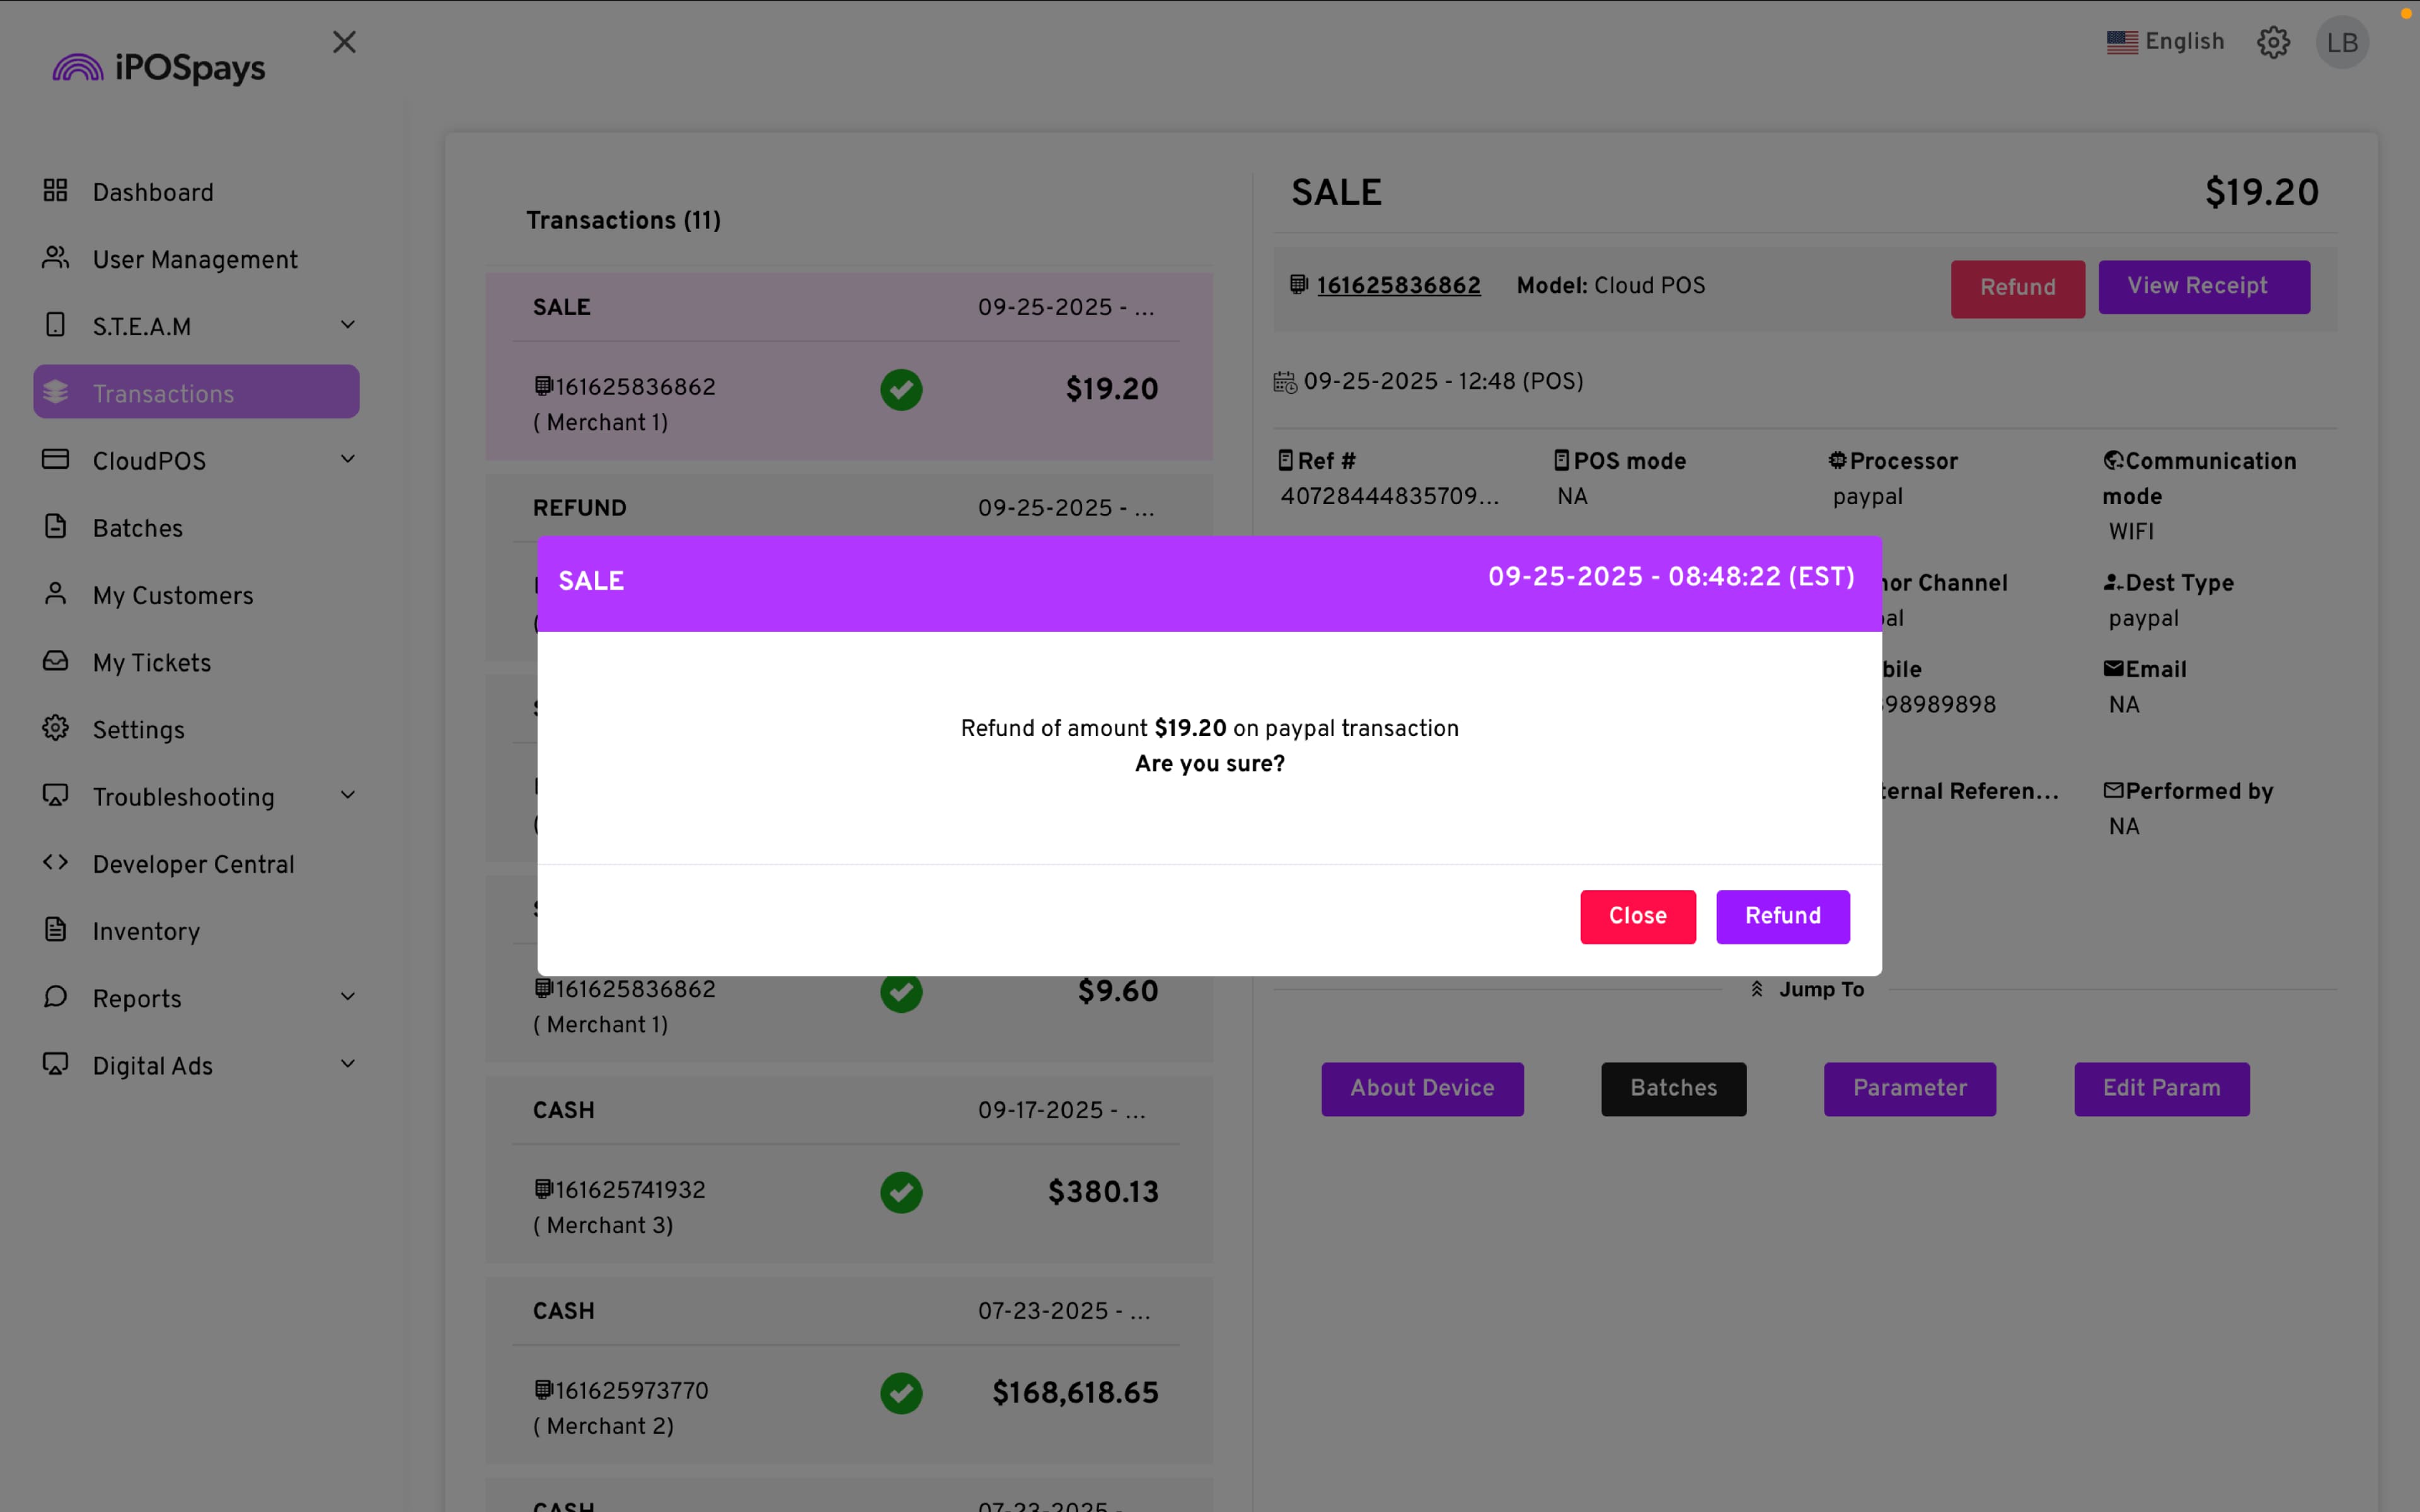
- Merchants can view transaction details in Transactions → Filter → Payments → Alternative Payments and perform void or refund if needed.
On CloudPOS (Virtual Terminal)
-
Log in to ipospays.com with a merchant account.
-
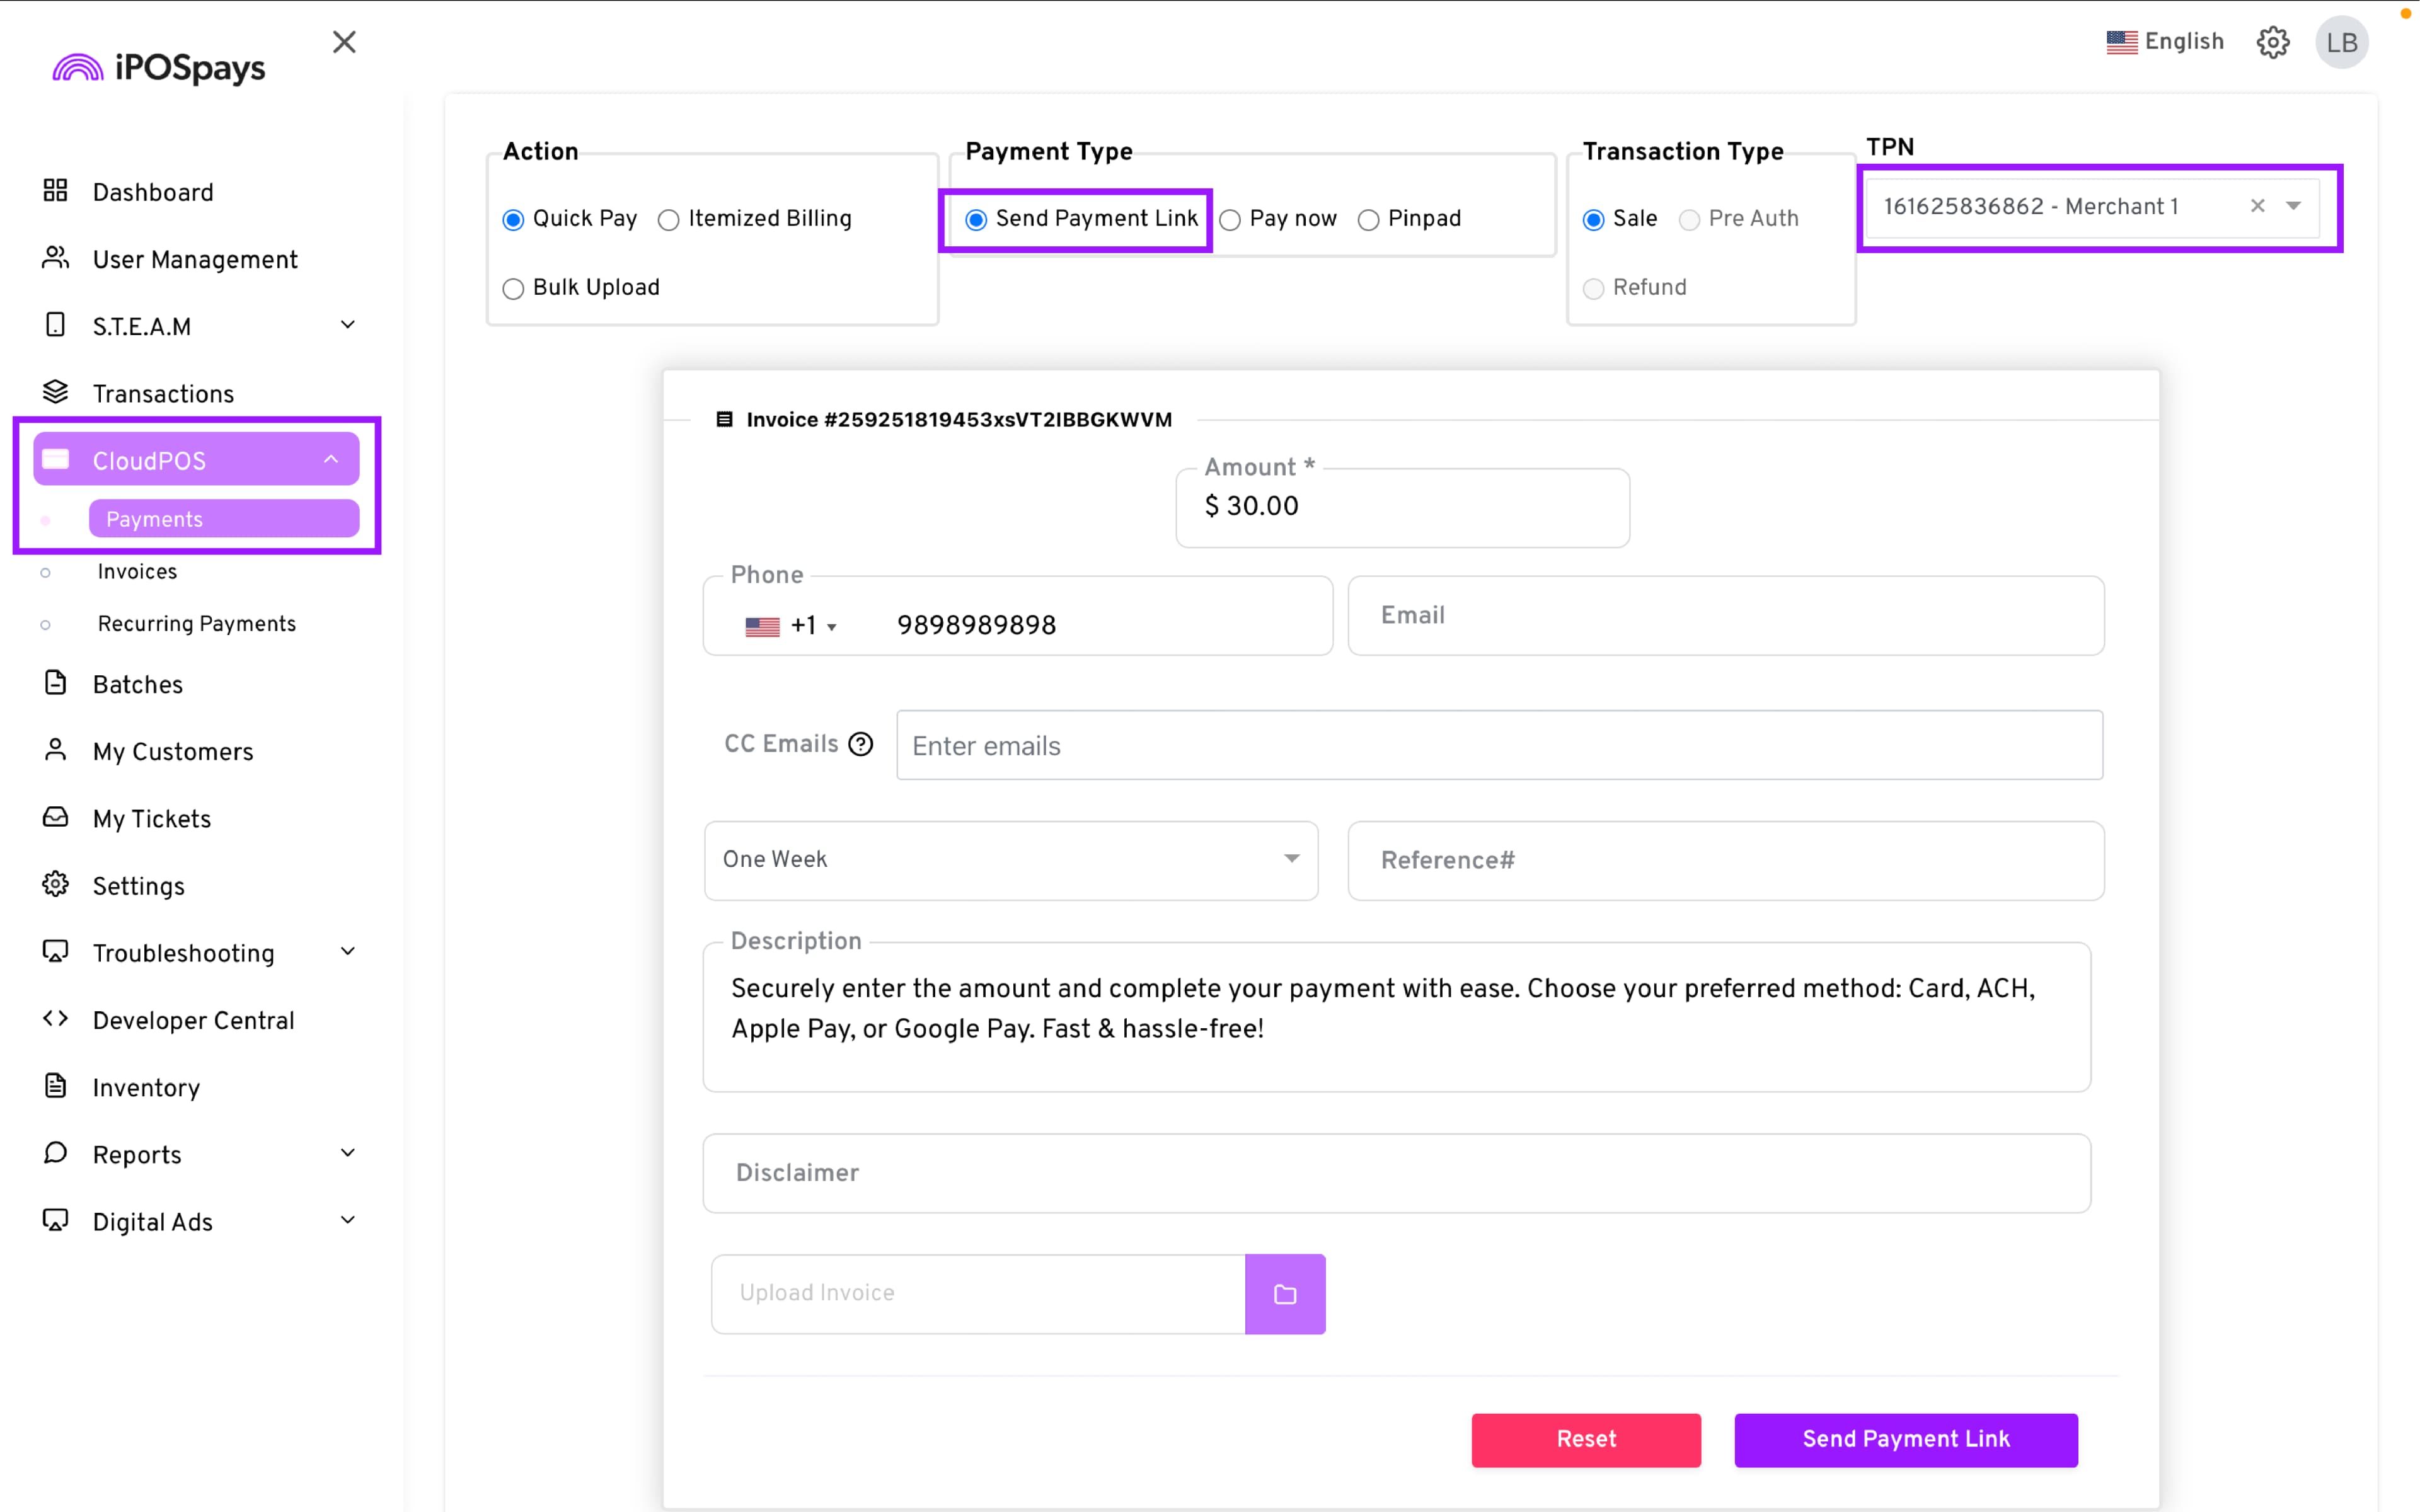
Navigate to CloudPOS → Payments.
-
Select the target TPN from the dropdown.
-
Configure the transaction:
-
Payment Type: Send Payment Link
-
Transaction Type: Sale
-
Amount: Enter transaction amount
-
Customer Info: Enter phone number and email
-
Description: Optional
- Click Send Payment Link.
Benefits
-
Merchants can expand payment options to attract more customers.
-
Customers can pay directly using their preferred wallets (PayPal or Venmo).
-
ISOs can offer merchants flexible and modern payment options, helping them remain competitive.