Add Bank (ACH) in My Customers
Merchants can now add and tokenize ACH bank accounts for their customers directly from the My Customers module in the portal.
How it works:
-
A new “Add Bank” button is available in the My Customers screen.
-
When clicked, it checks if:
-
The user is mapped to a store.
-
The store has ACH-enabled TPNs.
-
-
If eligible, you’ll be redirected to the CloudPOS → Payments (ACH) screen.
-
The bank account will be tokenized and saved under the selected customer.
What you can do with it:
-
Use the bank token for one-time payments
-
Set up recurring payments
-
Process voids and refunds via ACH
This feature is available for stores that support ACH transactions.
How to use:
Ensure the customer’s store has ACH set up for this to work.
-
Log in to the iPOSpays portal using a merchant account.
-
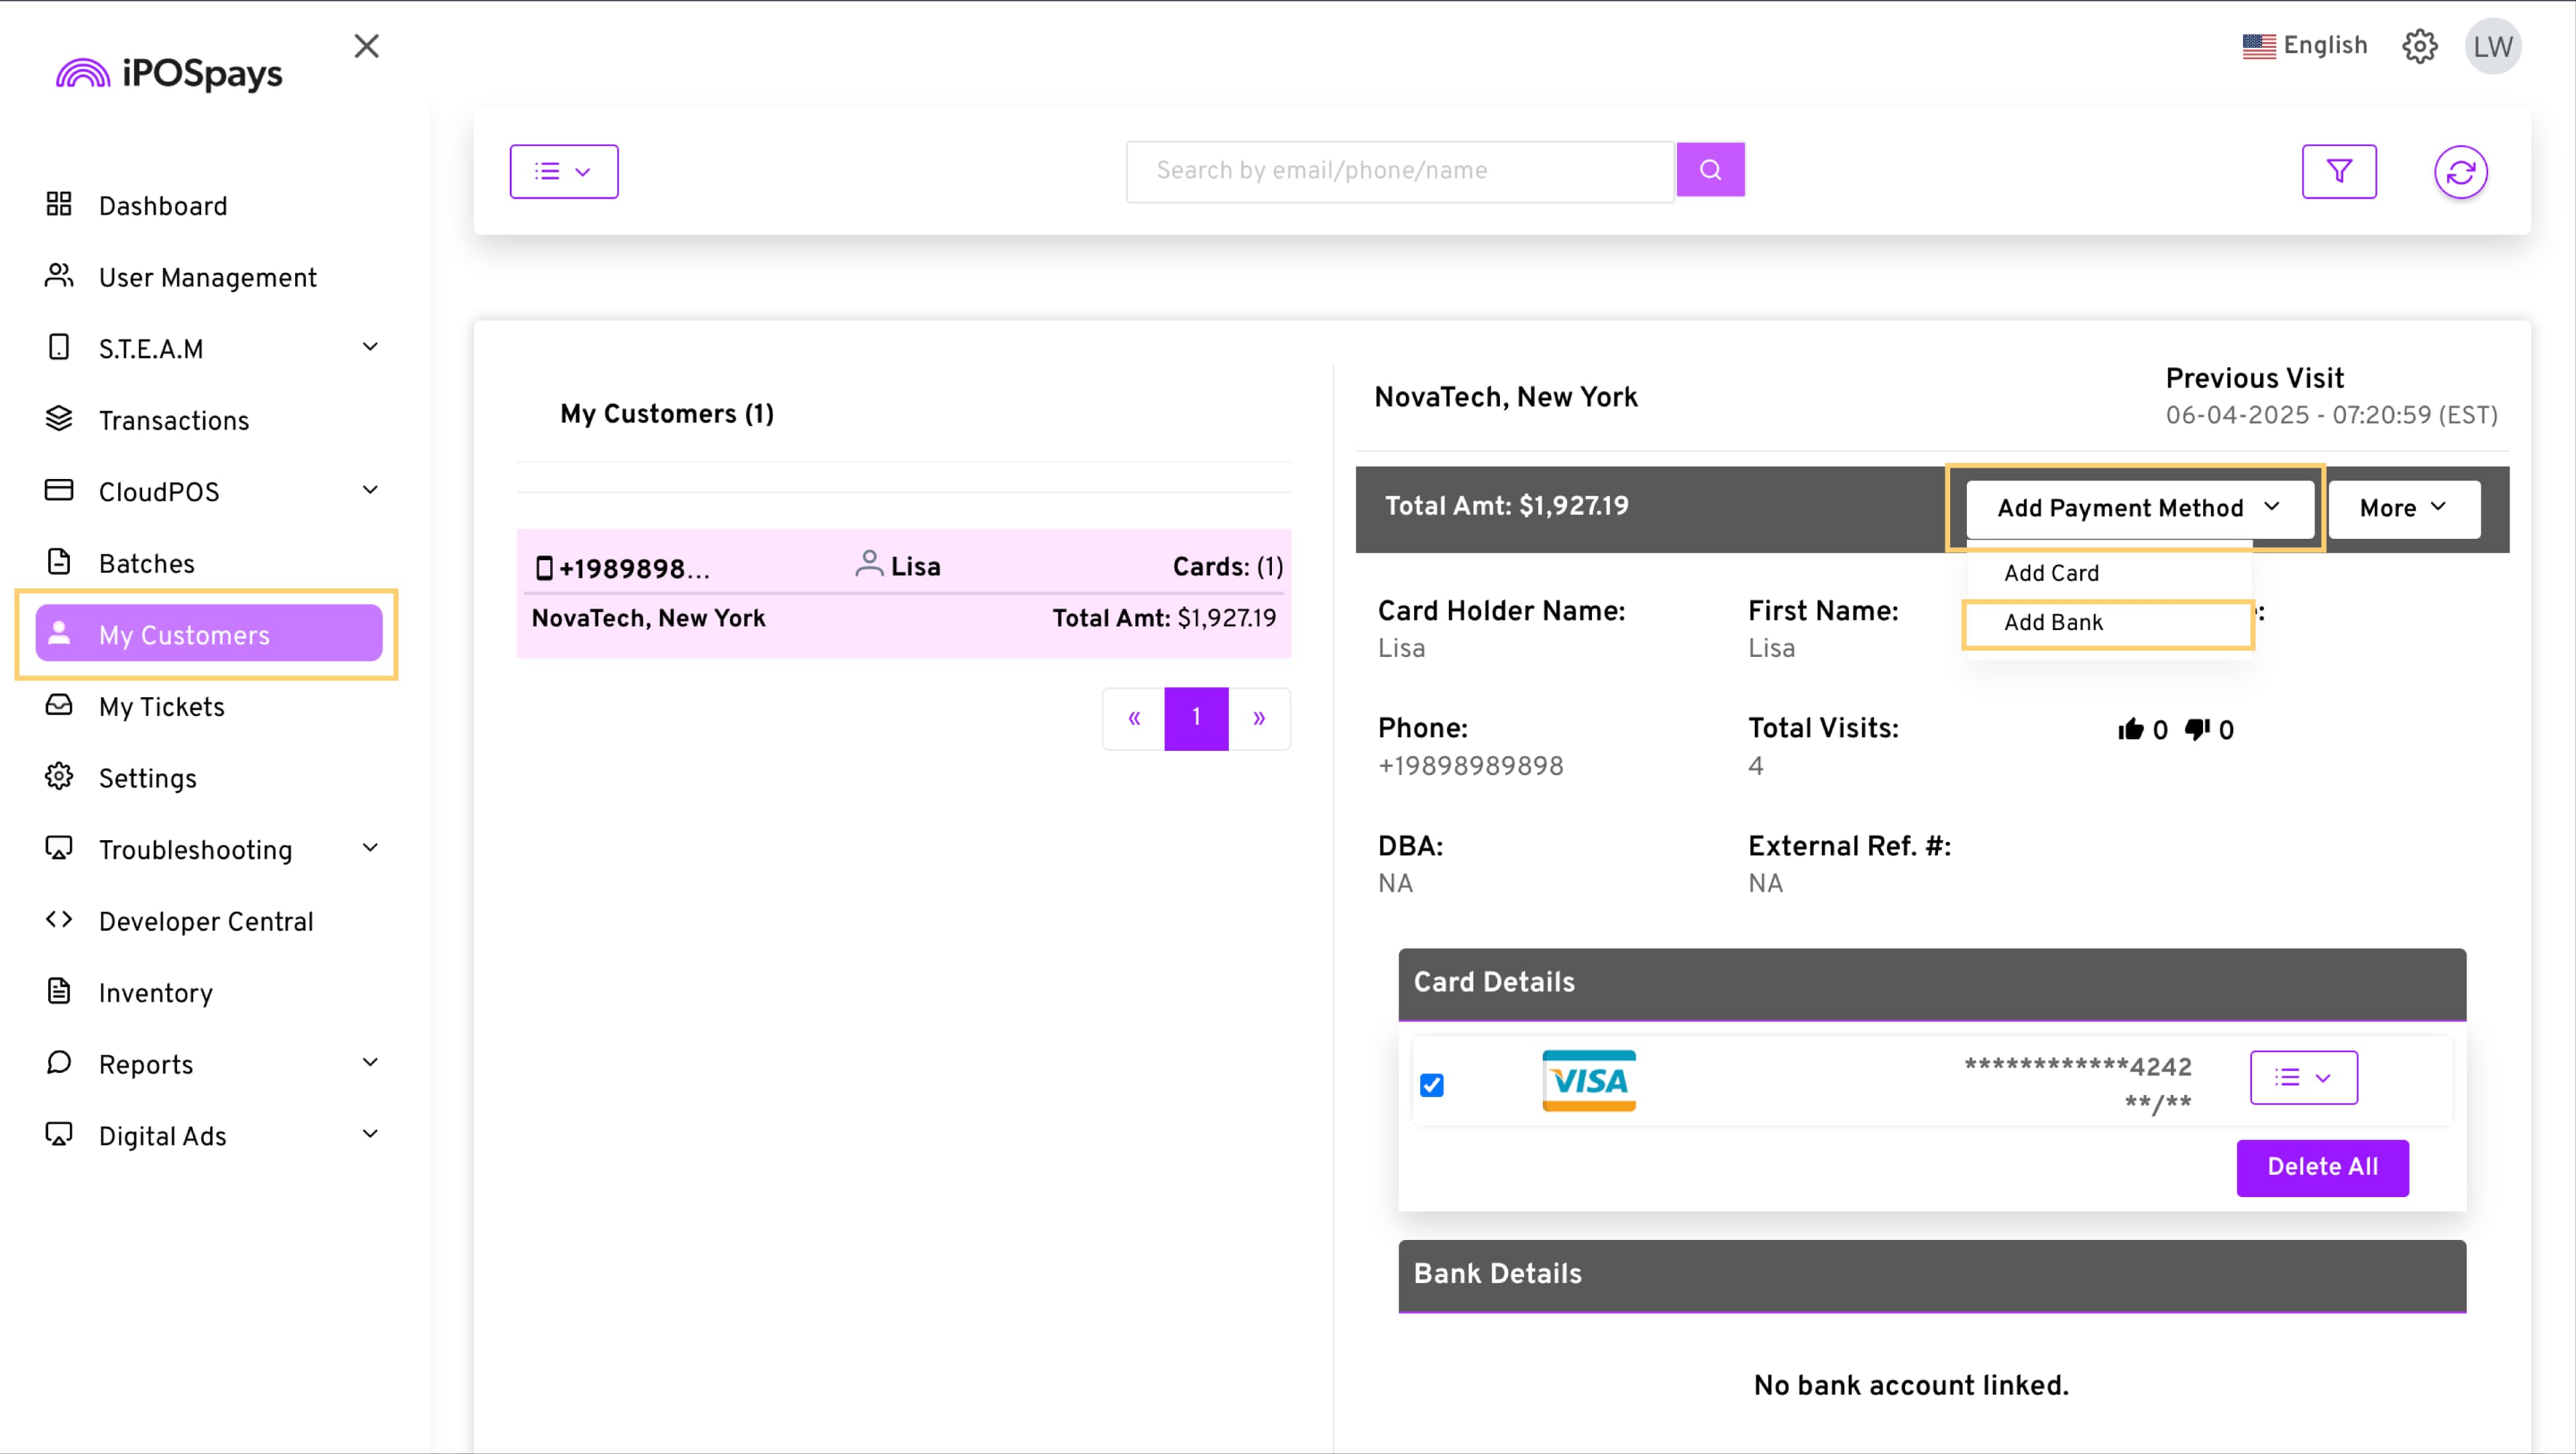
Go to My Customers → search and select the specific customer using the search box at the top.
-
Click on the Add Payment Method drop-down menu on the right side of the customer profile and choose Add Bank.
-
You’ll be redirected to the CloudPOS → Payments (ACH) screen.
-
If you haven’t chosen a TPN, choose the desired TPN against which the customer’s bank details will be saved to be used again later in a transaction.
-
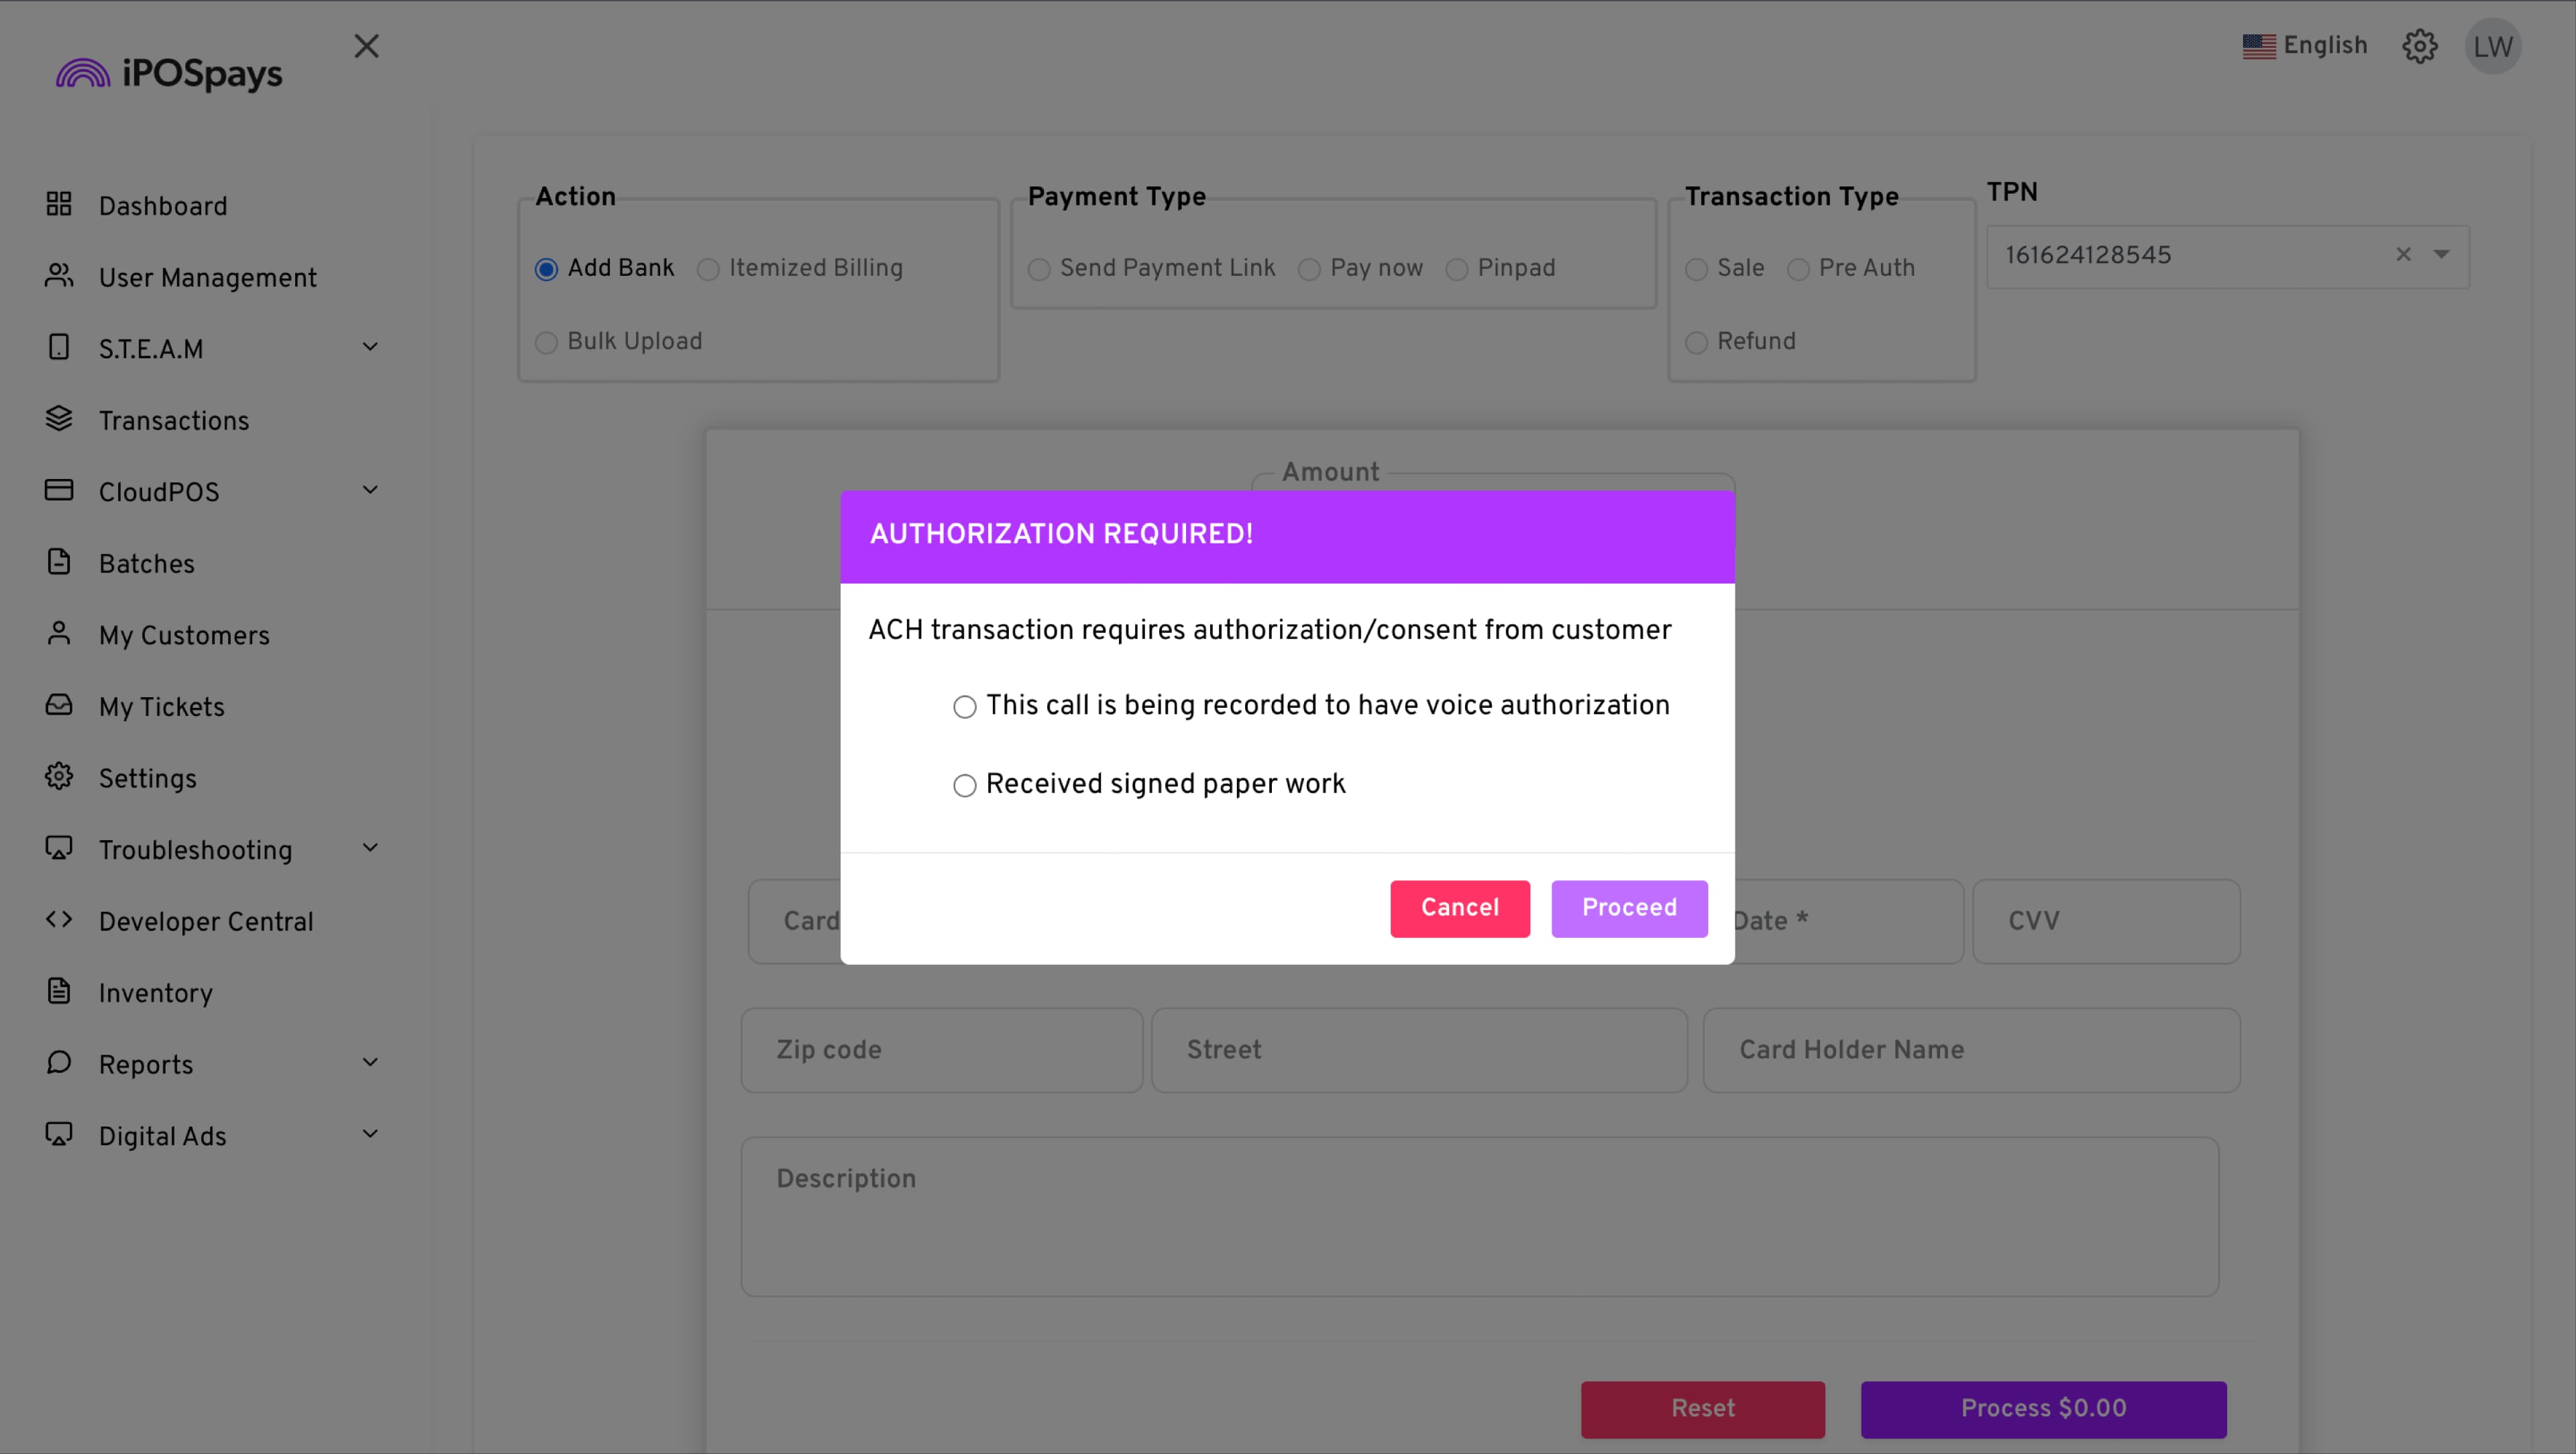
ACH Type: Choose between:
-
“Telephone-initiated”
-
“Prearranged payment”
Telephone-Initiated ACH:
- Enter the required information. The mandatory fields will change based on the Tell ID provided during the Paya integration process.
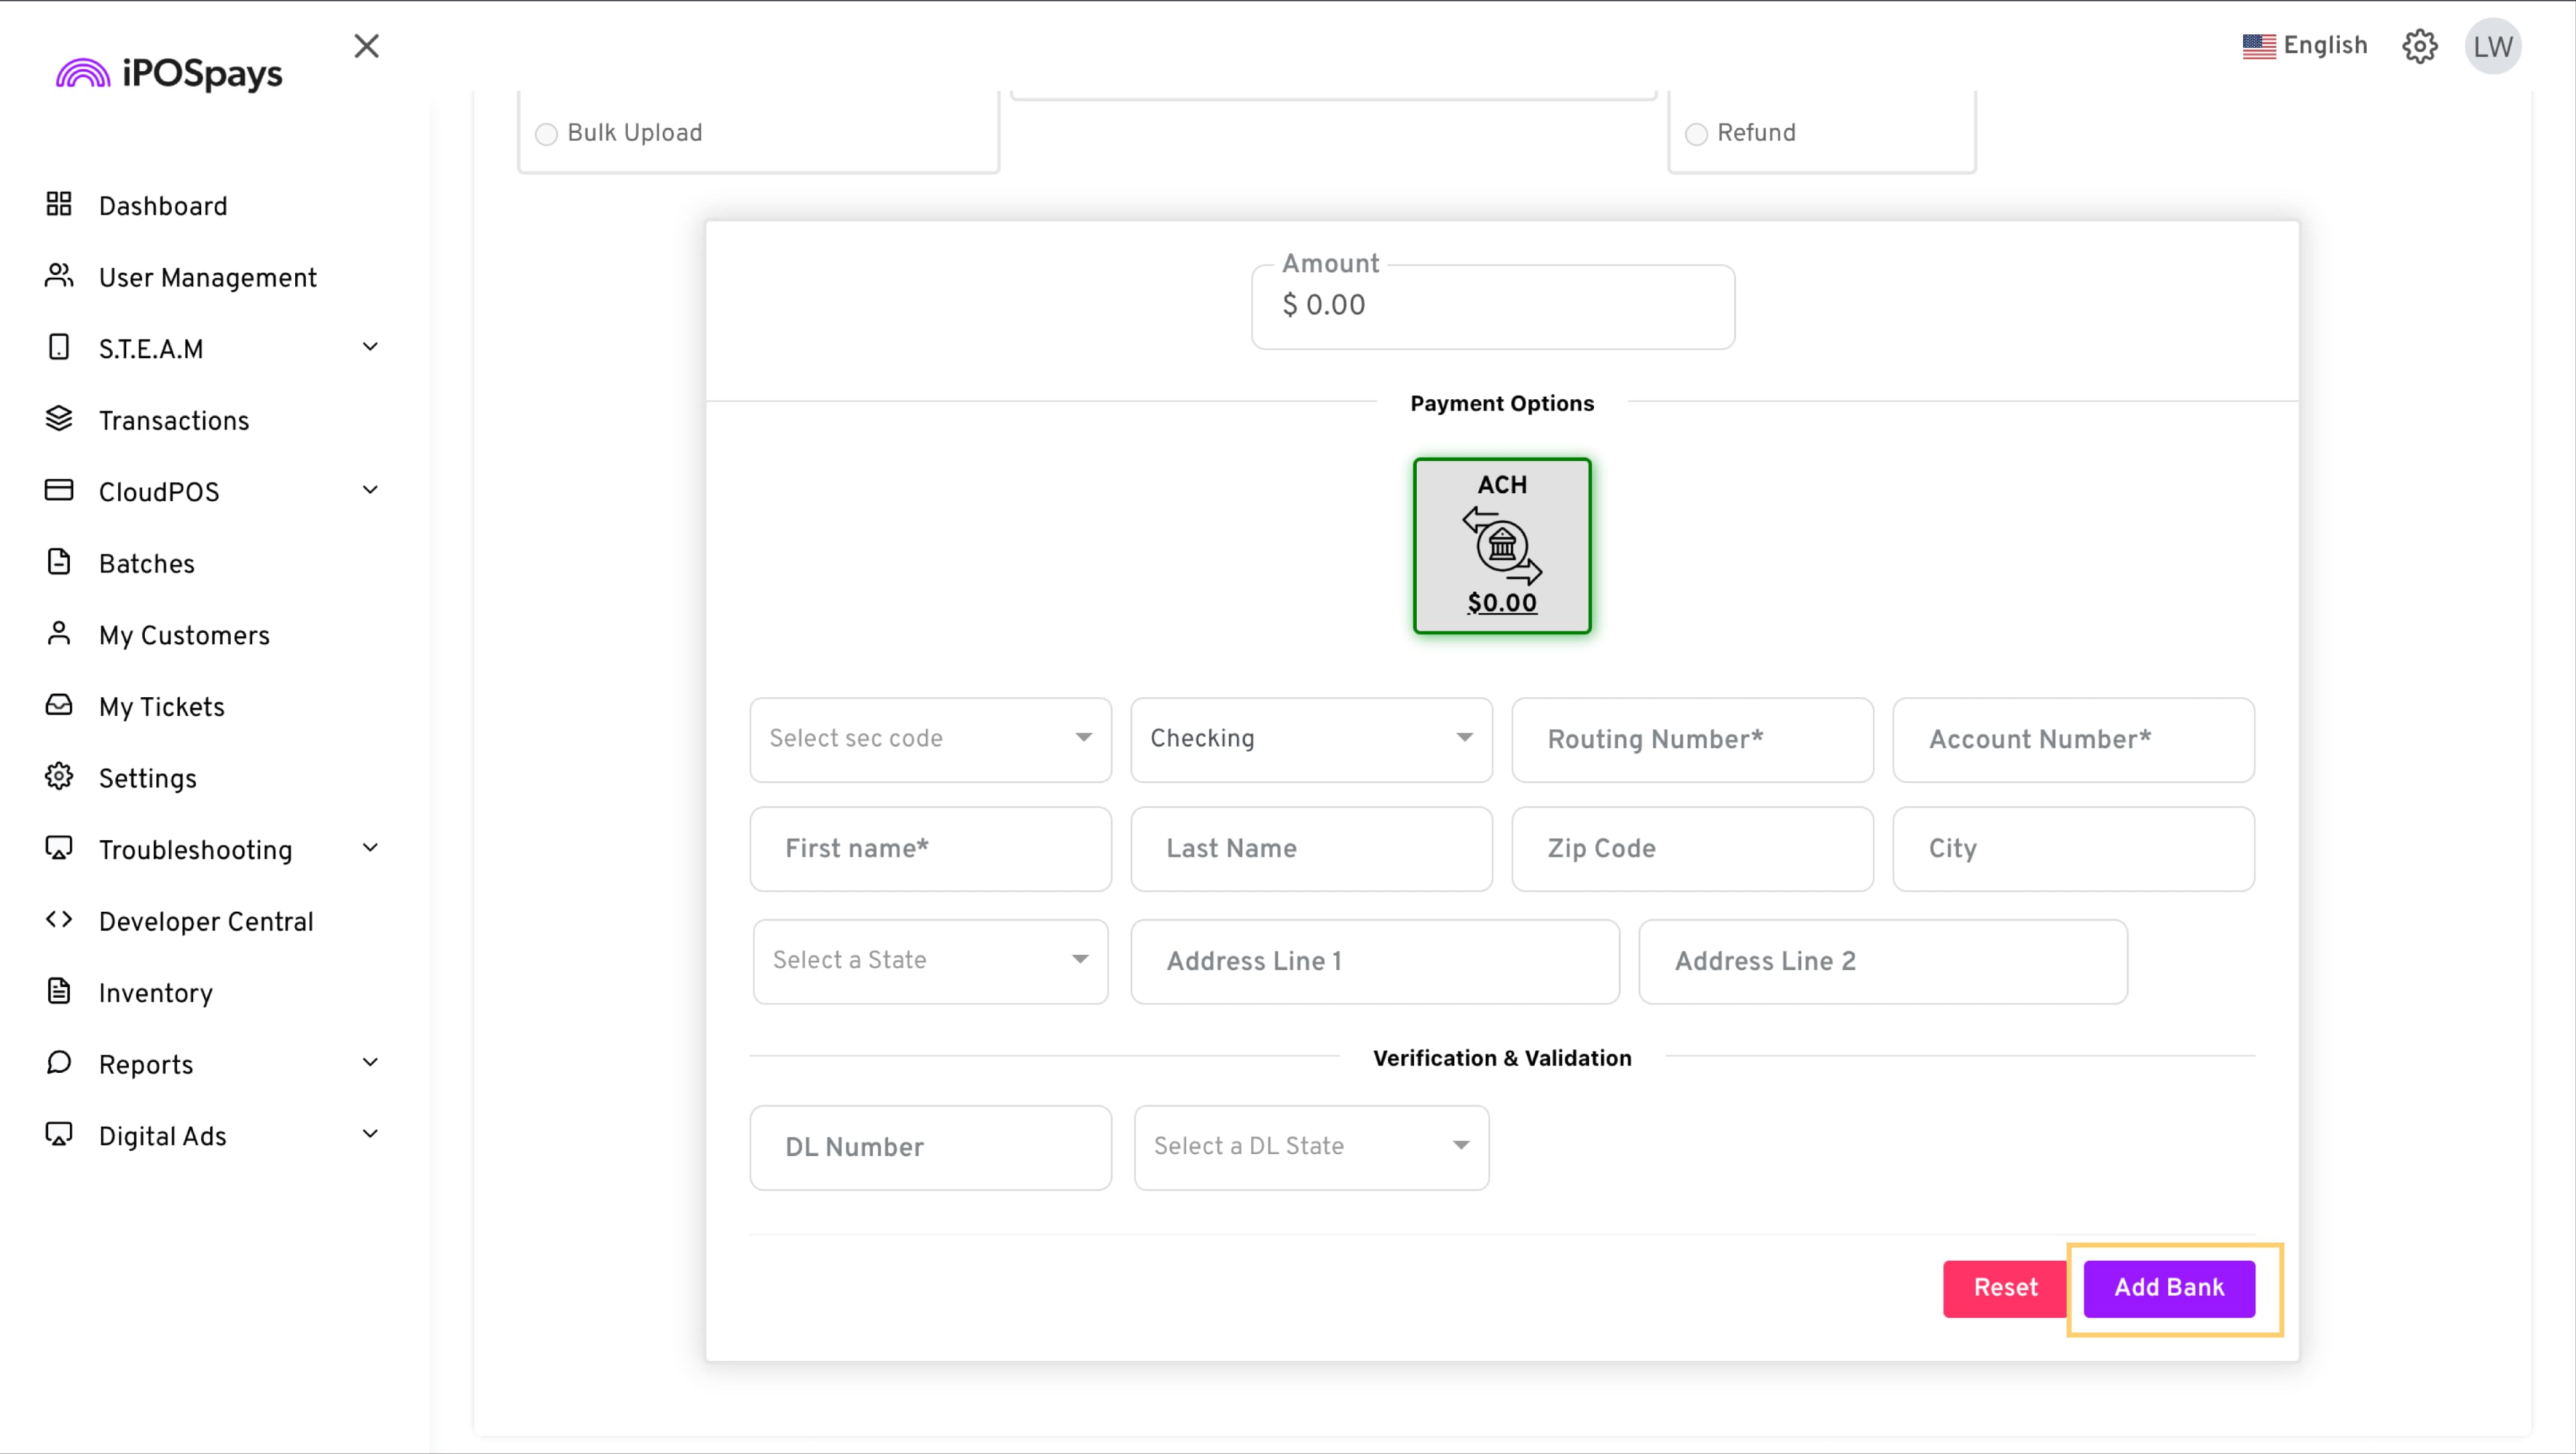
- Tap Add Bank to save and tokenize the customer’s bank information.
Prearranged ACH:
-
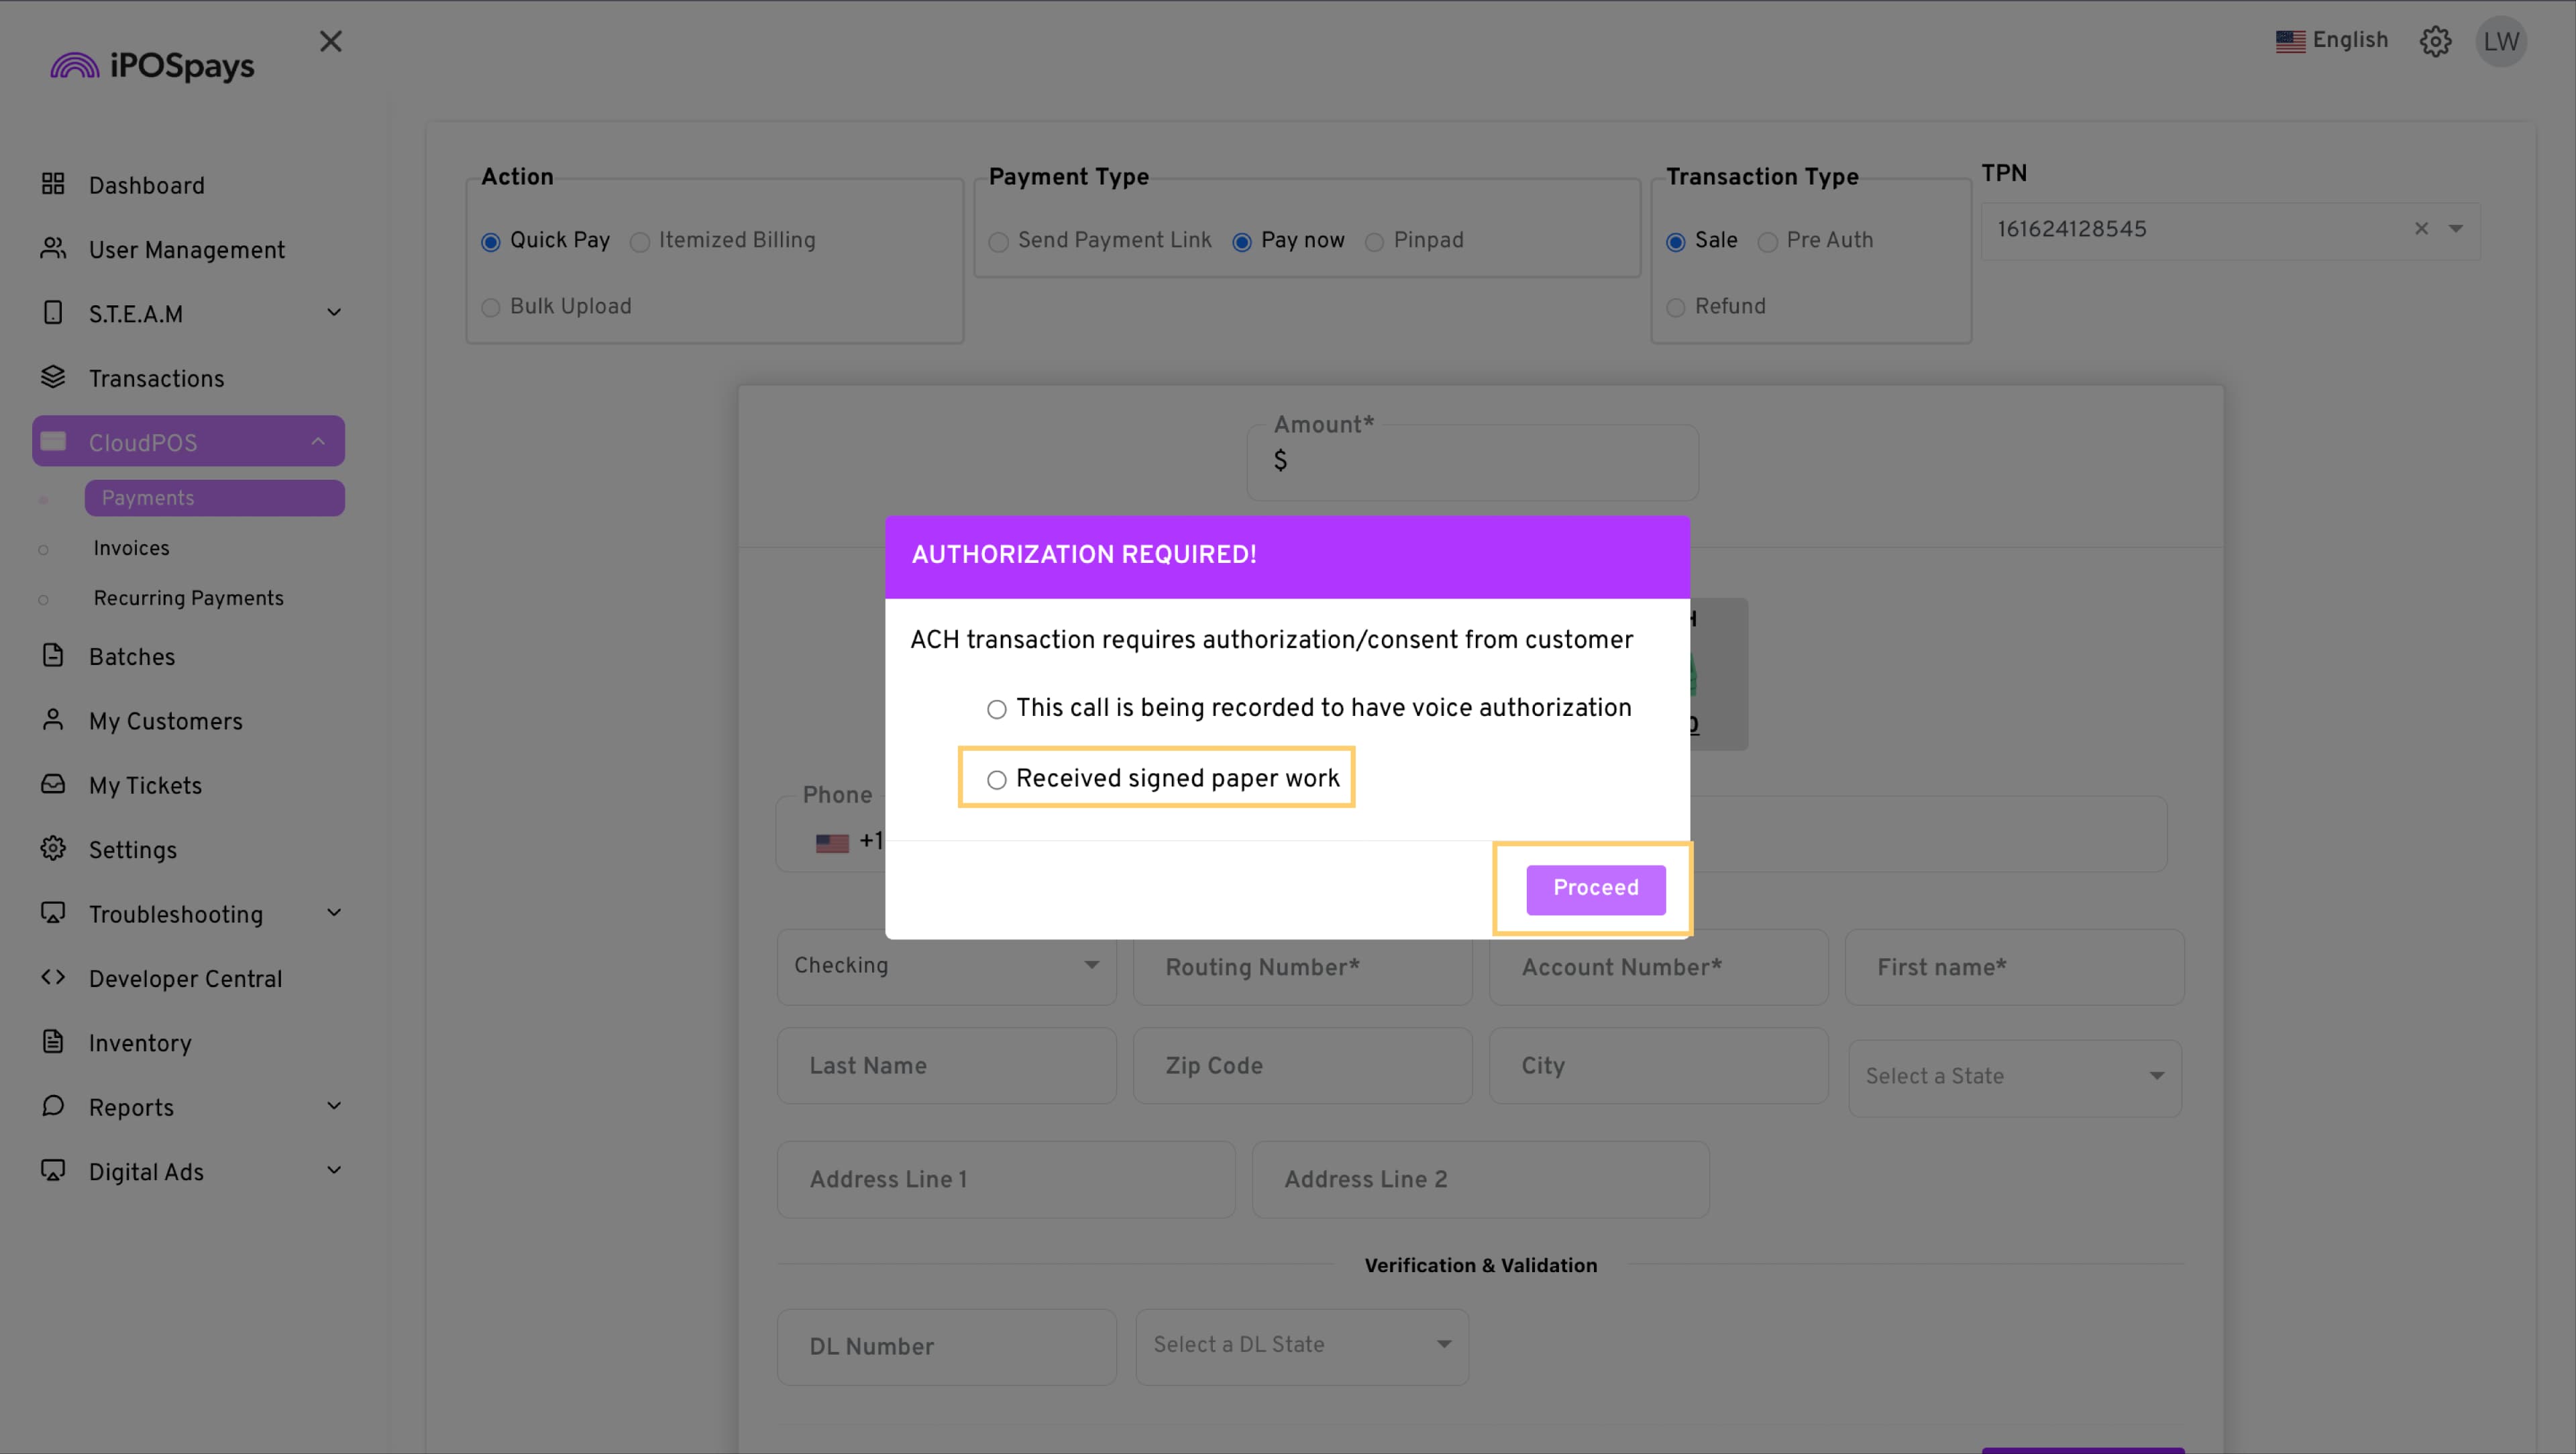
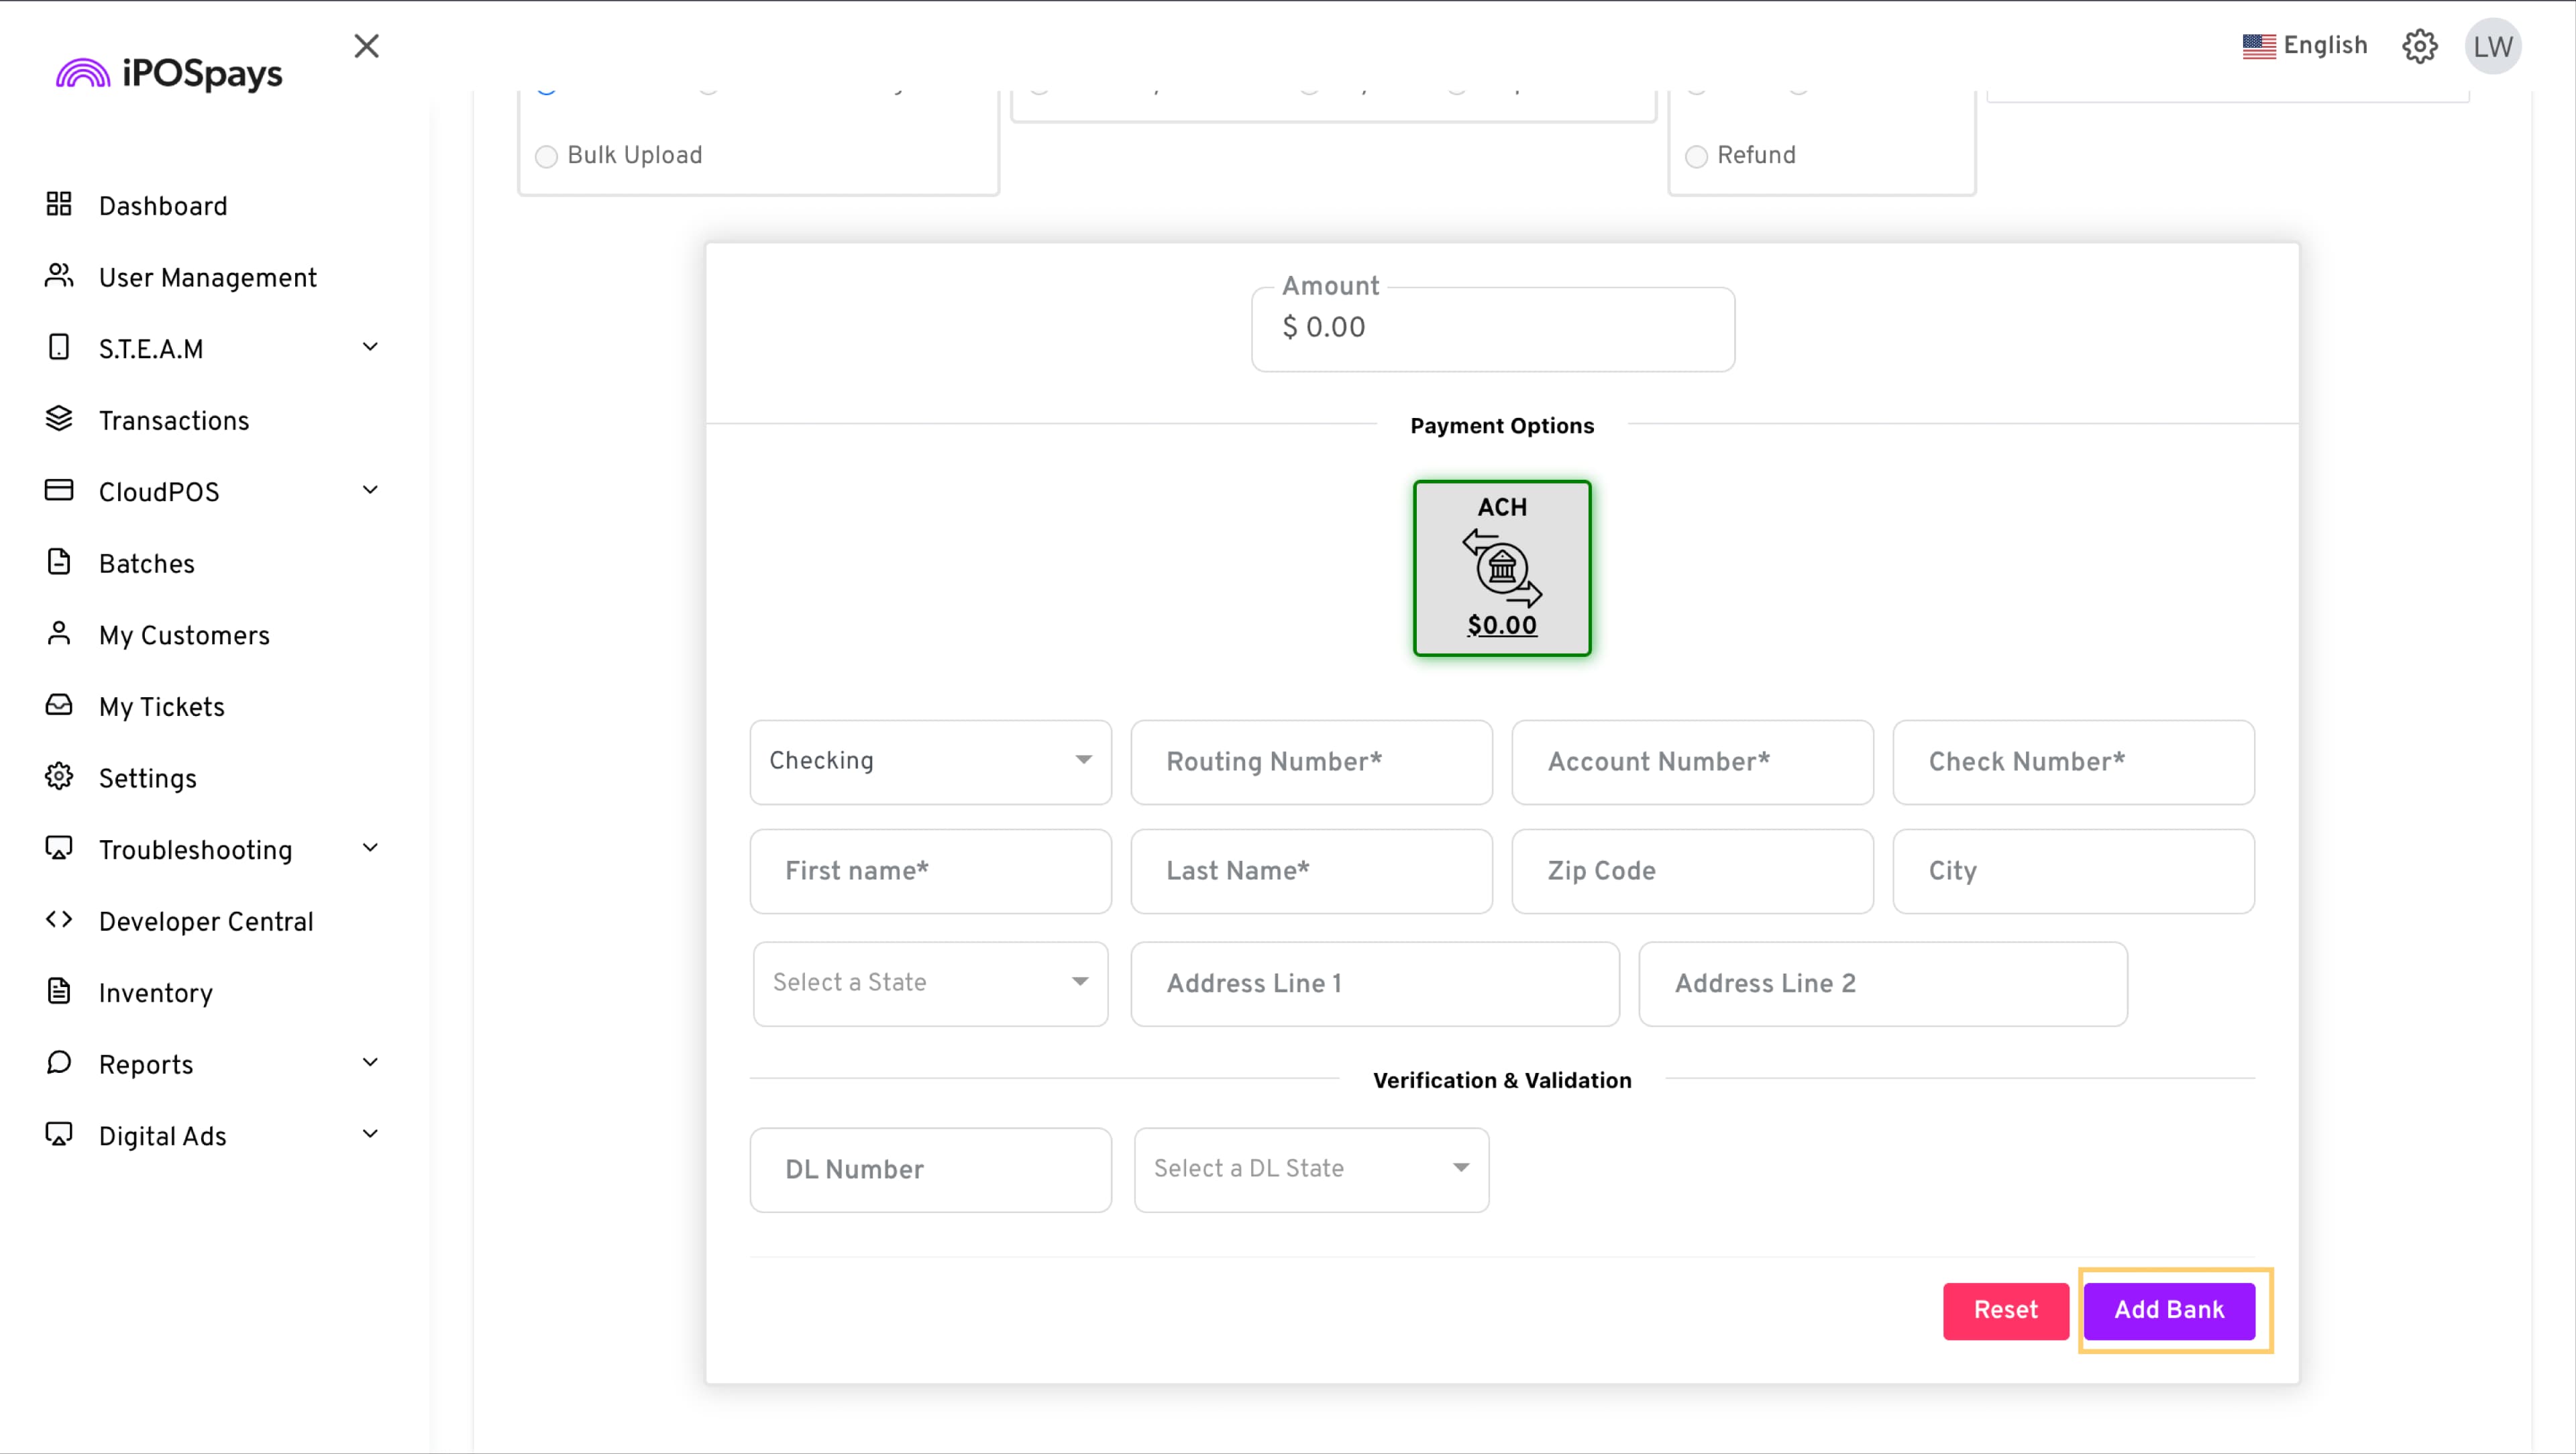
Complete the required fields on the Paya ACH screen. The mandatory fields will change based on the PPD/CCD provided during the Paya integration process.
-
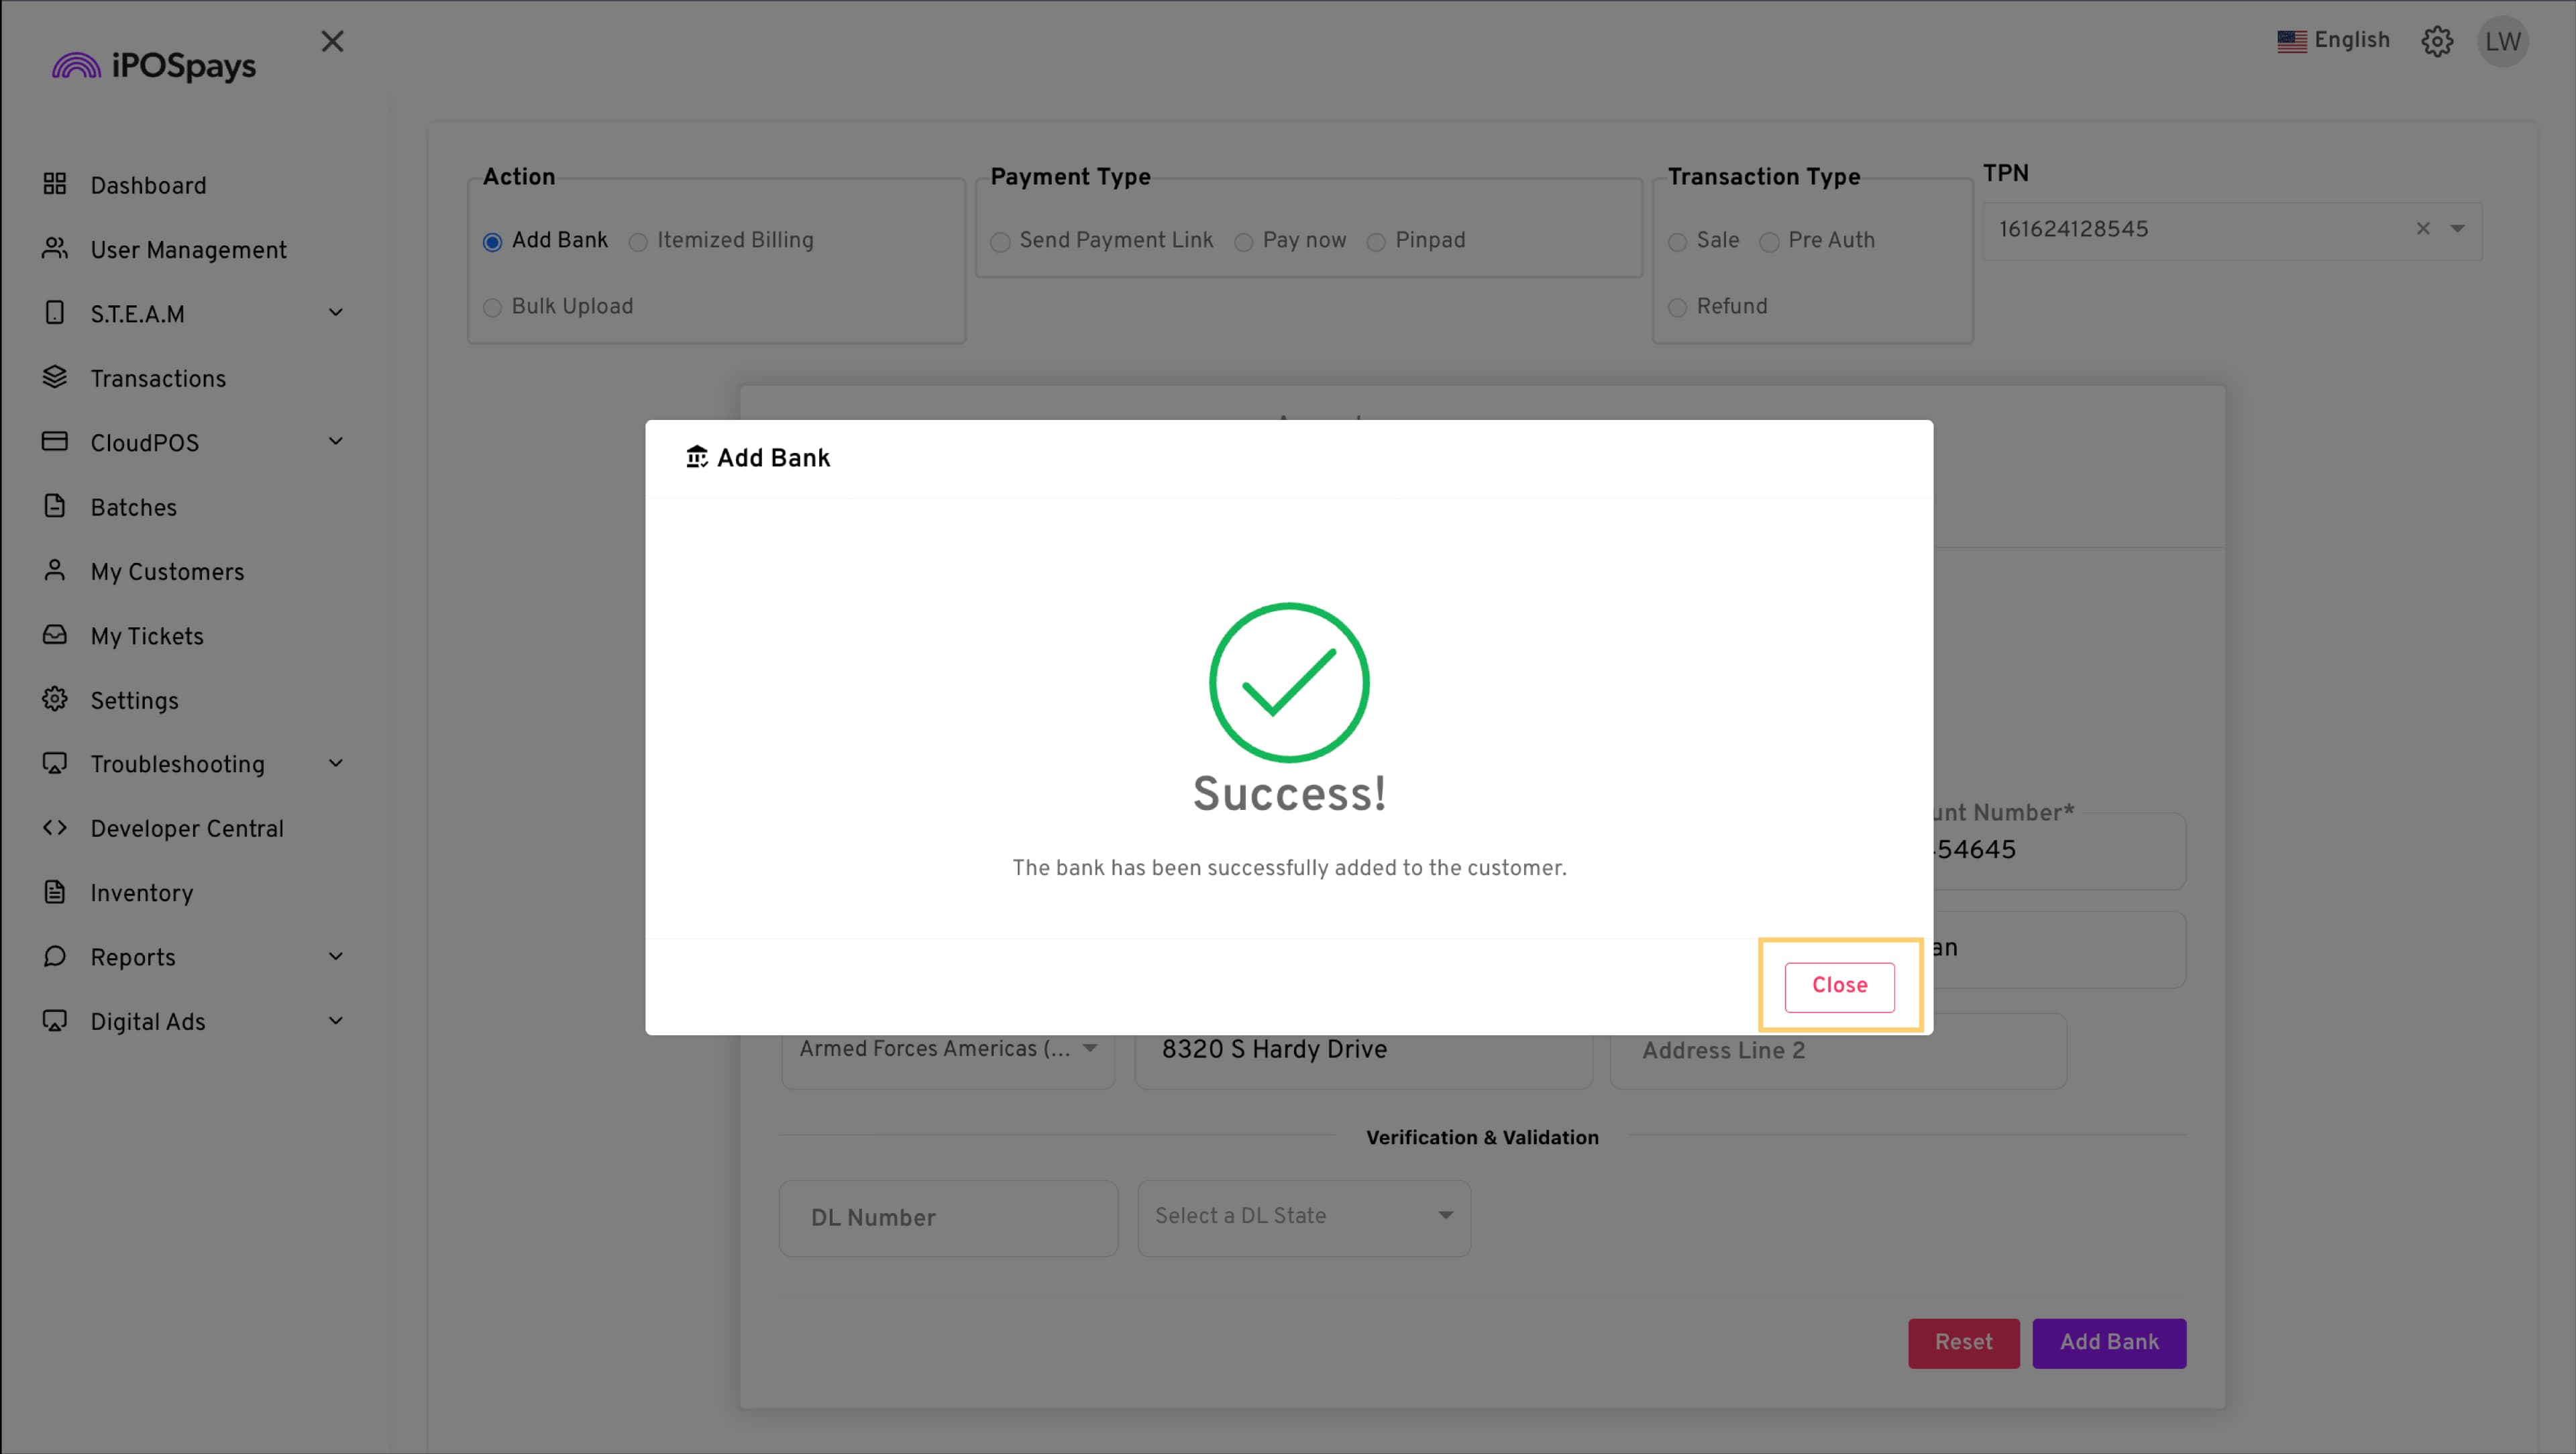
Tap Add Bank to save and tokenize the customer’s bank information.
-
Tap Close to go back to the My Customers module.
-
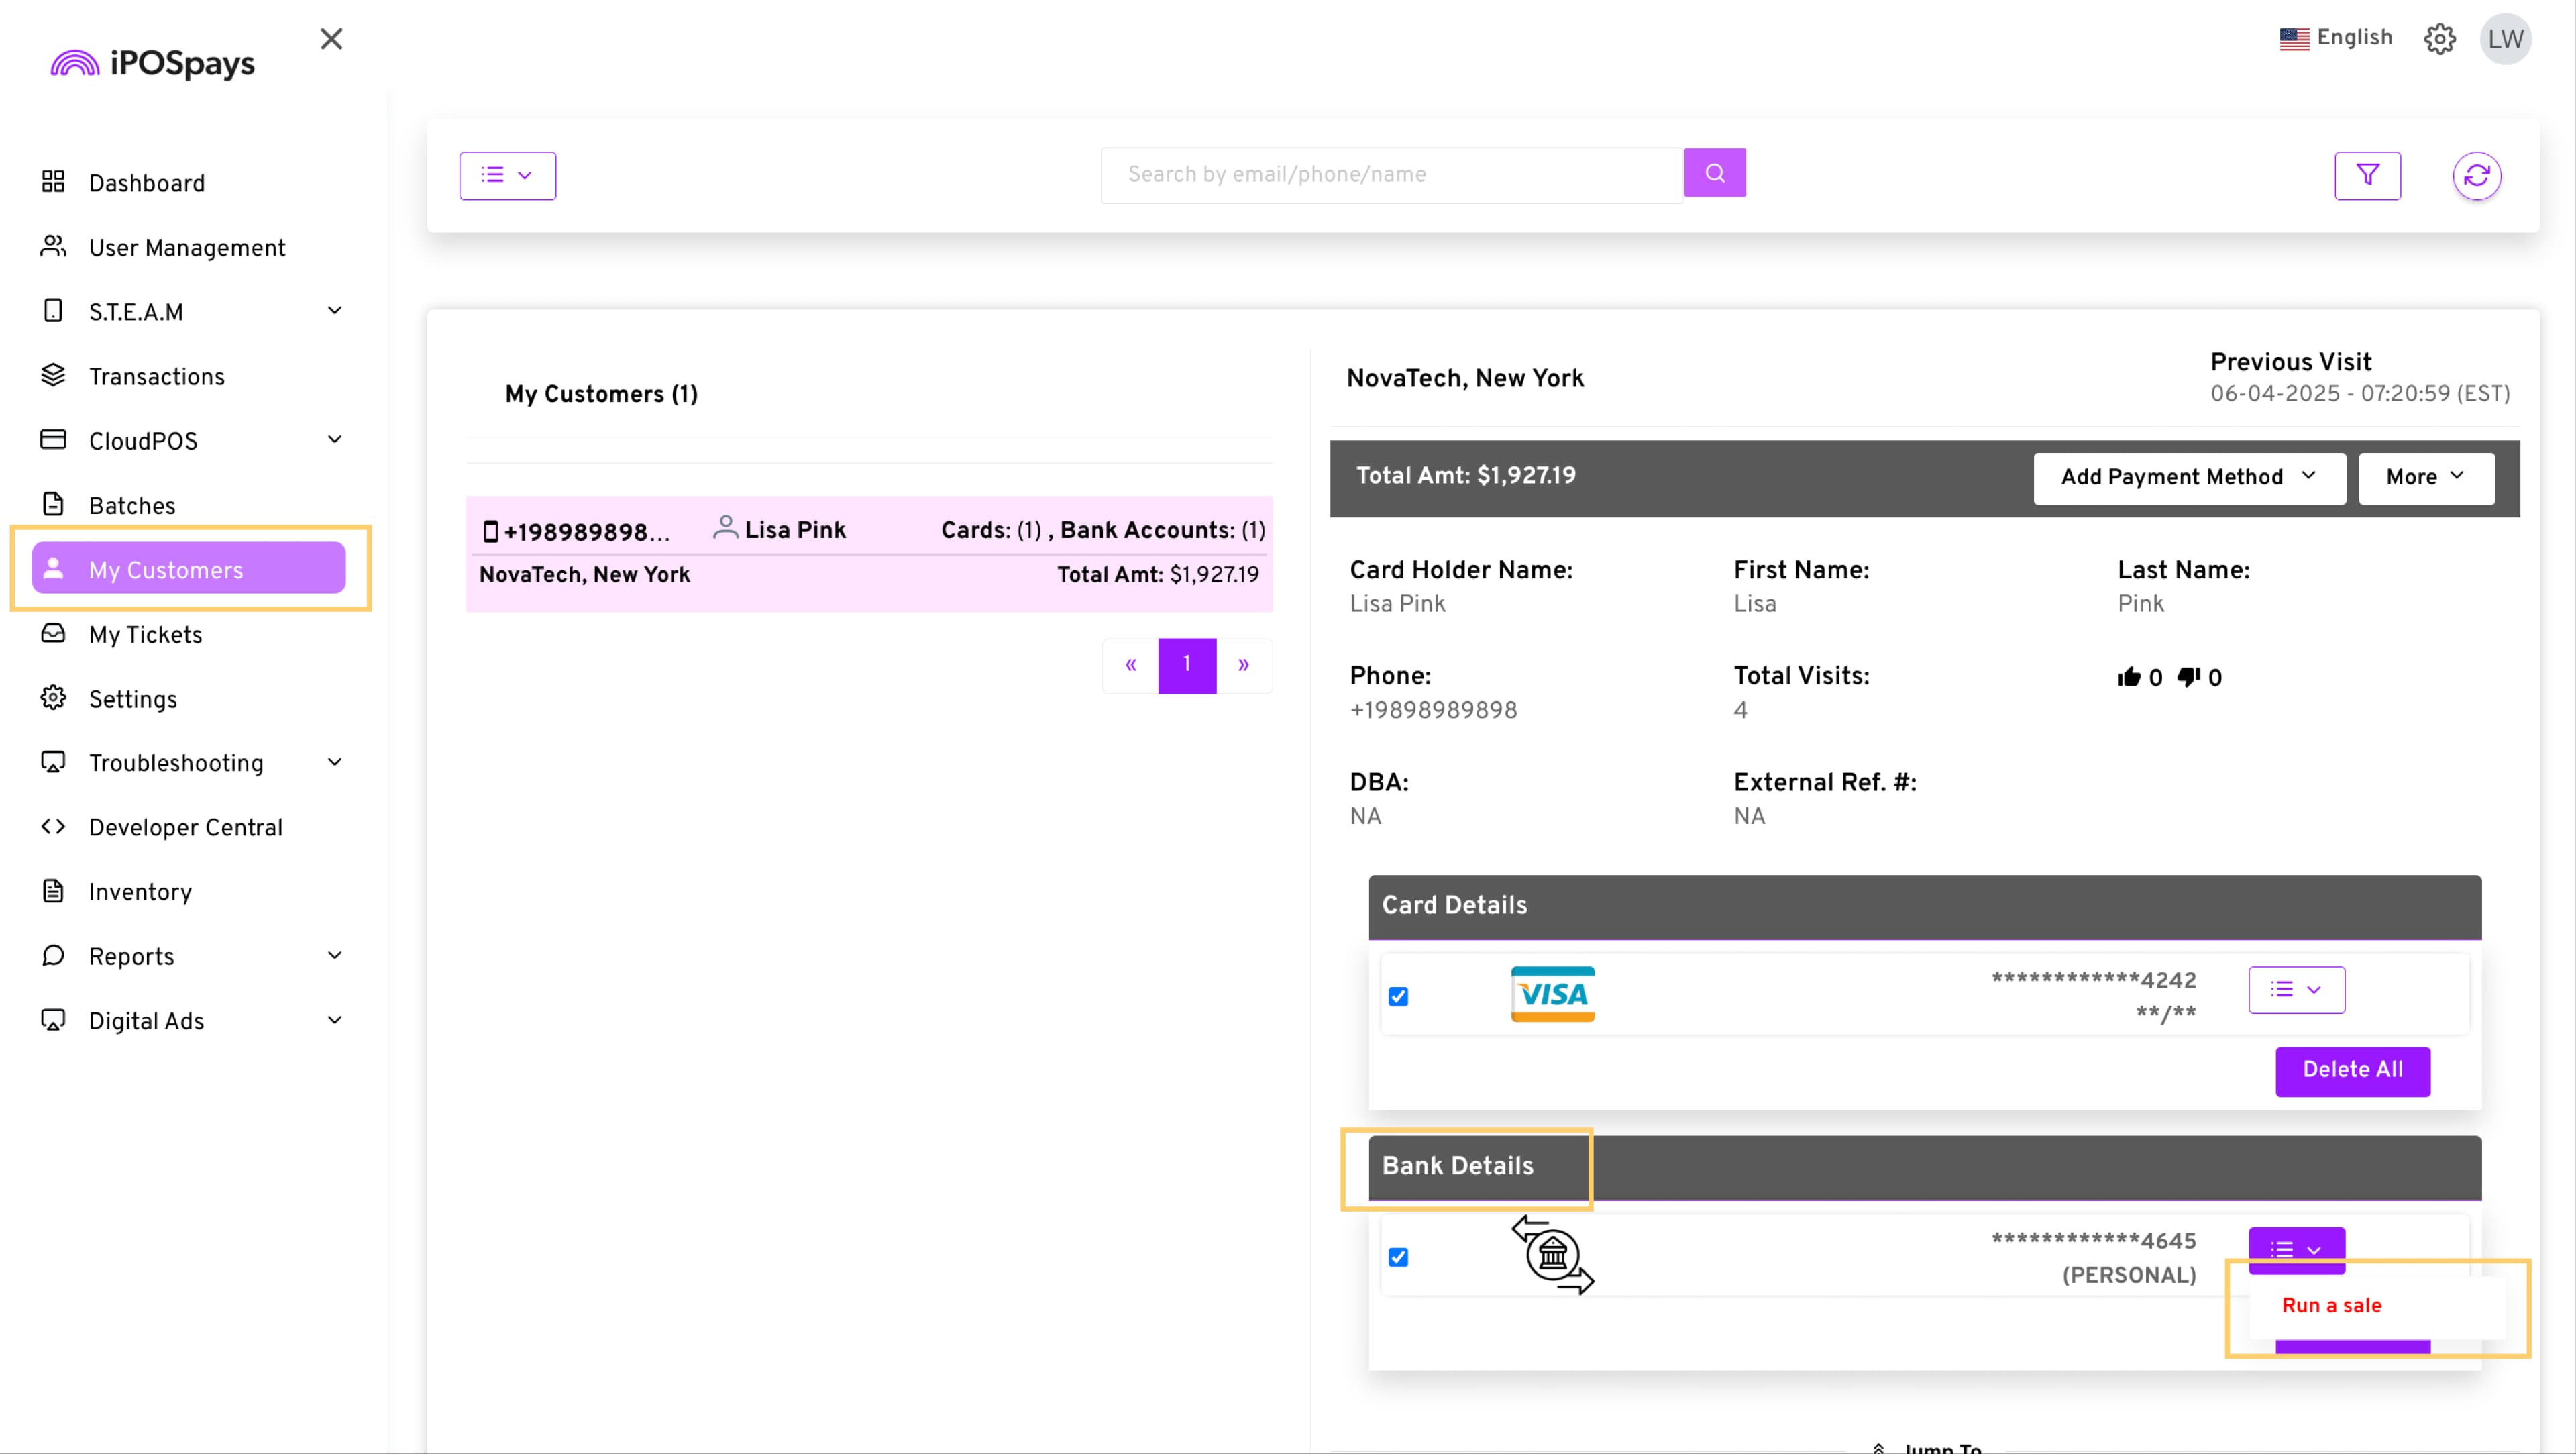
Now, on the right side of the customer profile, you’ll find the customer’s tokenized bank account.
-
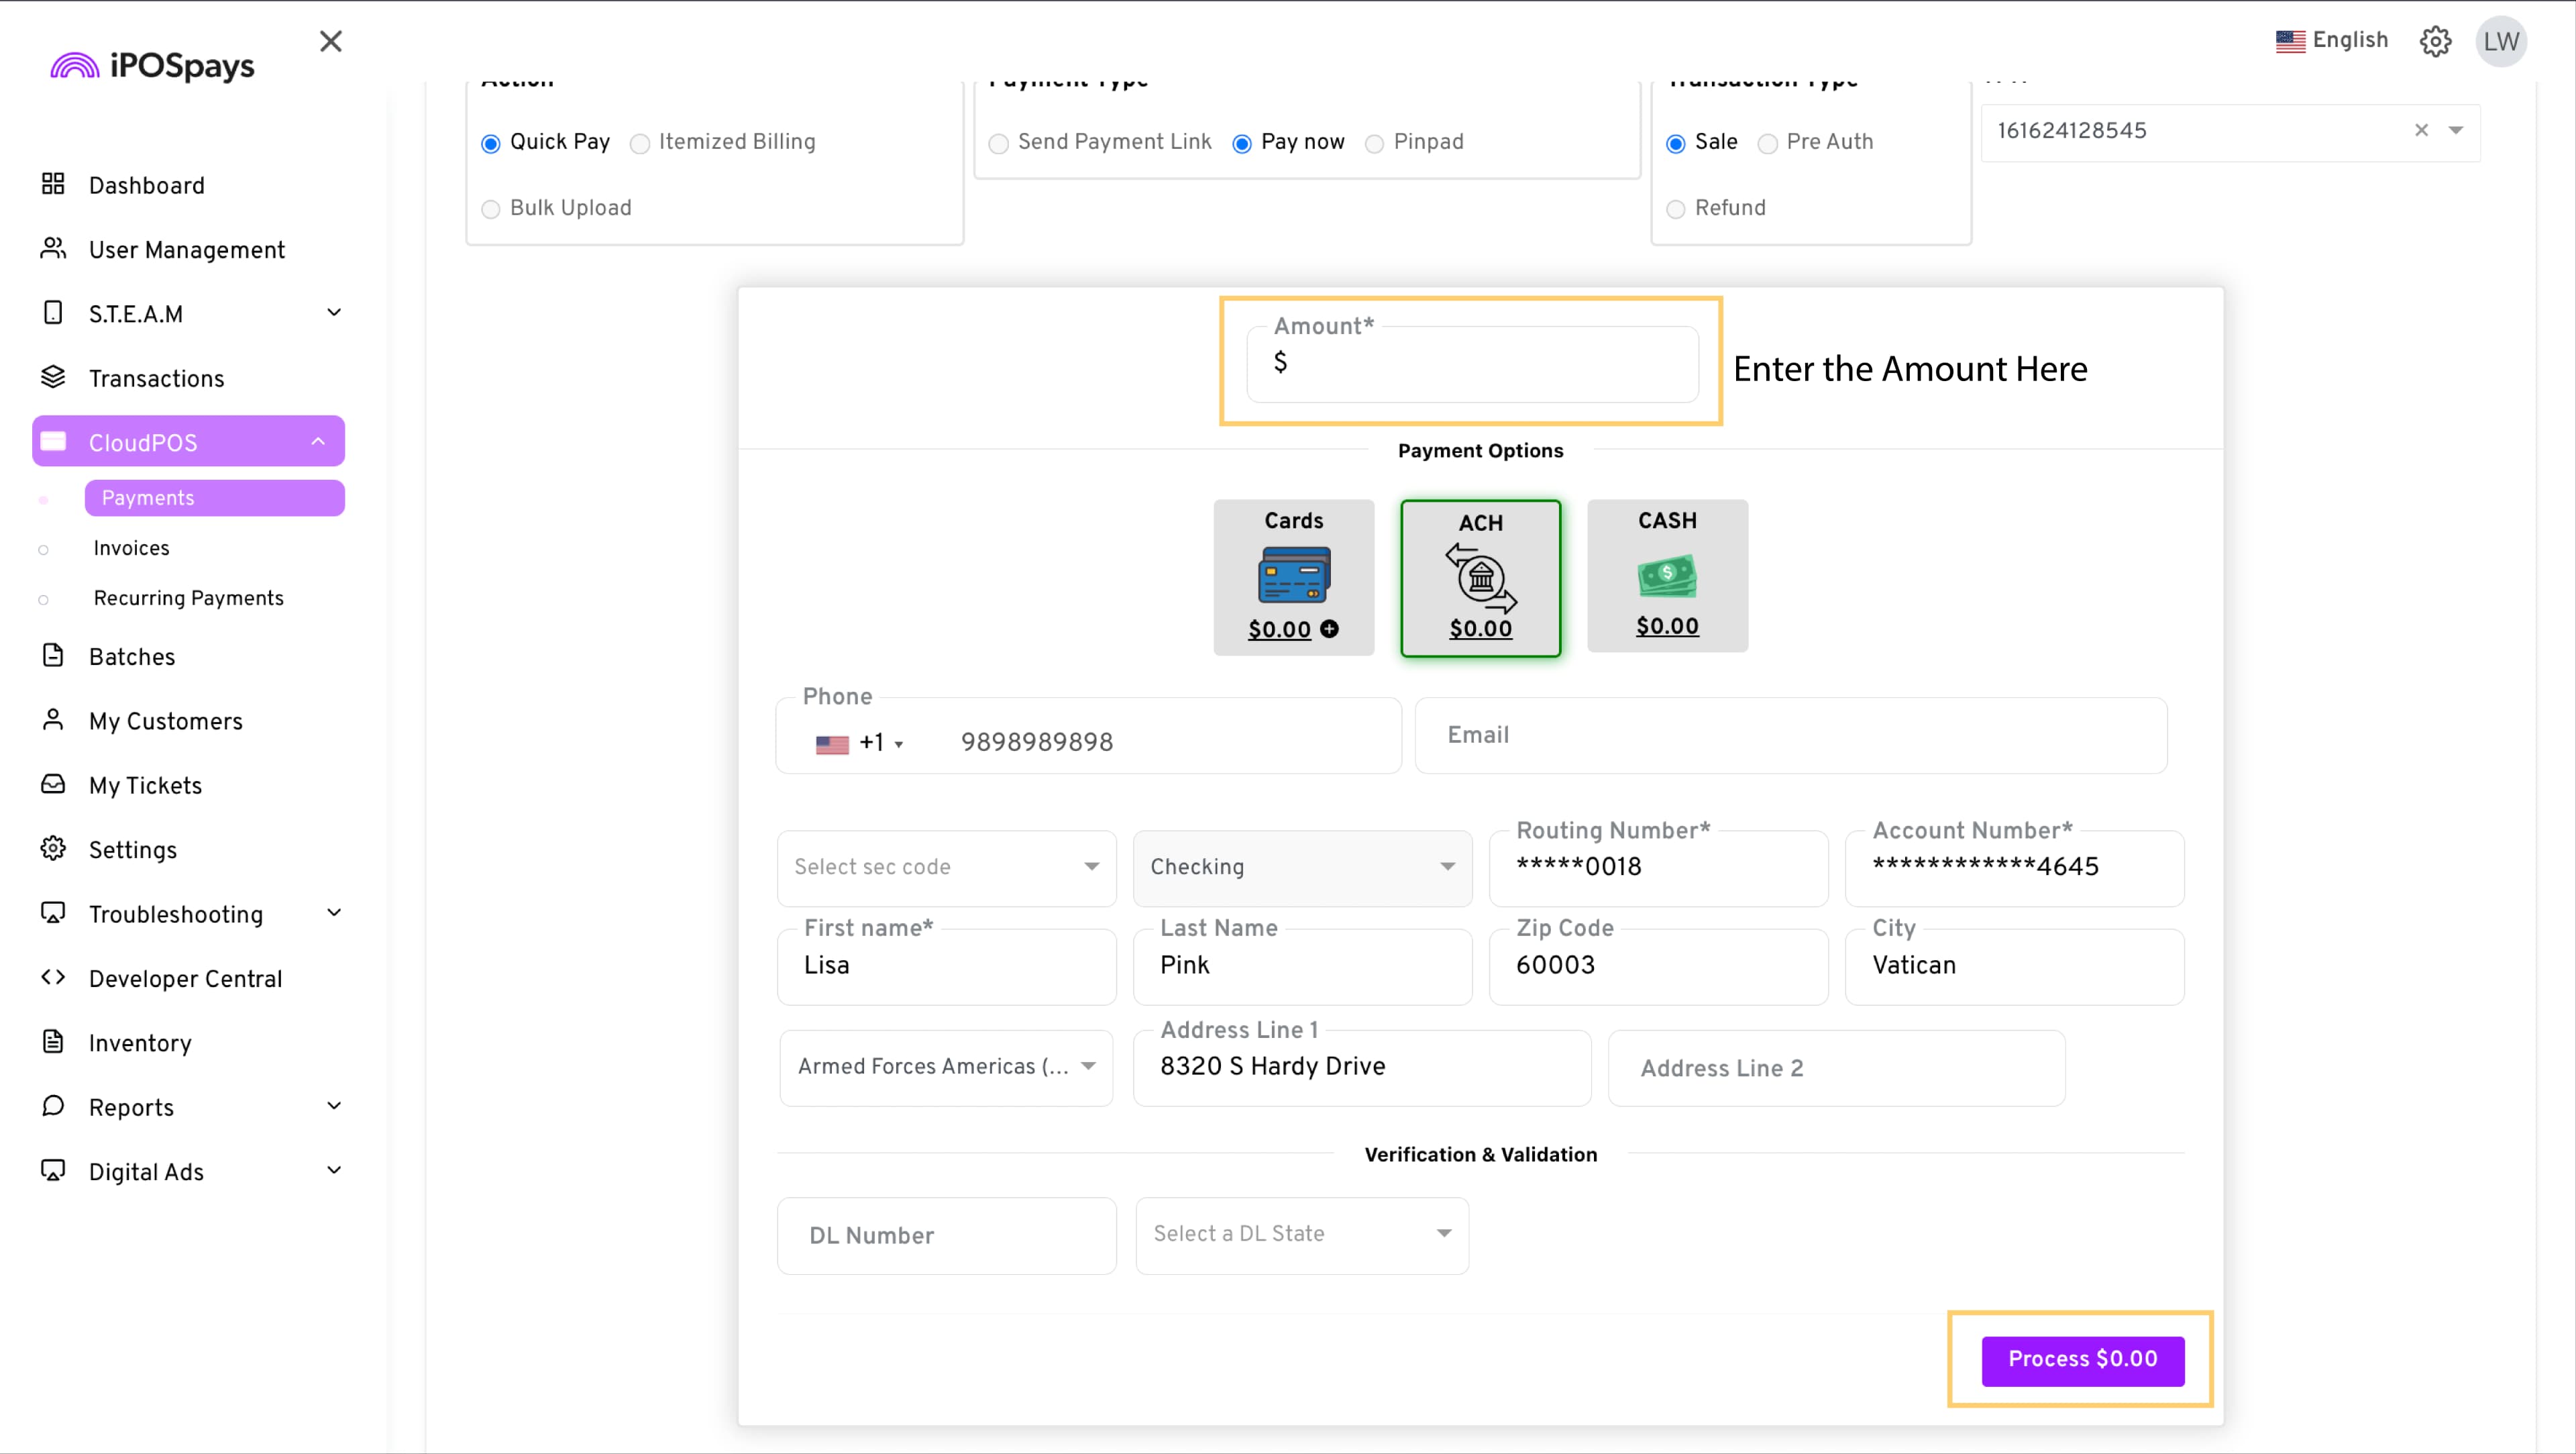
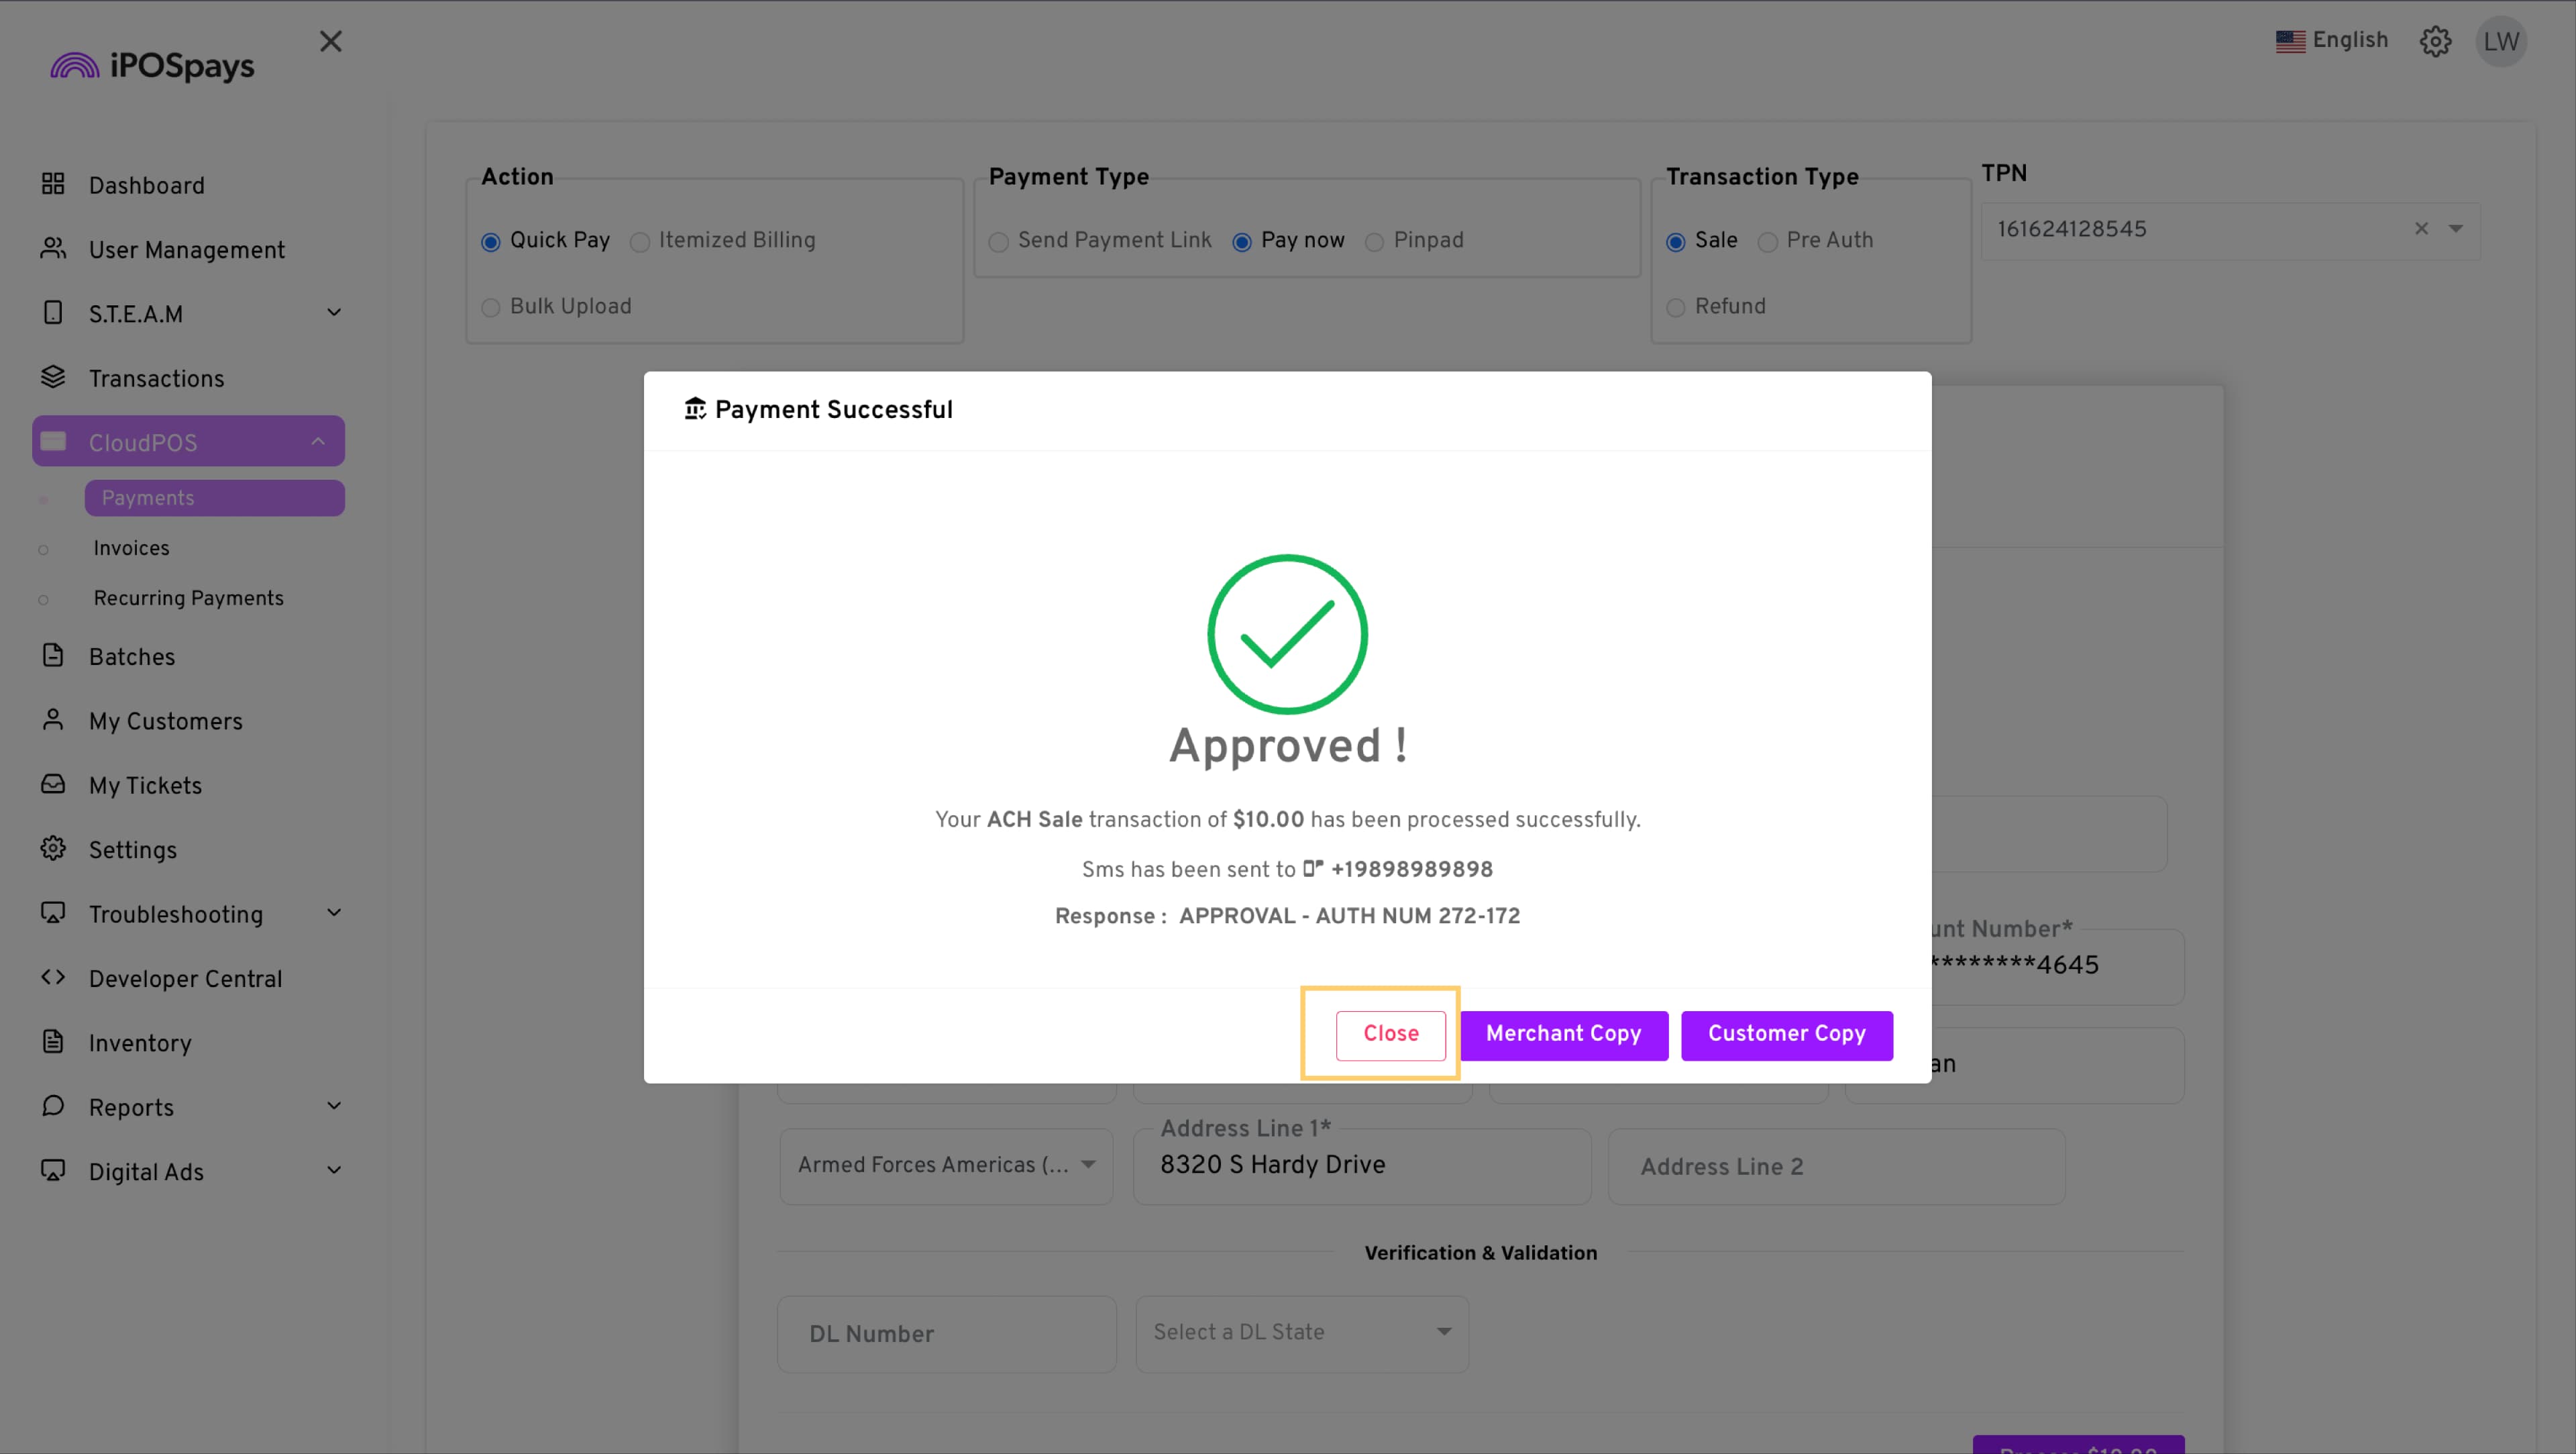
Tap on the menu icon and choose Run a sale to process transactions immediately without the customer having to provide their bank details again.
- Ensure mandatory fields are entered correctly and click Process to complete the transaction.
How to View Tokenized ACH Transactions After They Are Processed
- Go to Transactions → Filter icon at the top right corner of the screen → Payments → Alternative Payments → Search.
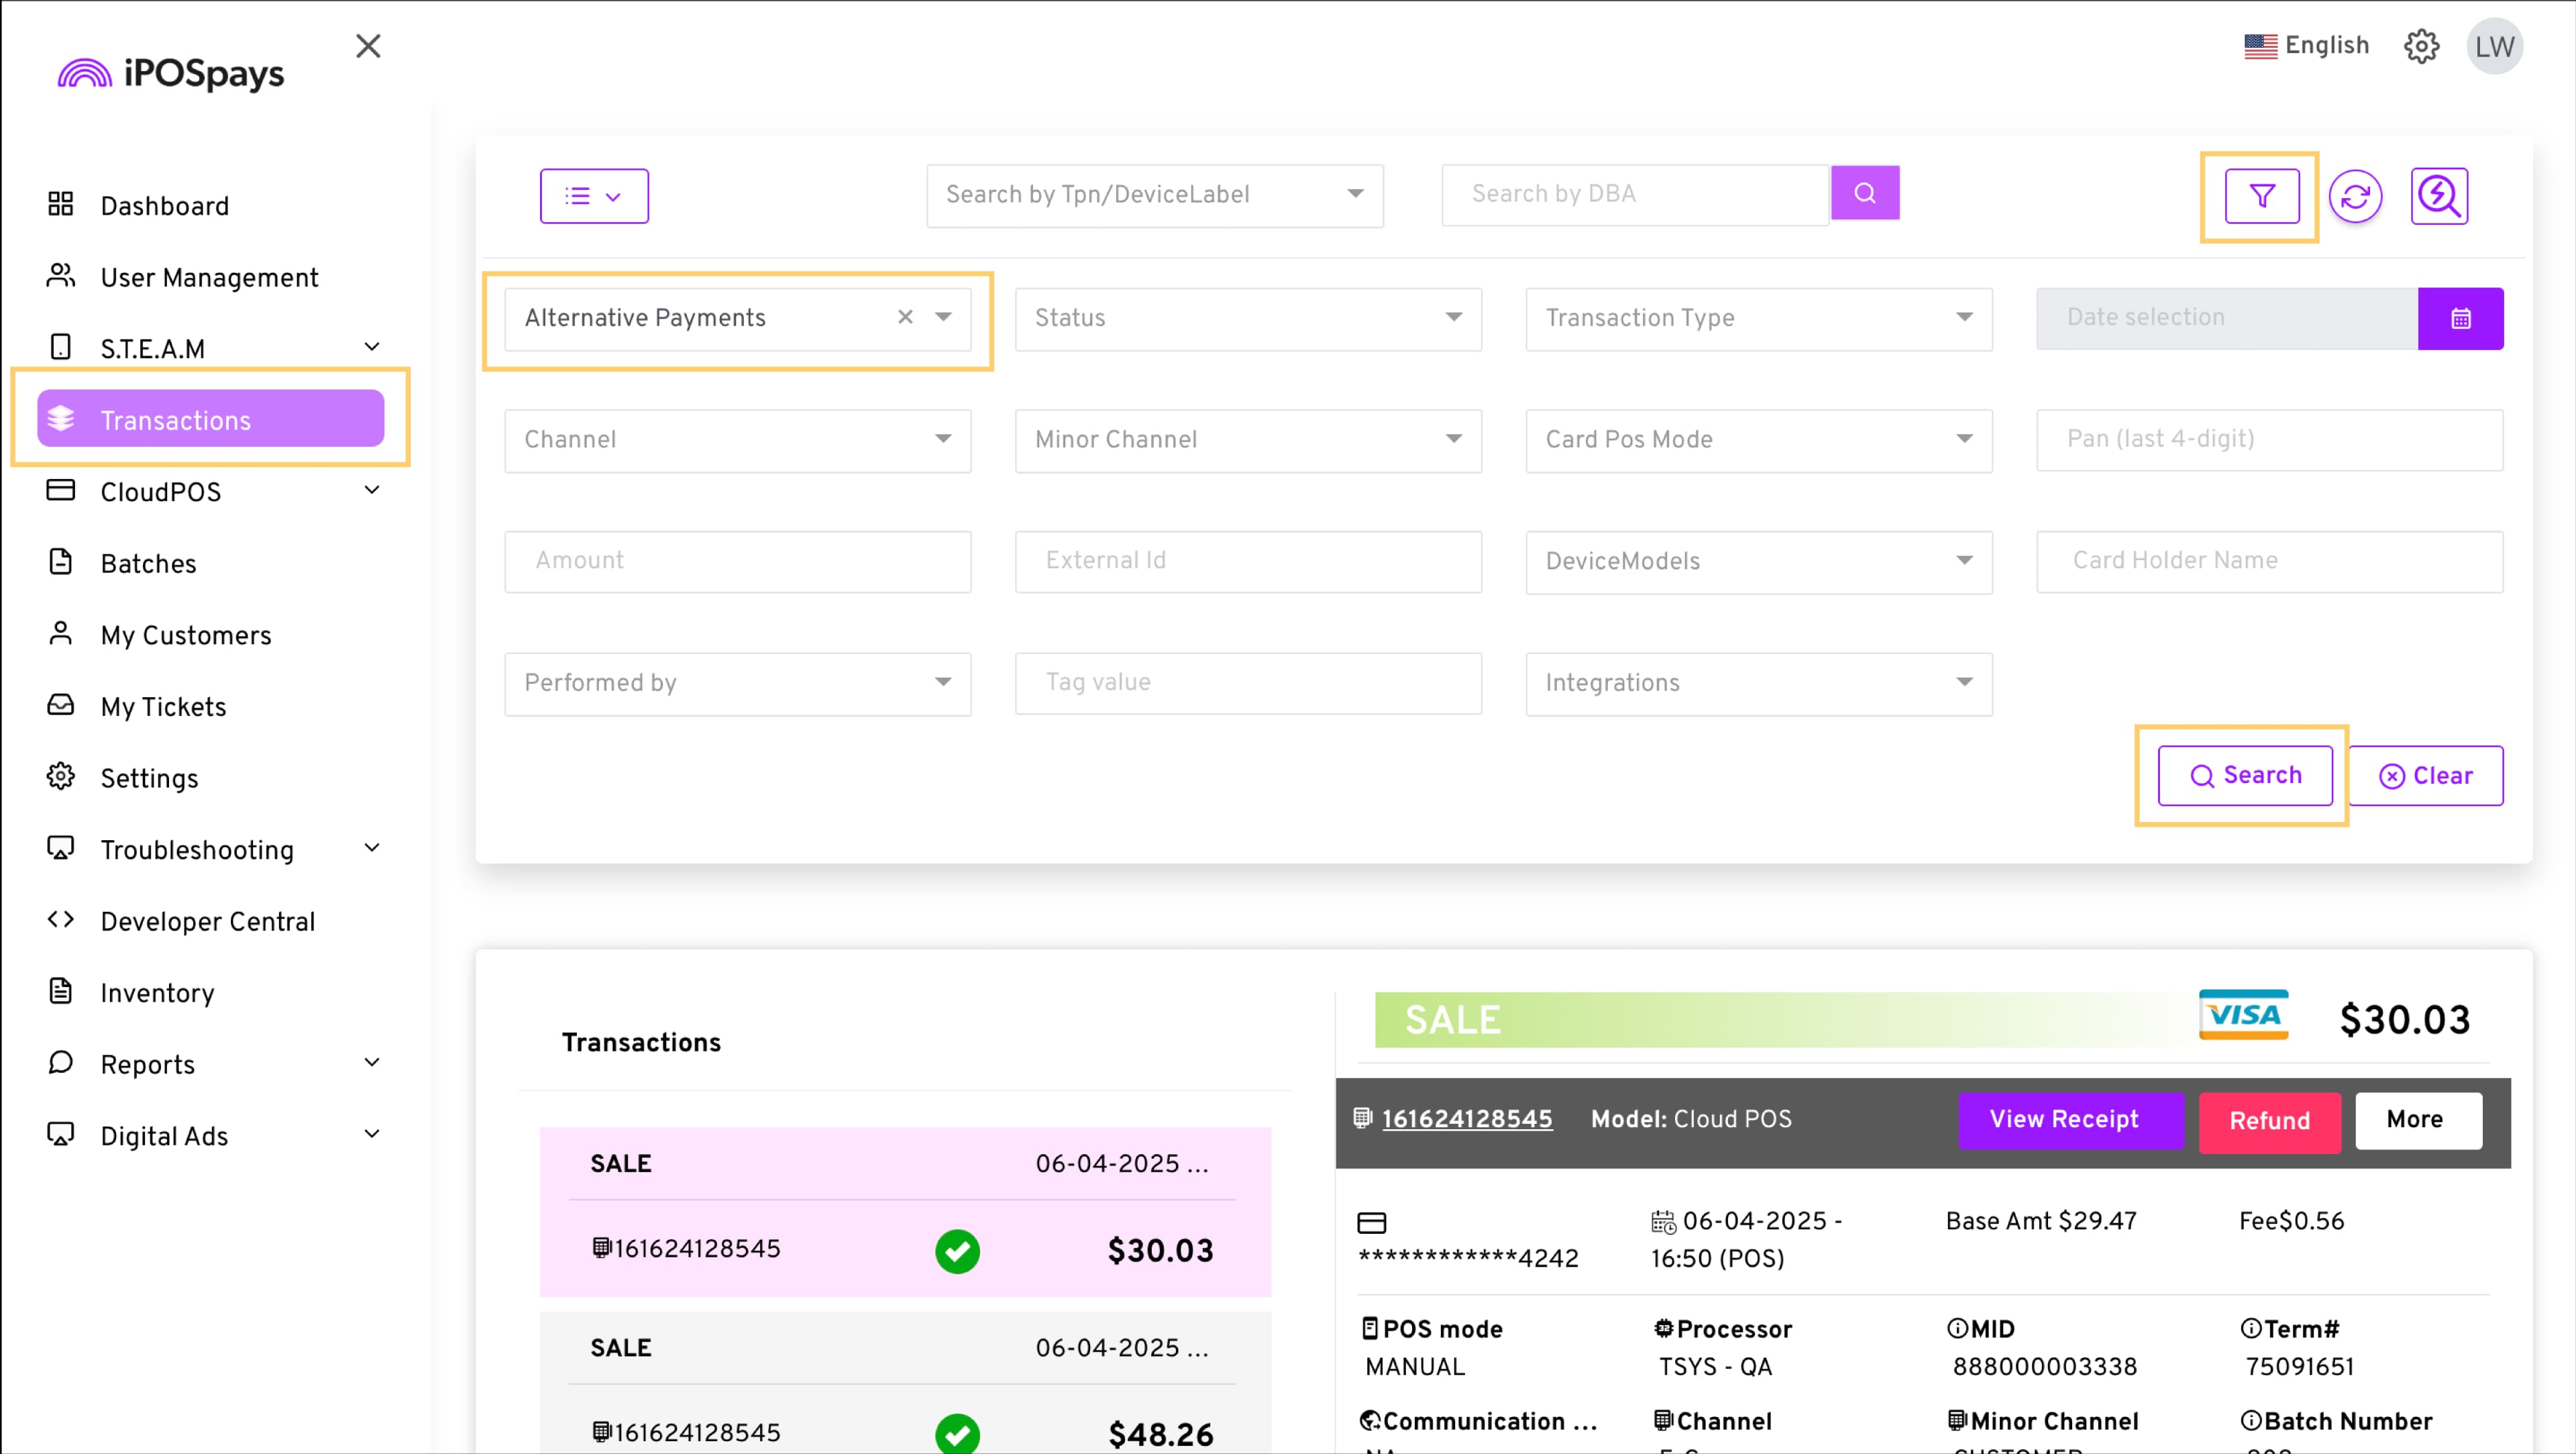
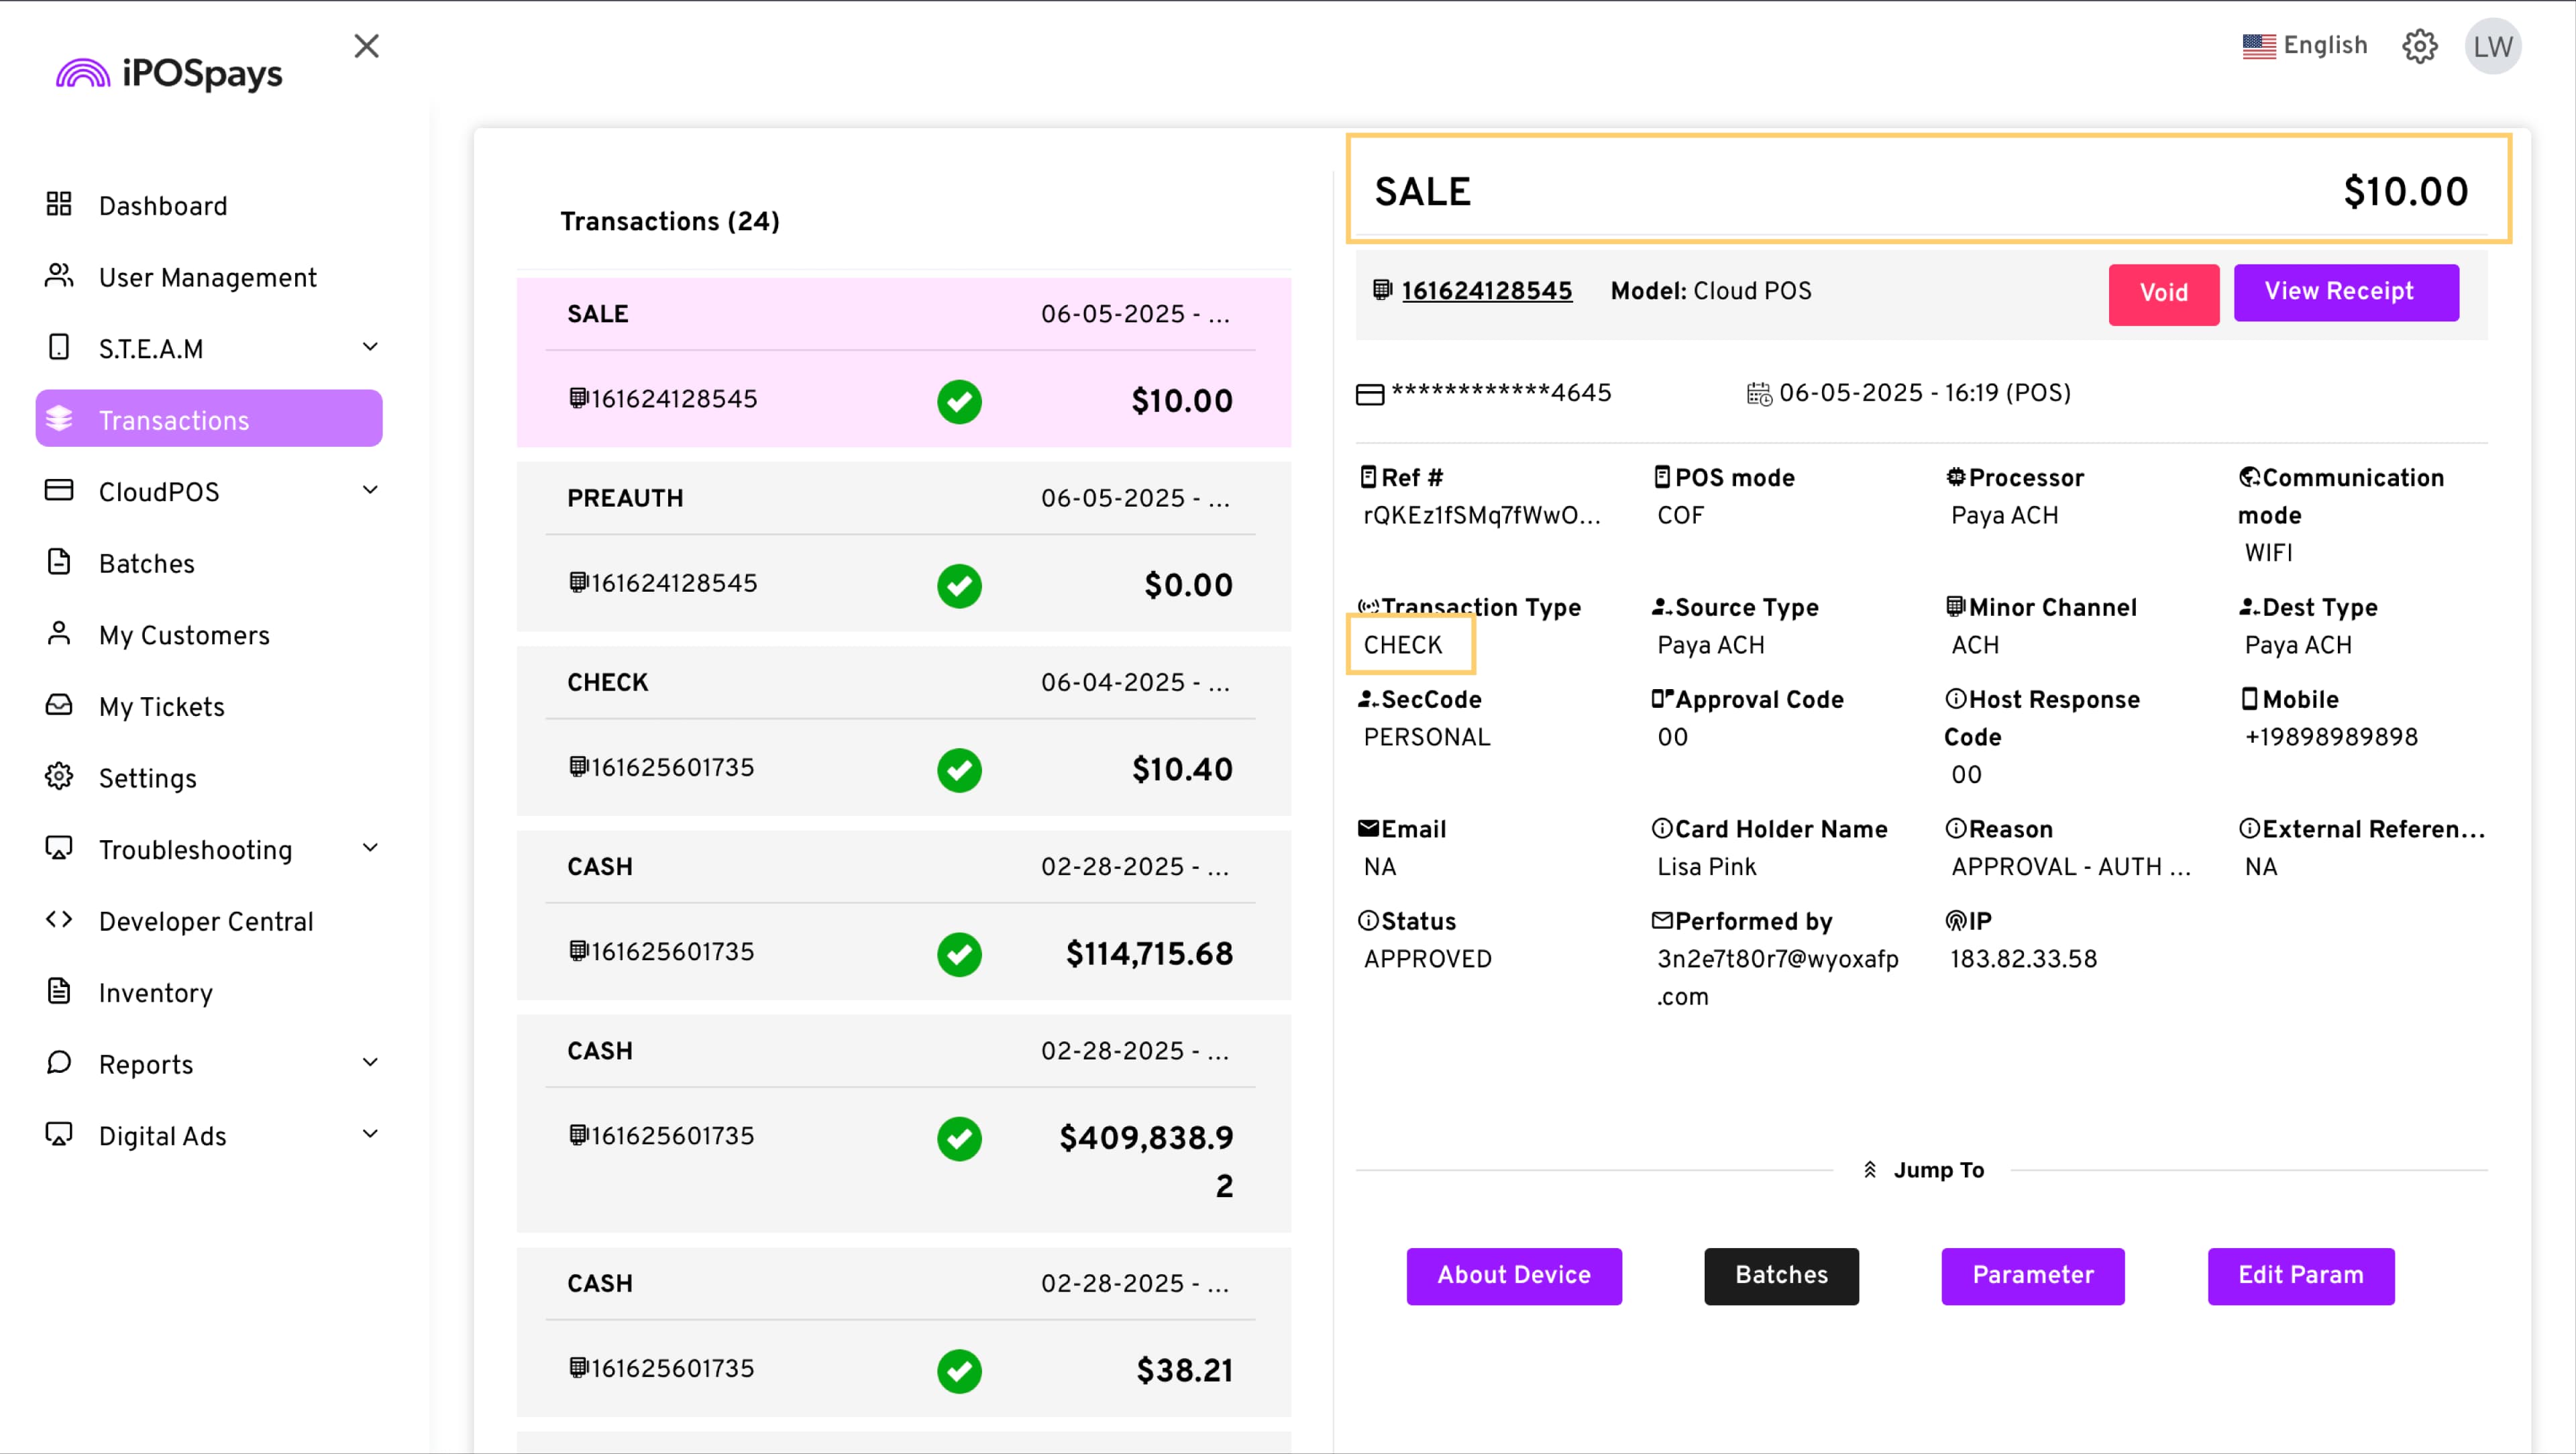
- All ACH transactions will be listed automatically when you apply this filter.
How to Void a Tokenized ACH Transaction
-
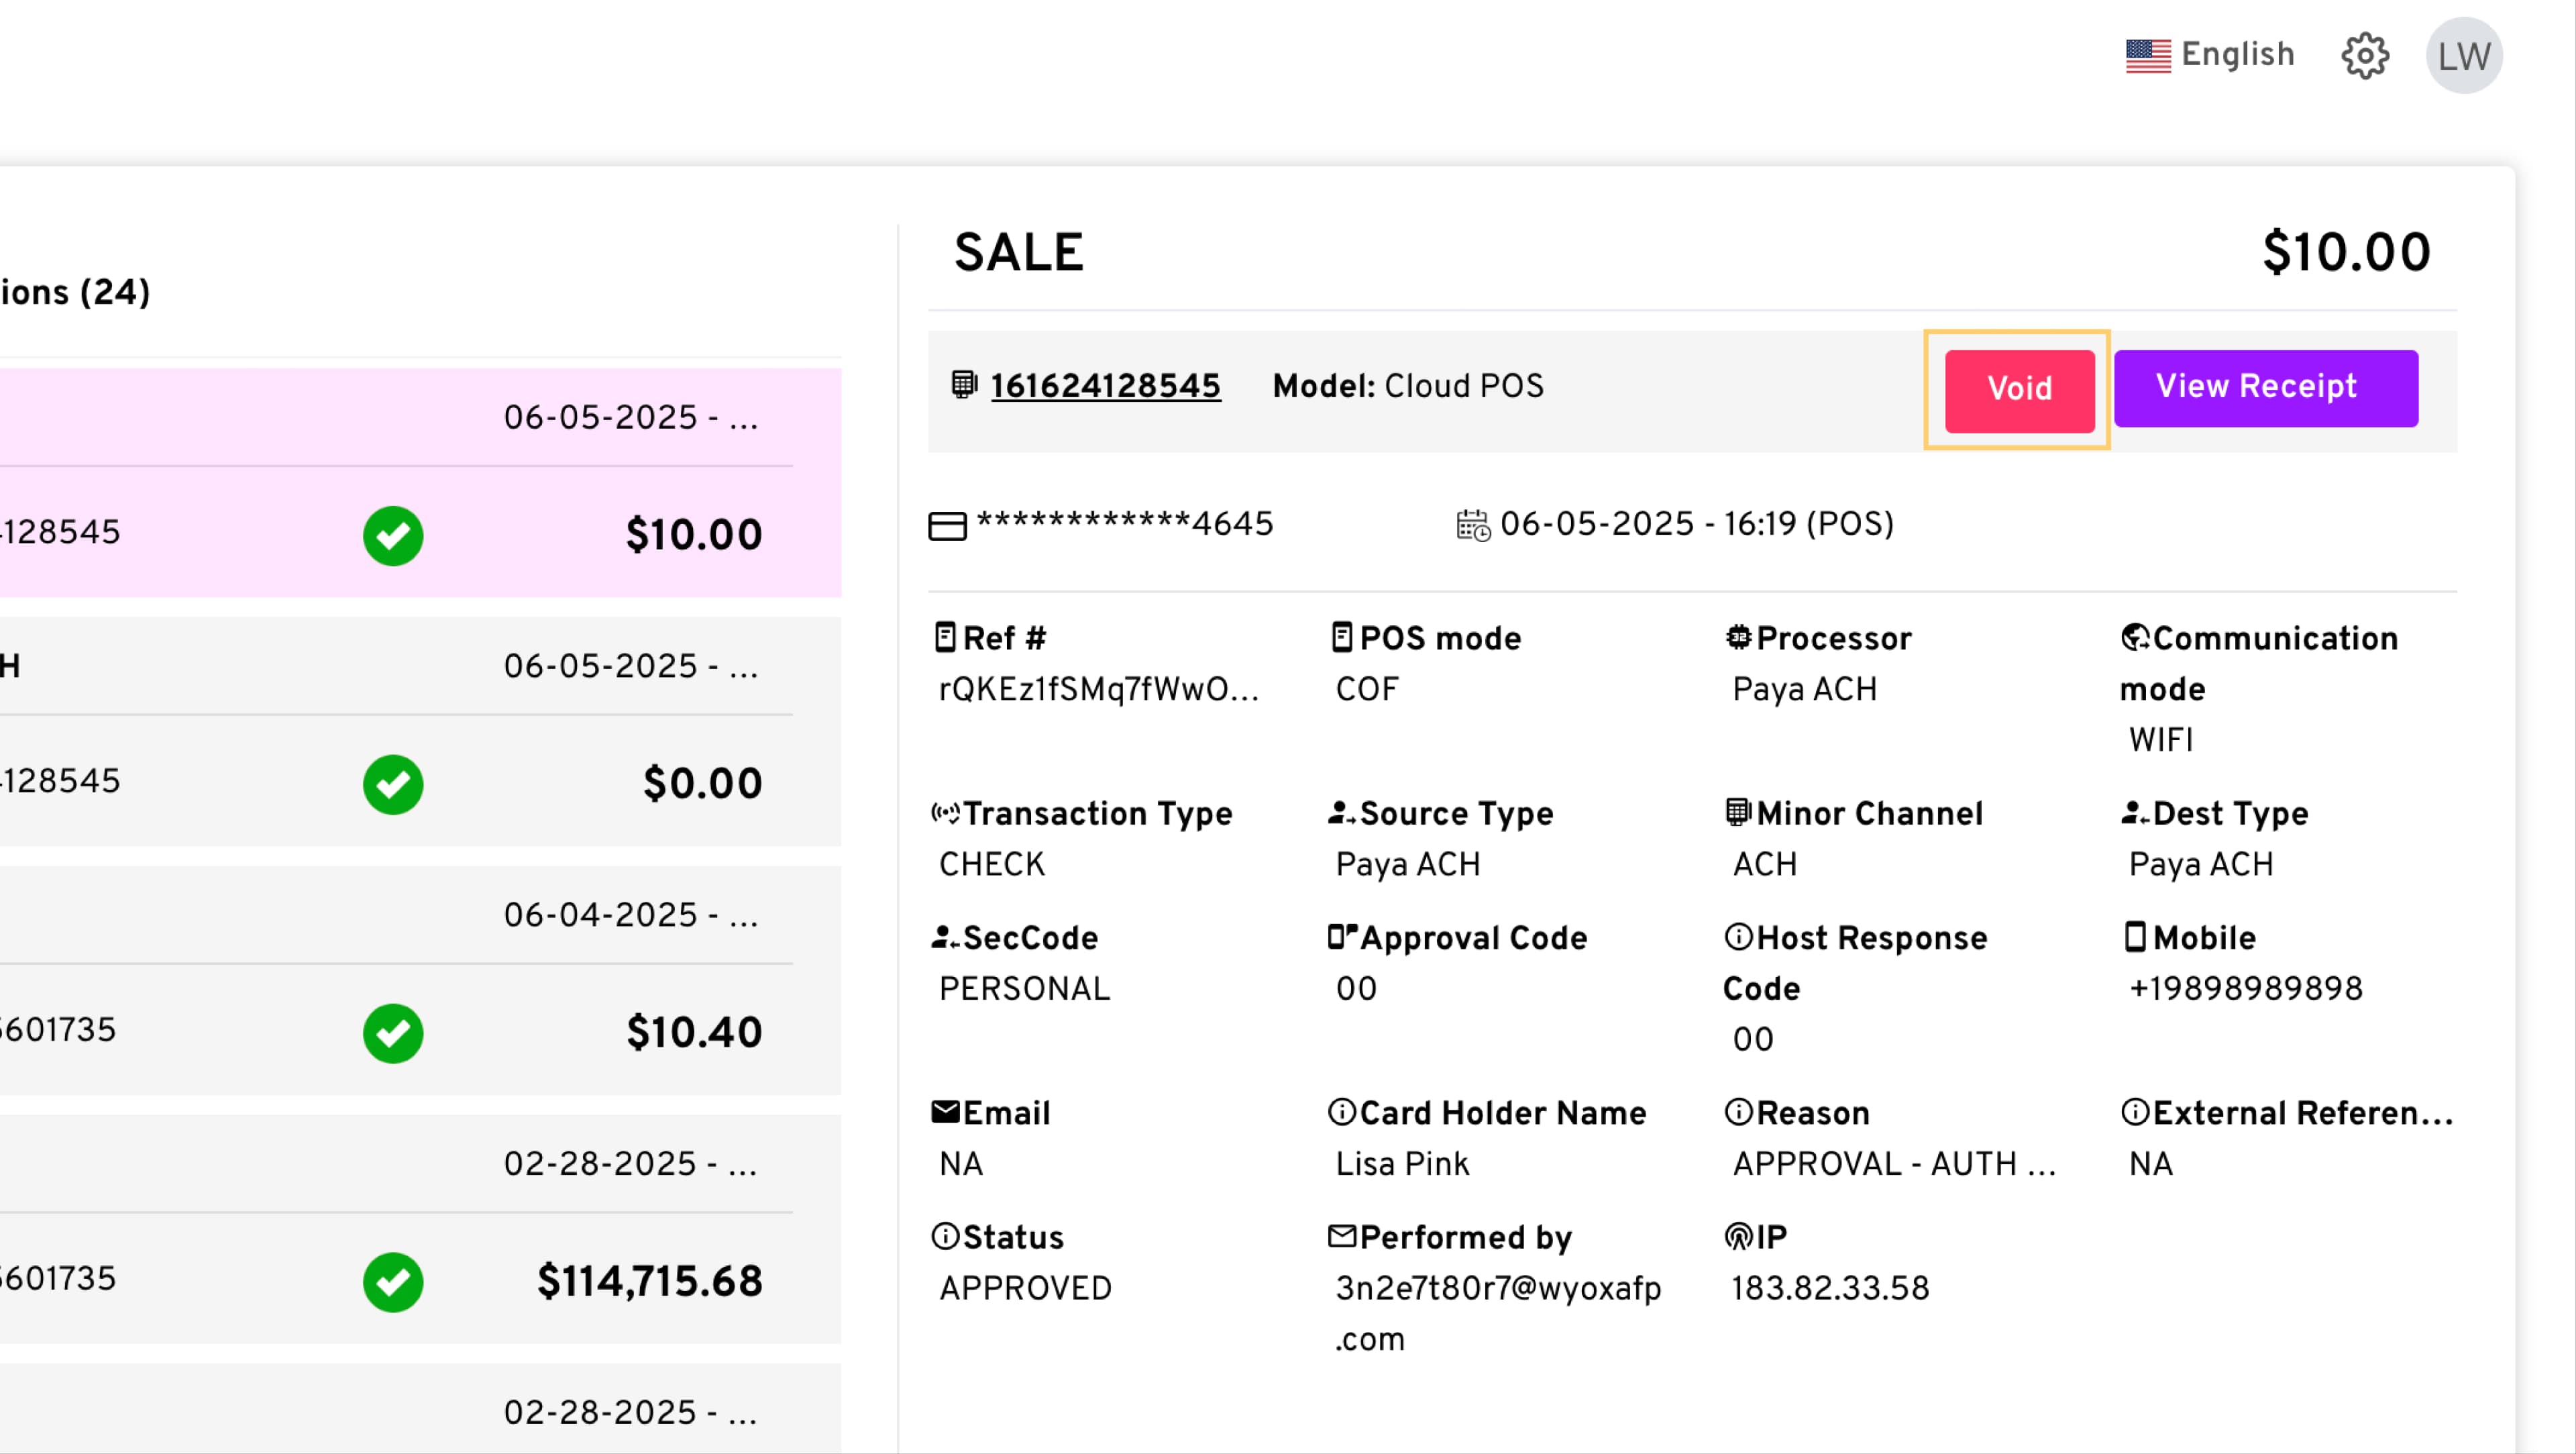
Go to Transactions → Filter icon at the top right corner of the screen → Payments → Alternative Payments → Search.
-
Choose the transaction you want to void and click the Void button on the right side of the screen.
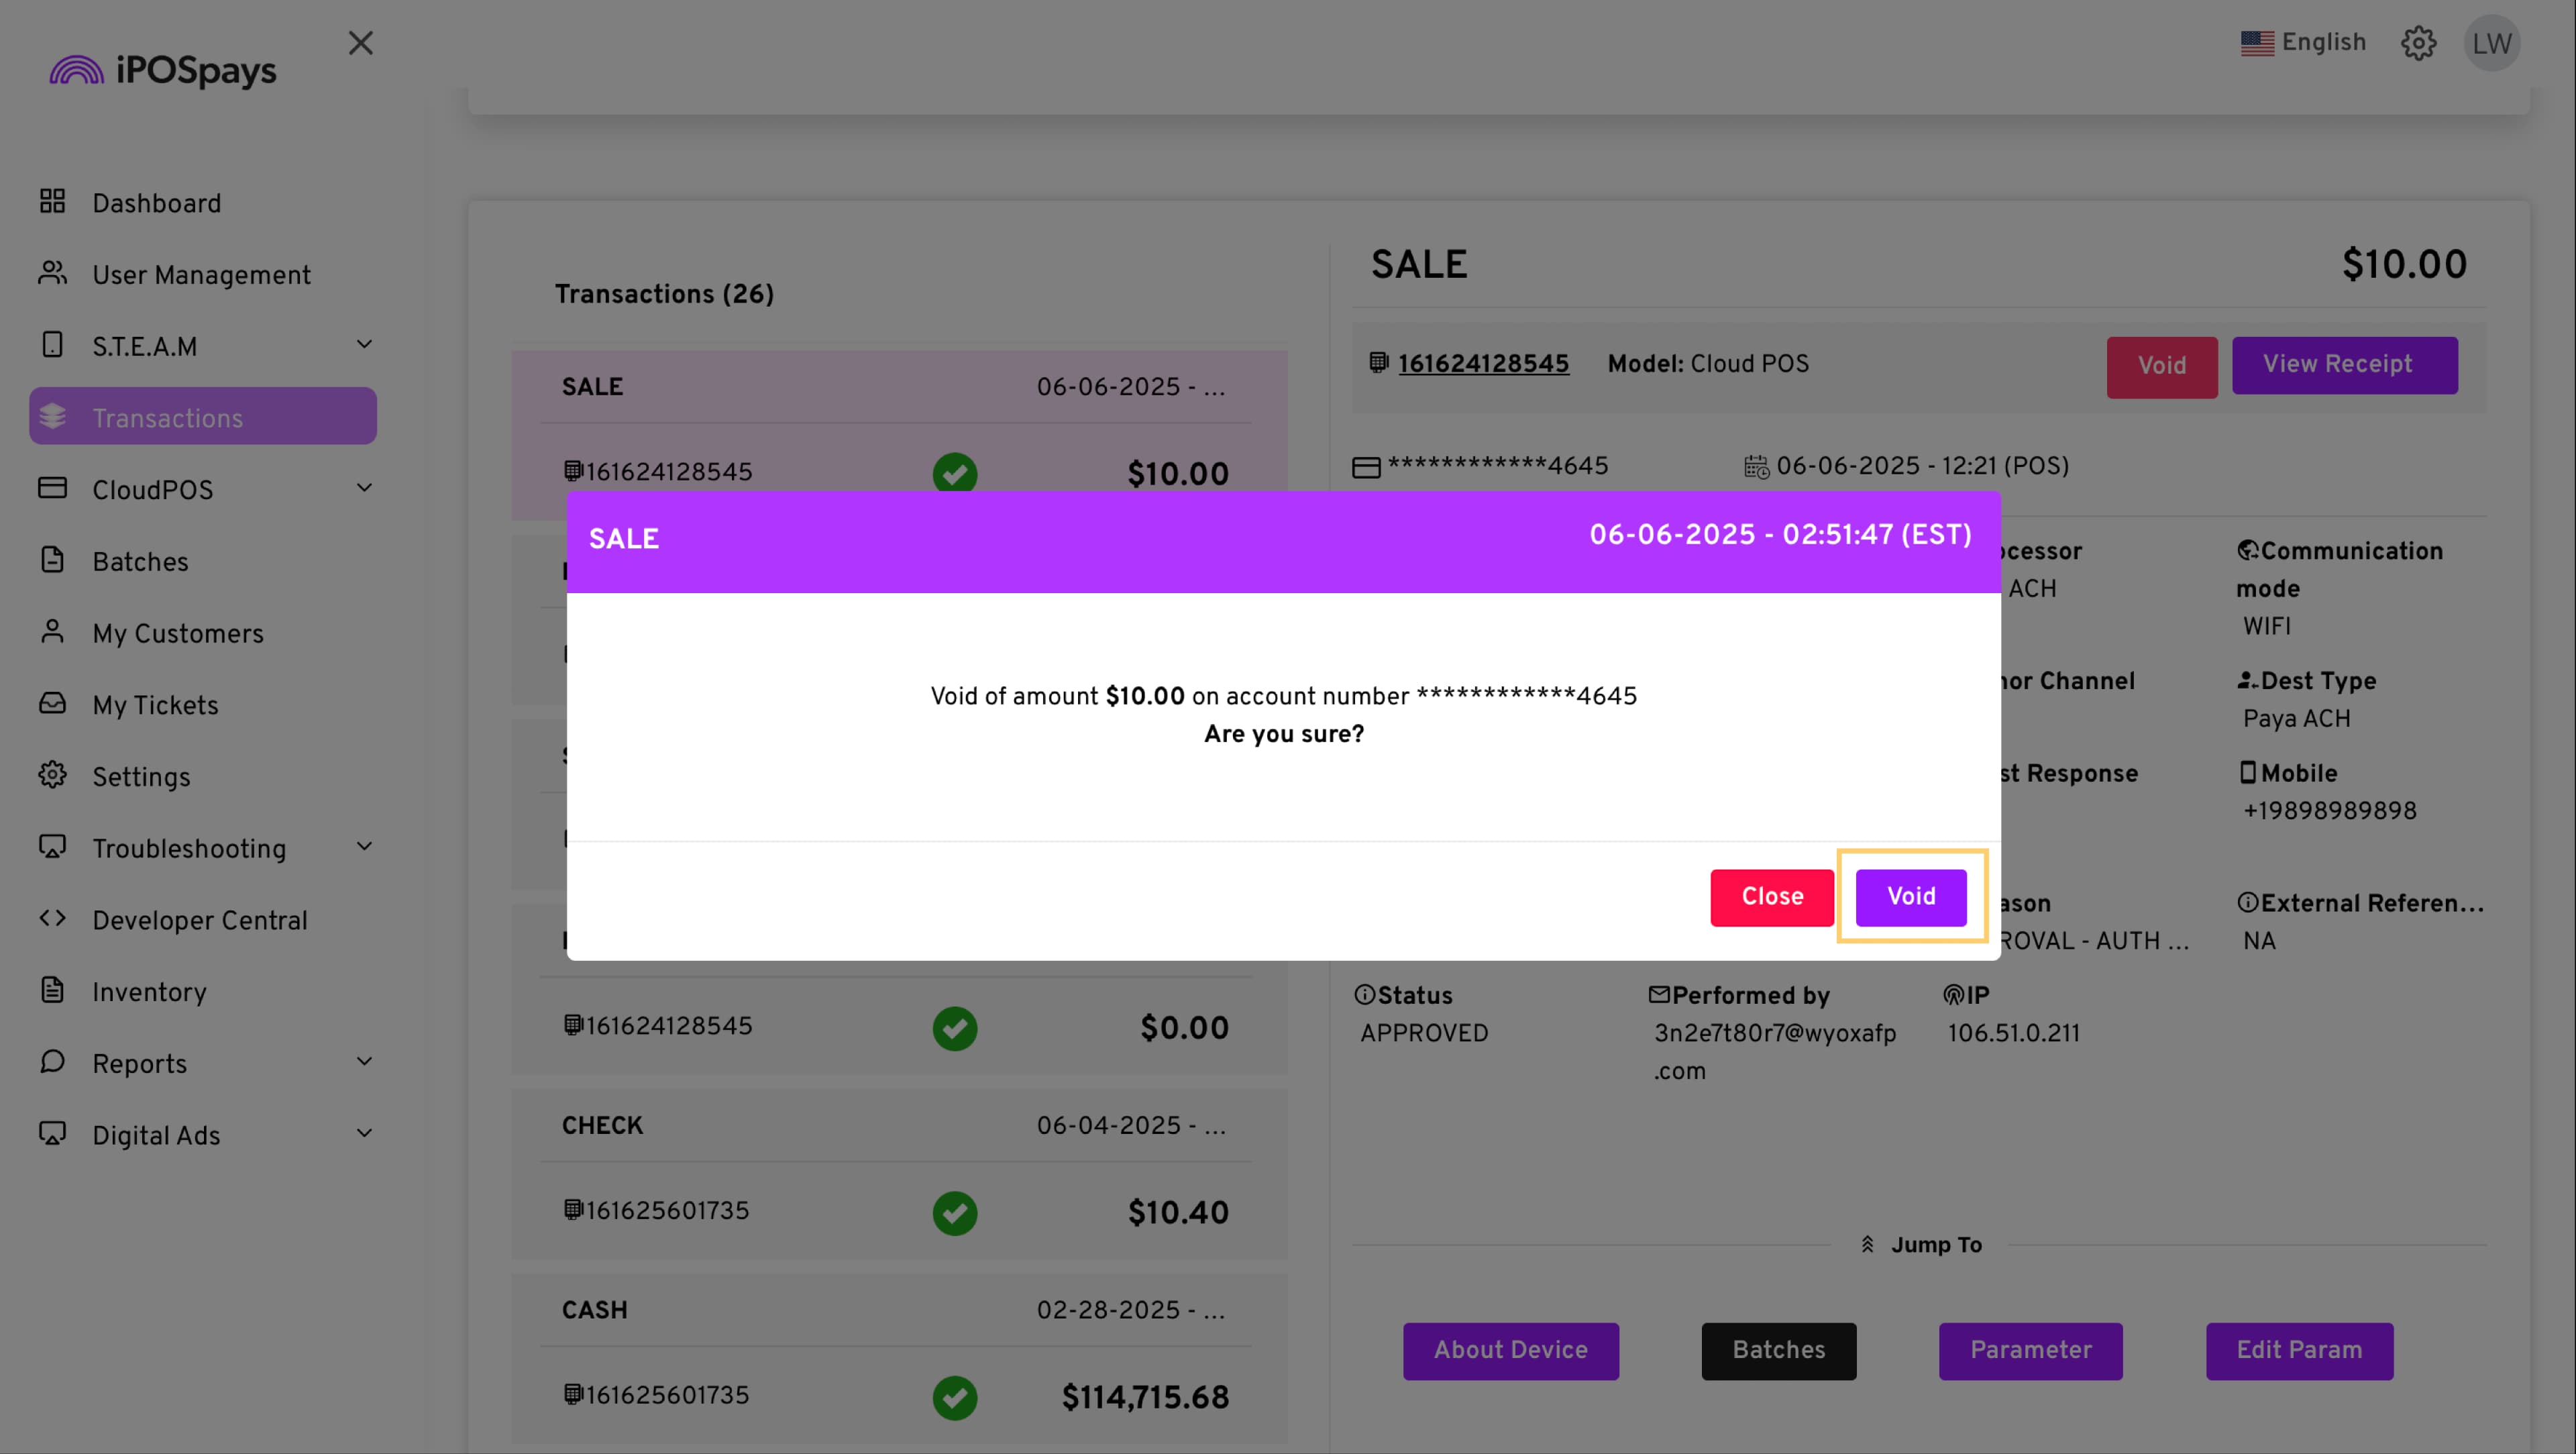
- Click Void to continue.
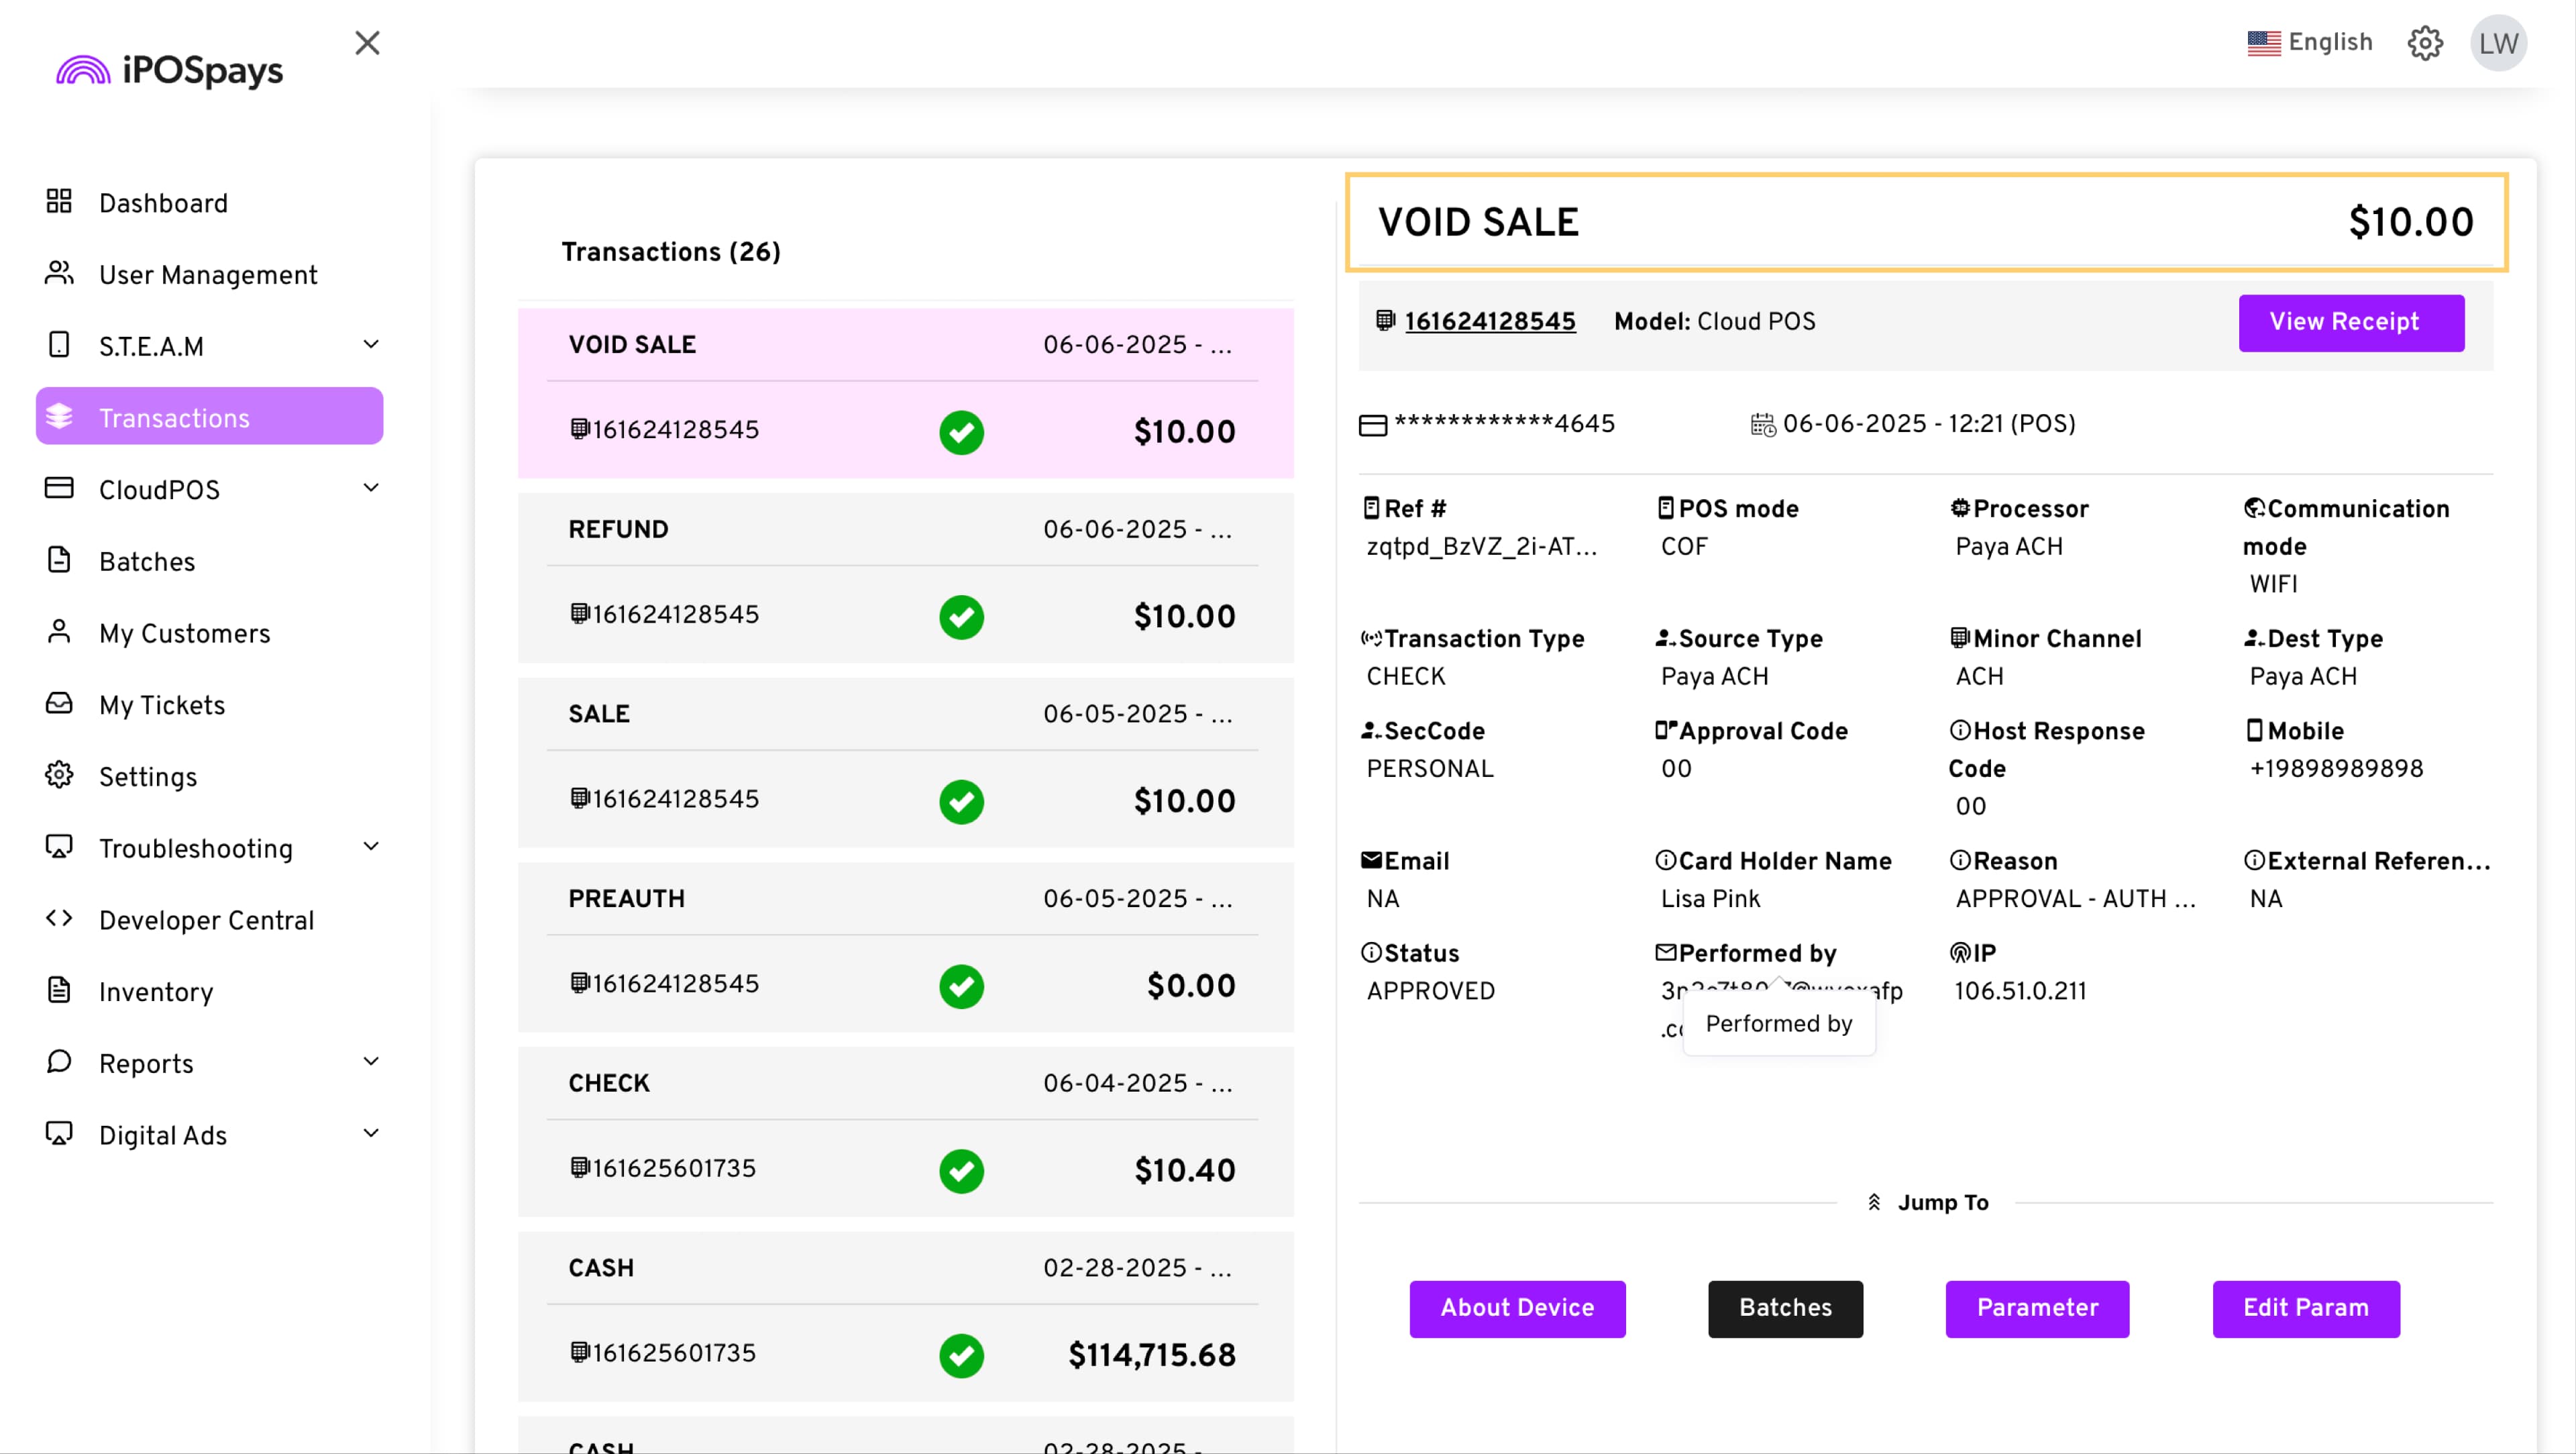
- The transaction will now be voided.
How to Refund a Tokenized ACH Transaction
-
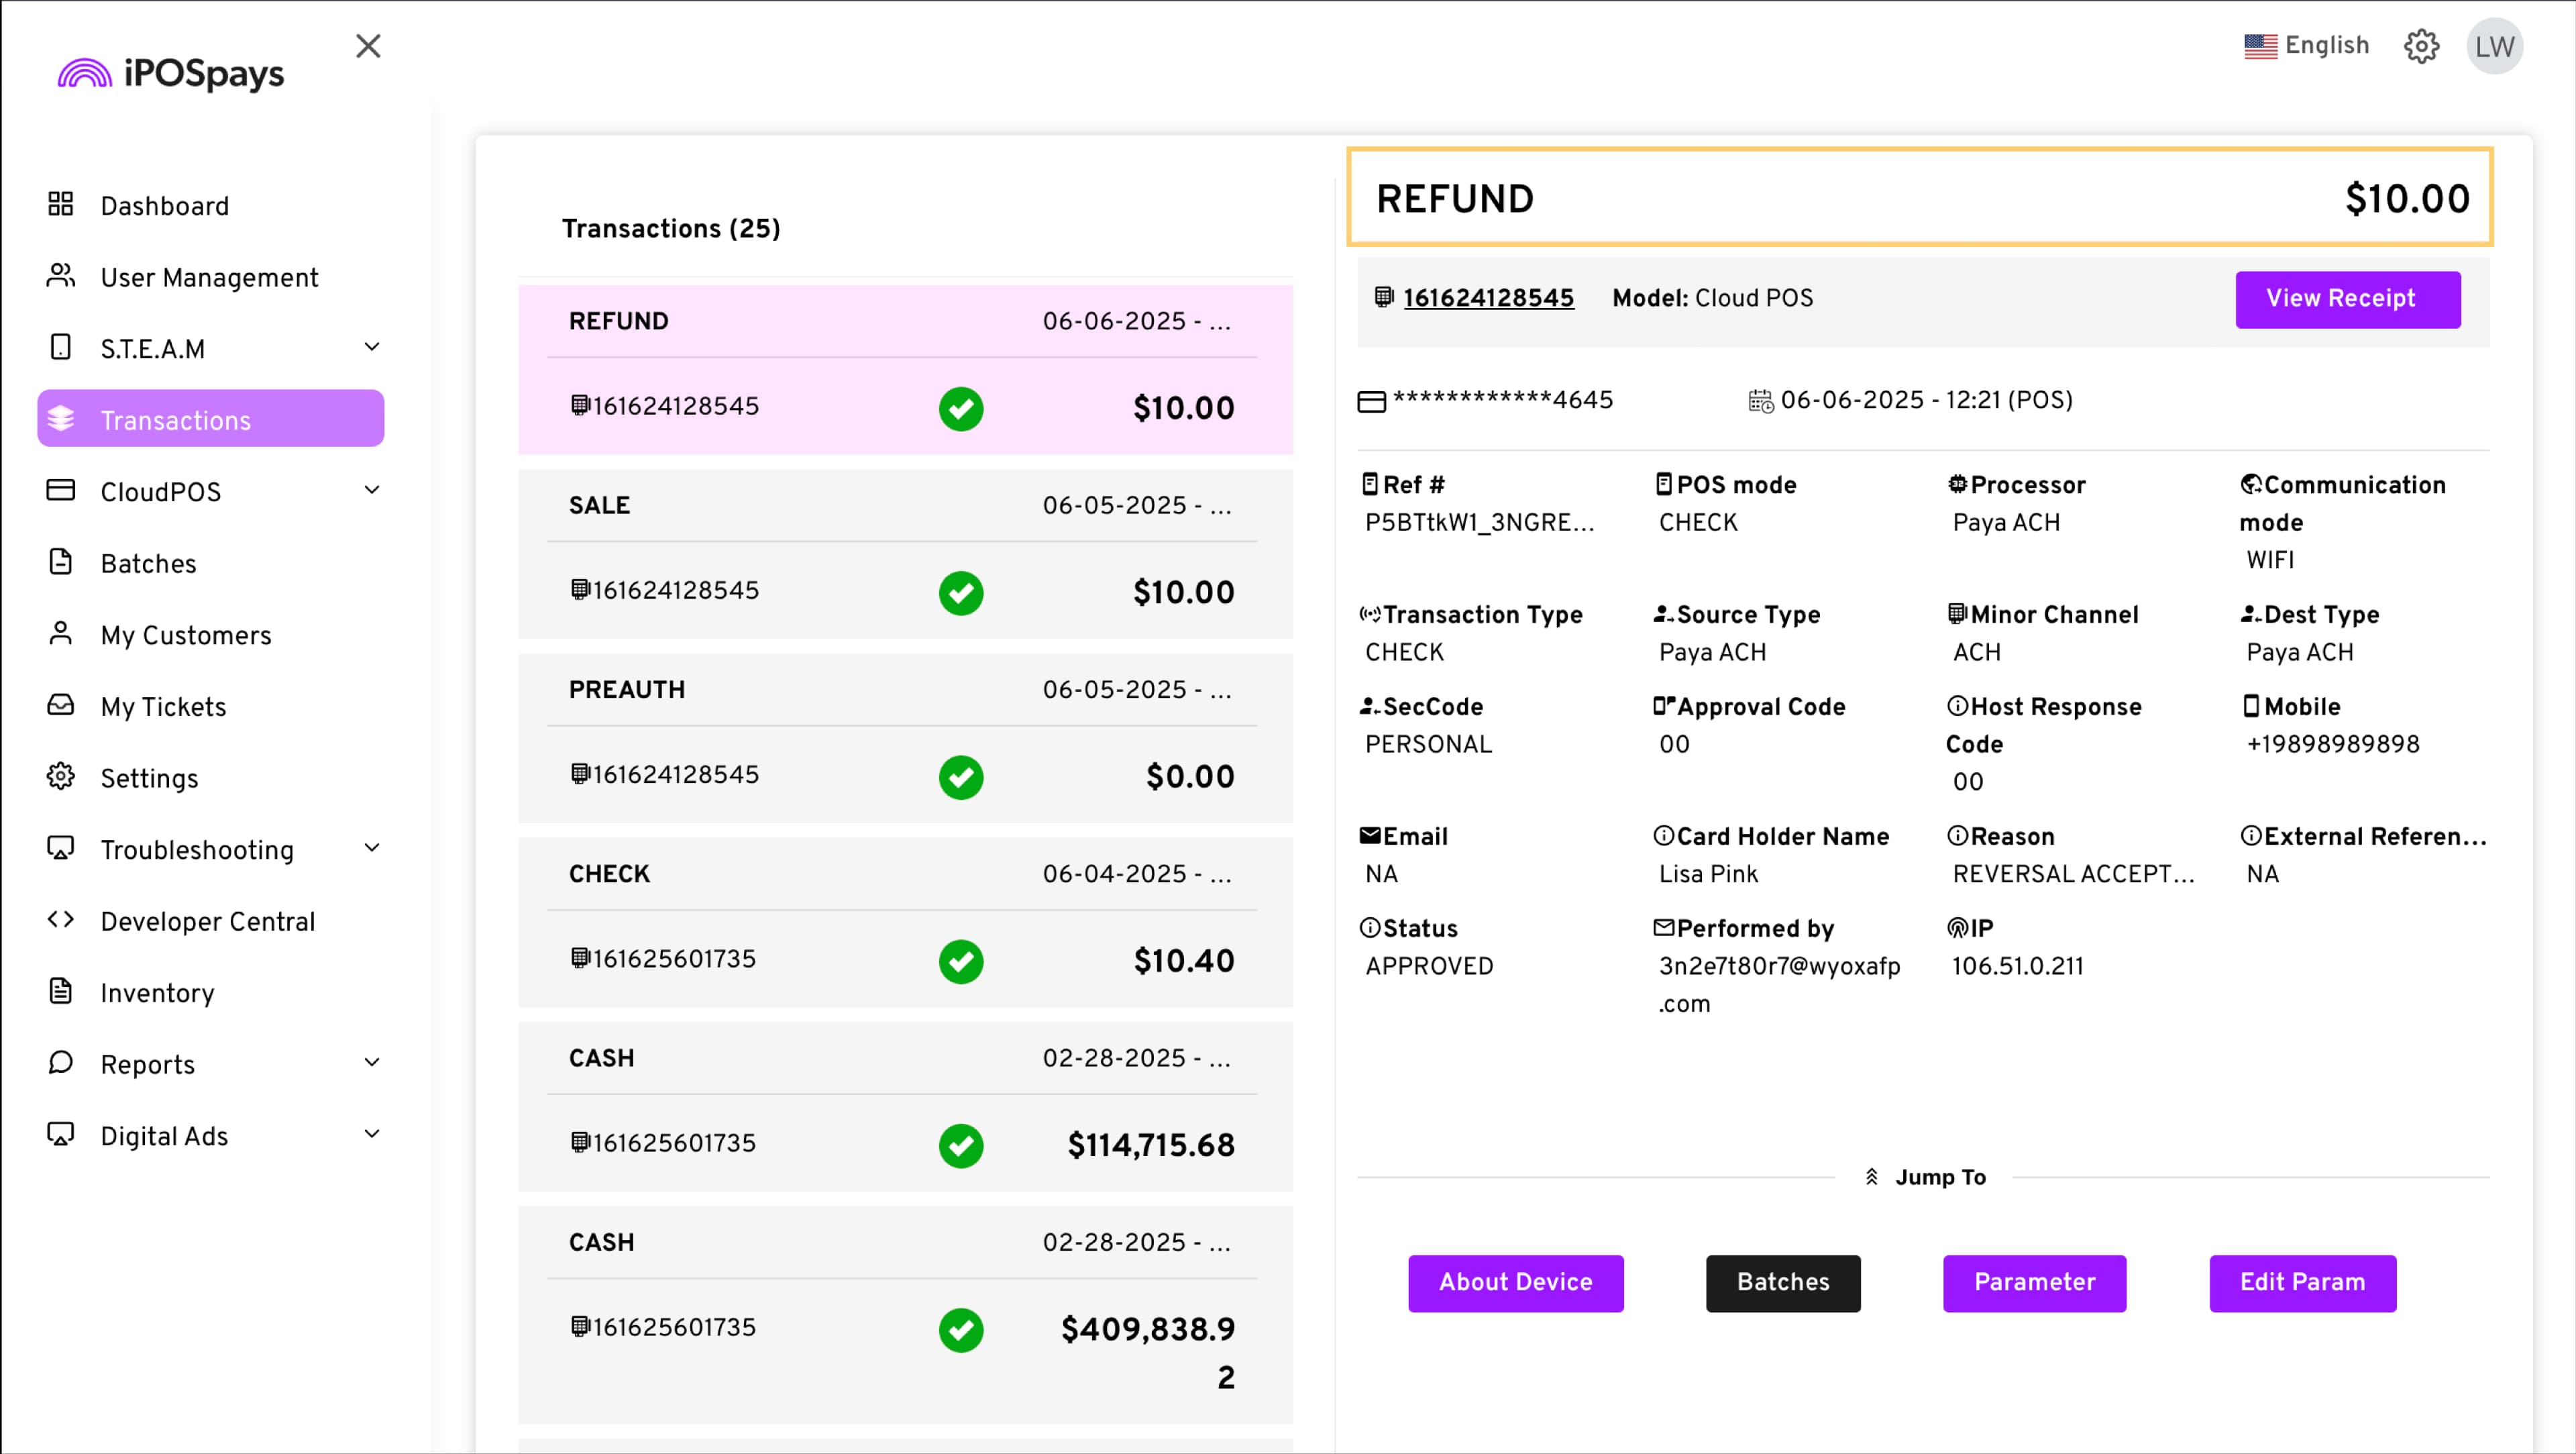
Go to Transactions → Filter icon at the top right corner of the screen → Payments → Alternative Payments → Search.
-
Choose the transaction you want to refund and click the Void button on the right side of the screen.
- Click Refund to continue.
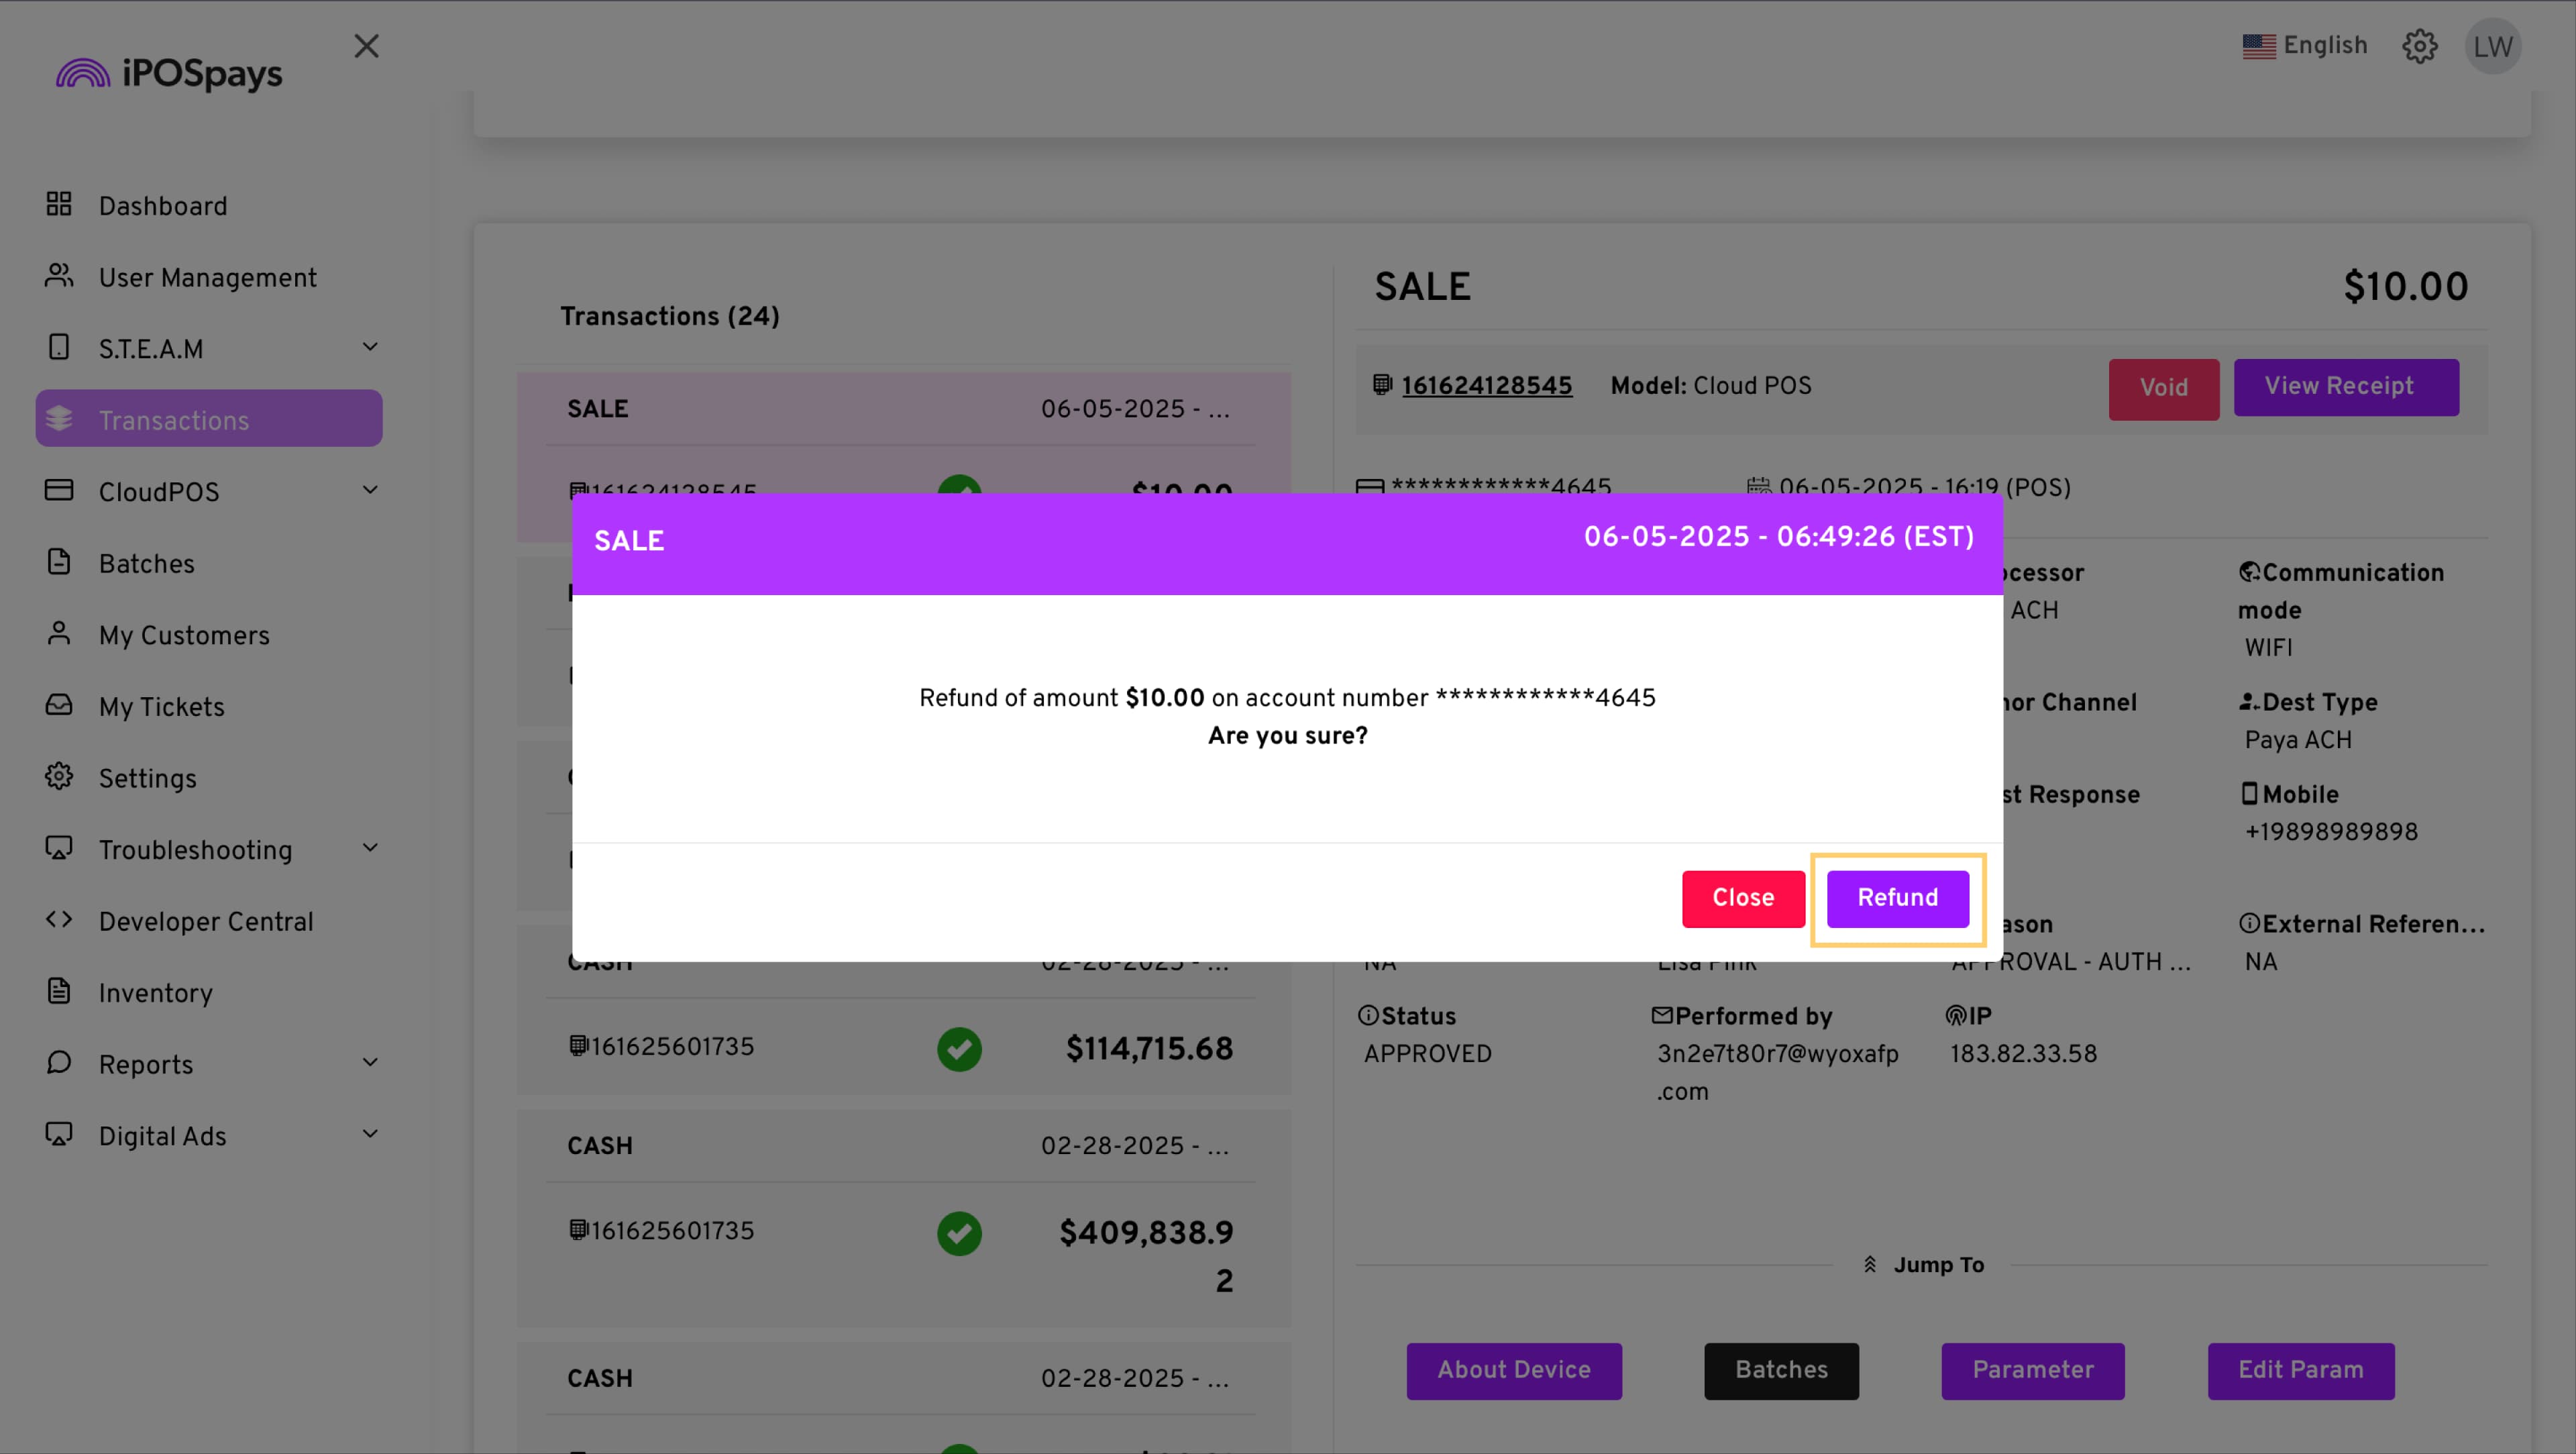
- The tokenized ACH transaction will now be refunded.
How to Set Up Recurring Payments With the Customer’s Tokenized Bank Details
-
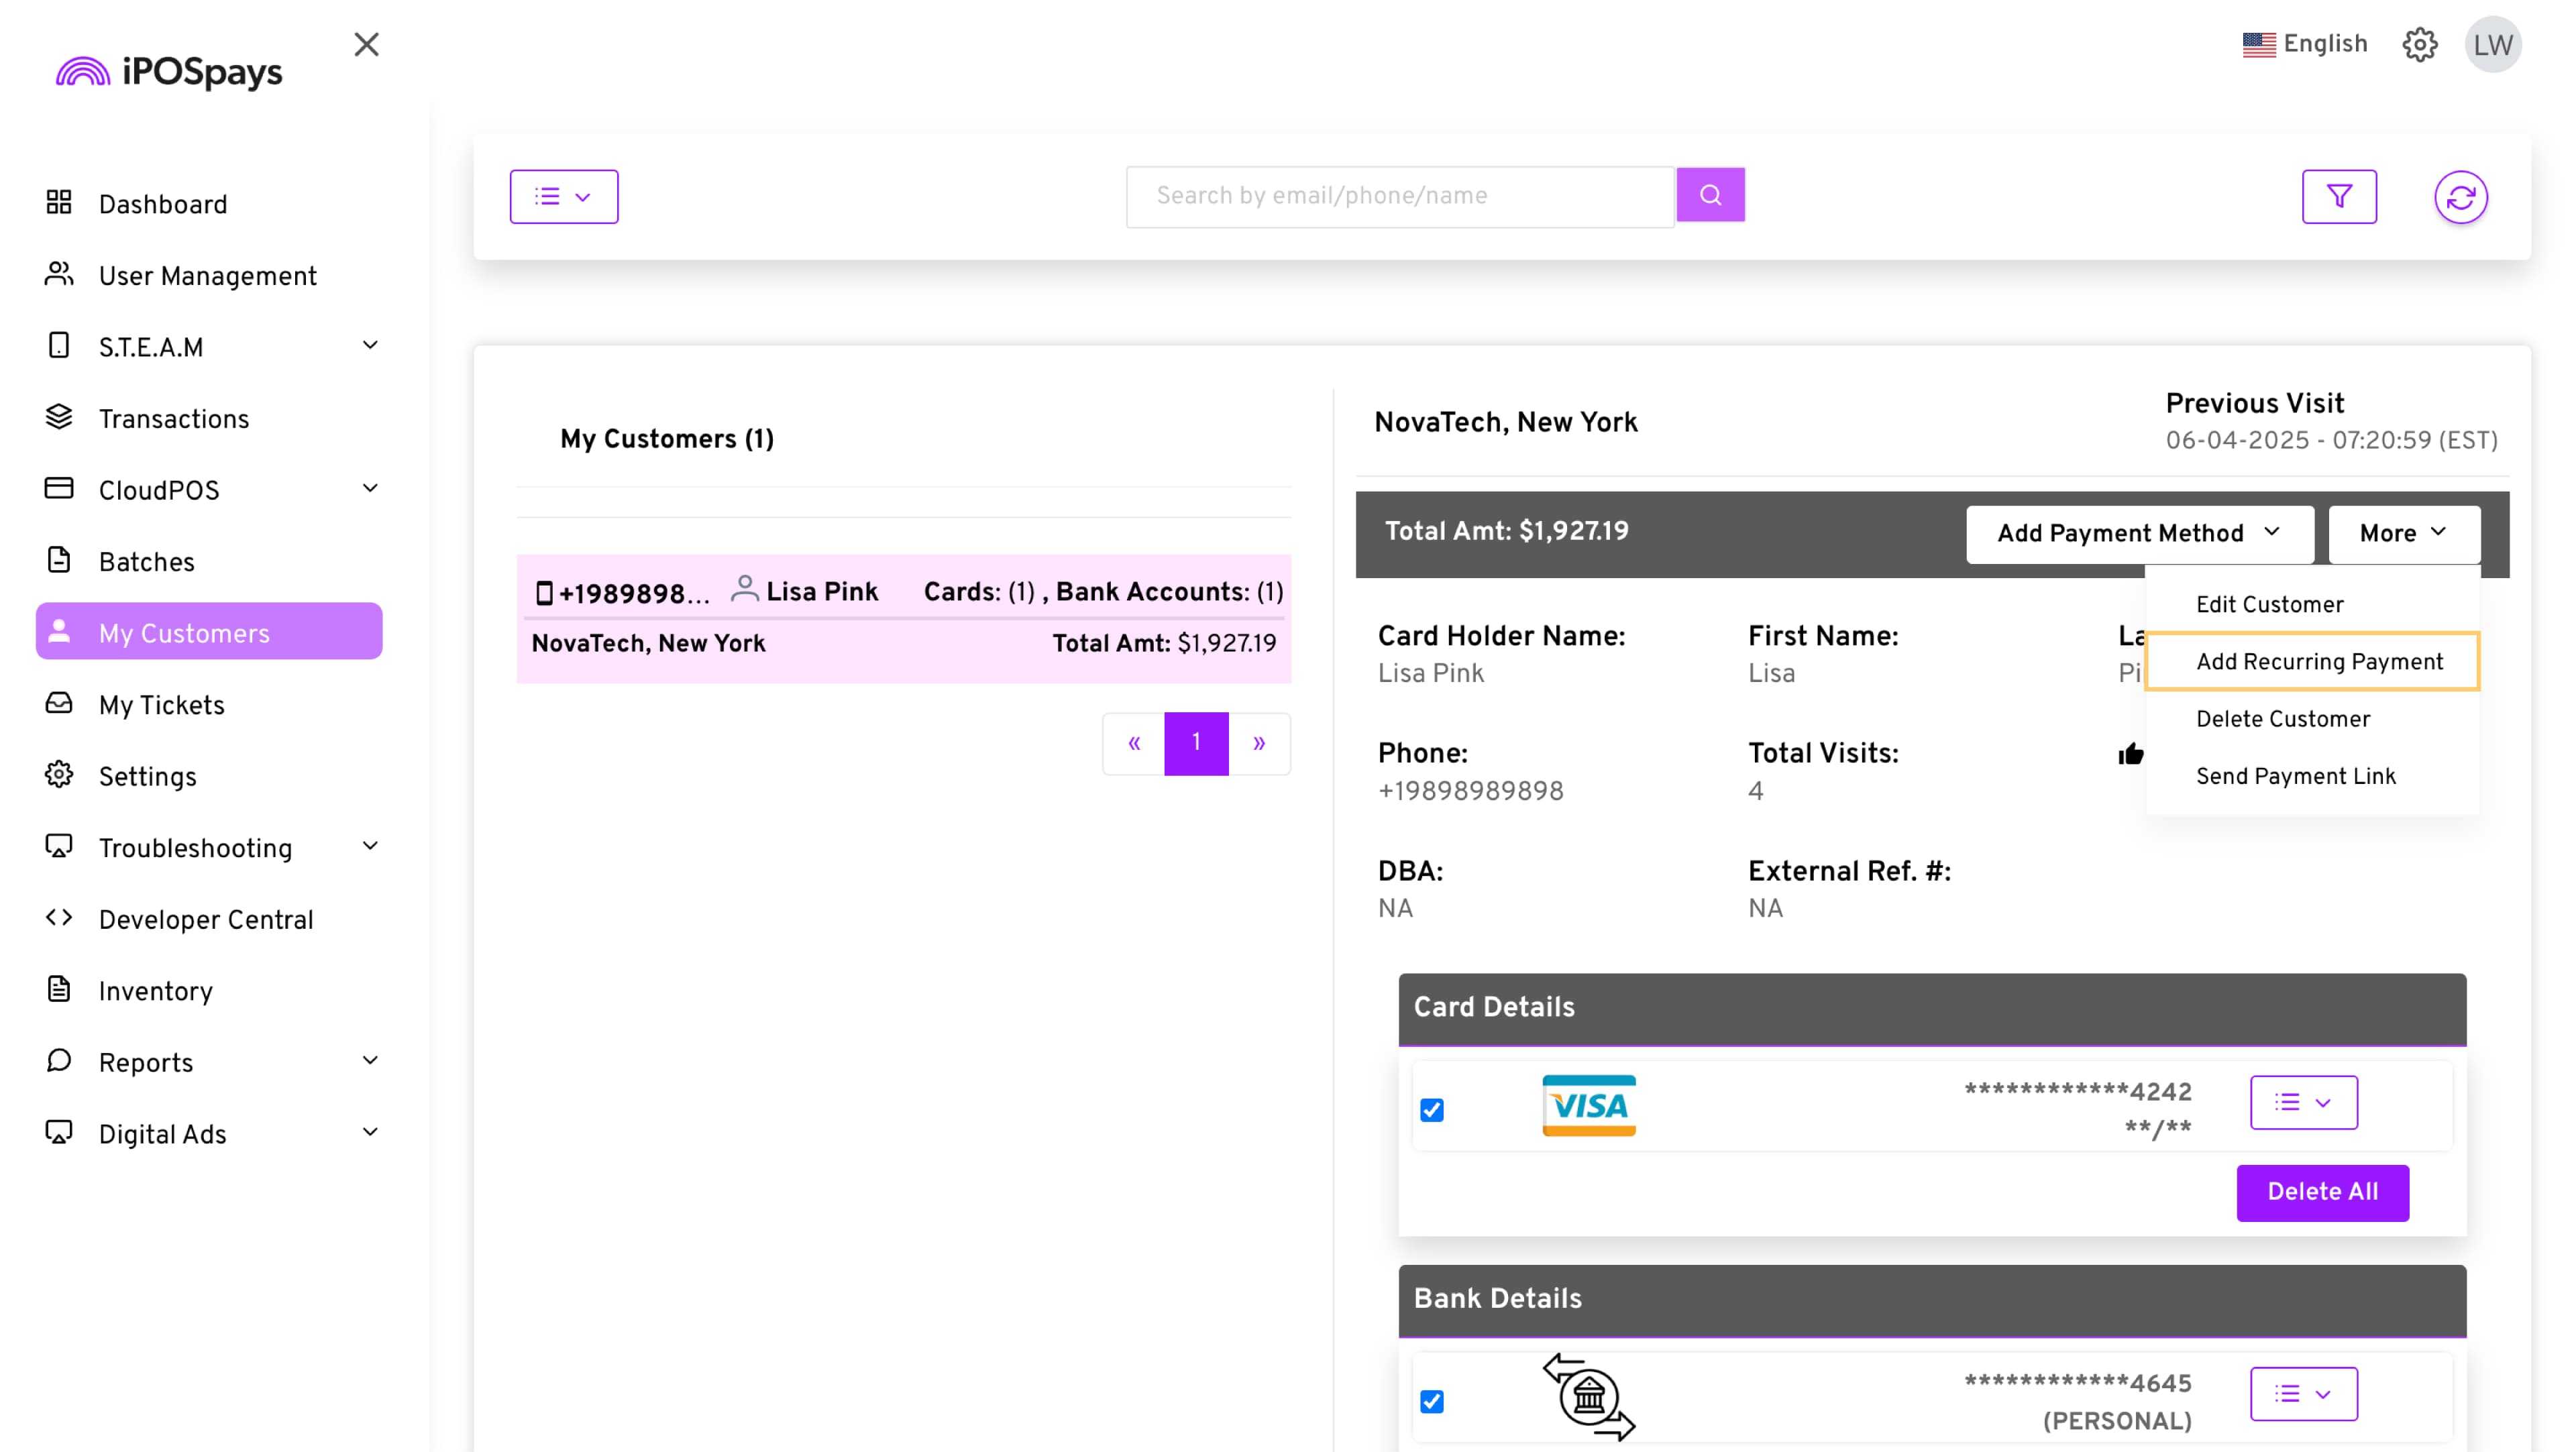
Go to the My Customers module → Choose the specific customer by scrolling down, or just use the search bar at the top to find them faster.
-
Click on More → Add Recurring Payment from the menu on the right side of the chosen customer’s profile.
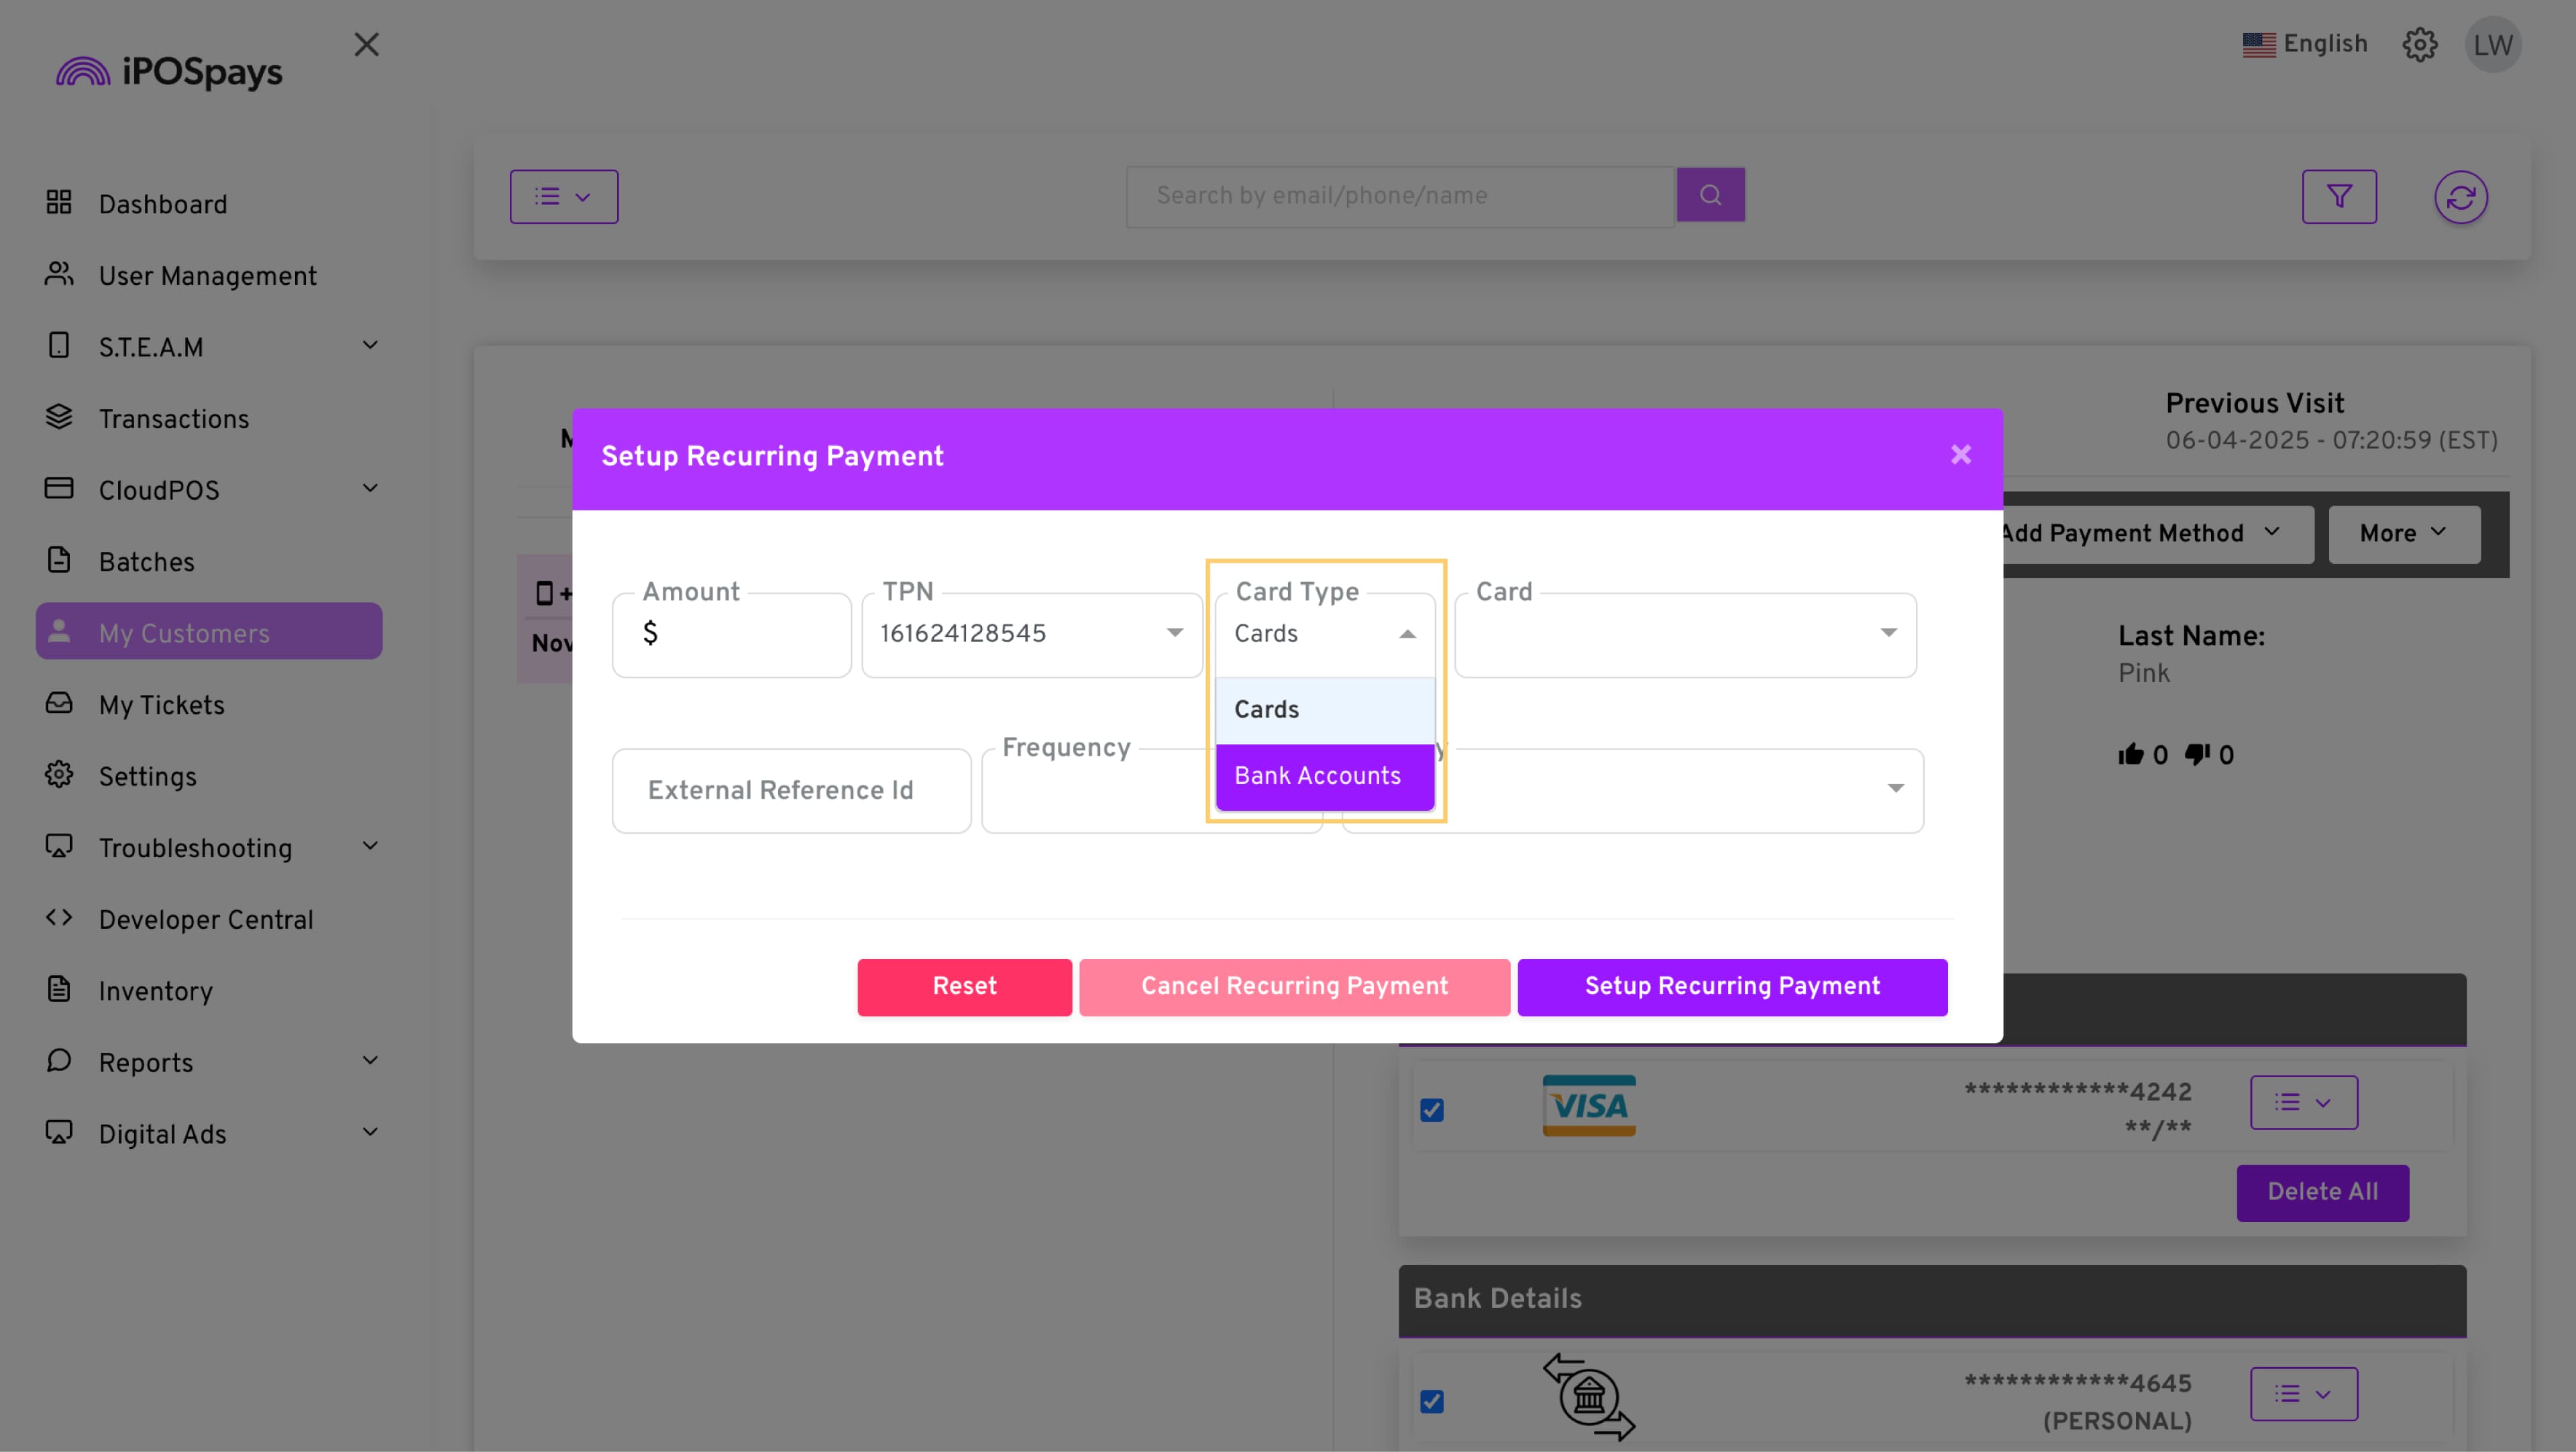
- As always, you can set up the recurring payment here and now, and you can choose the tokenized bank details from the Card Type drop-down menu.
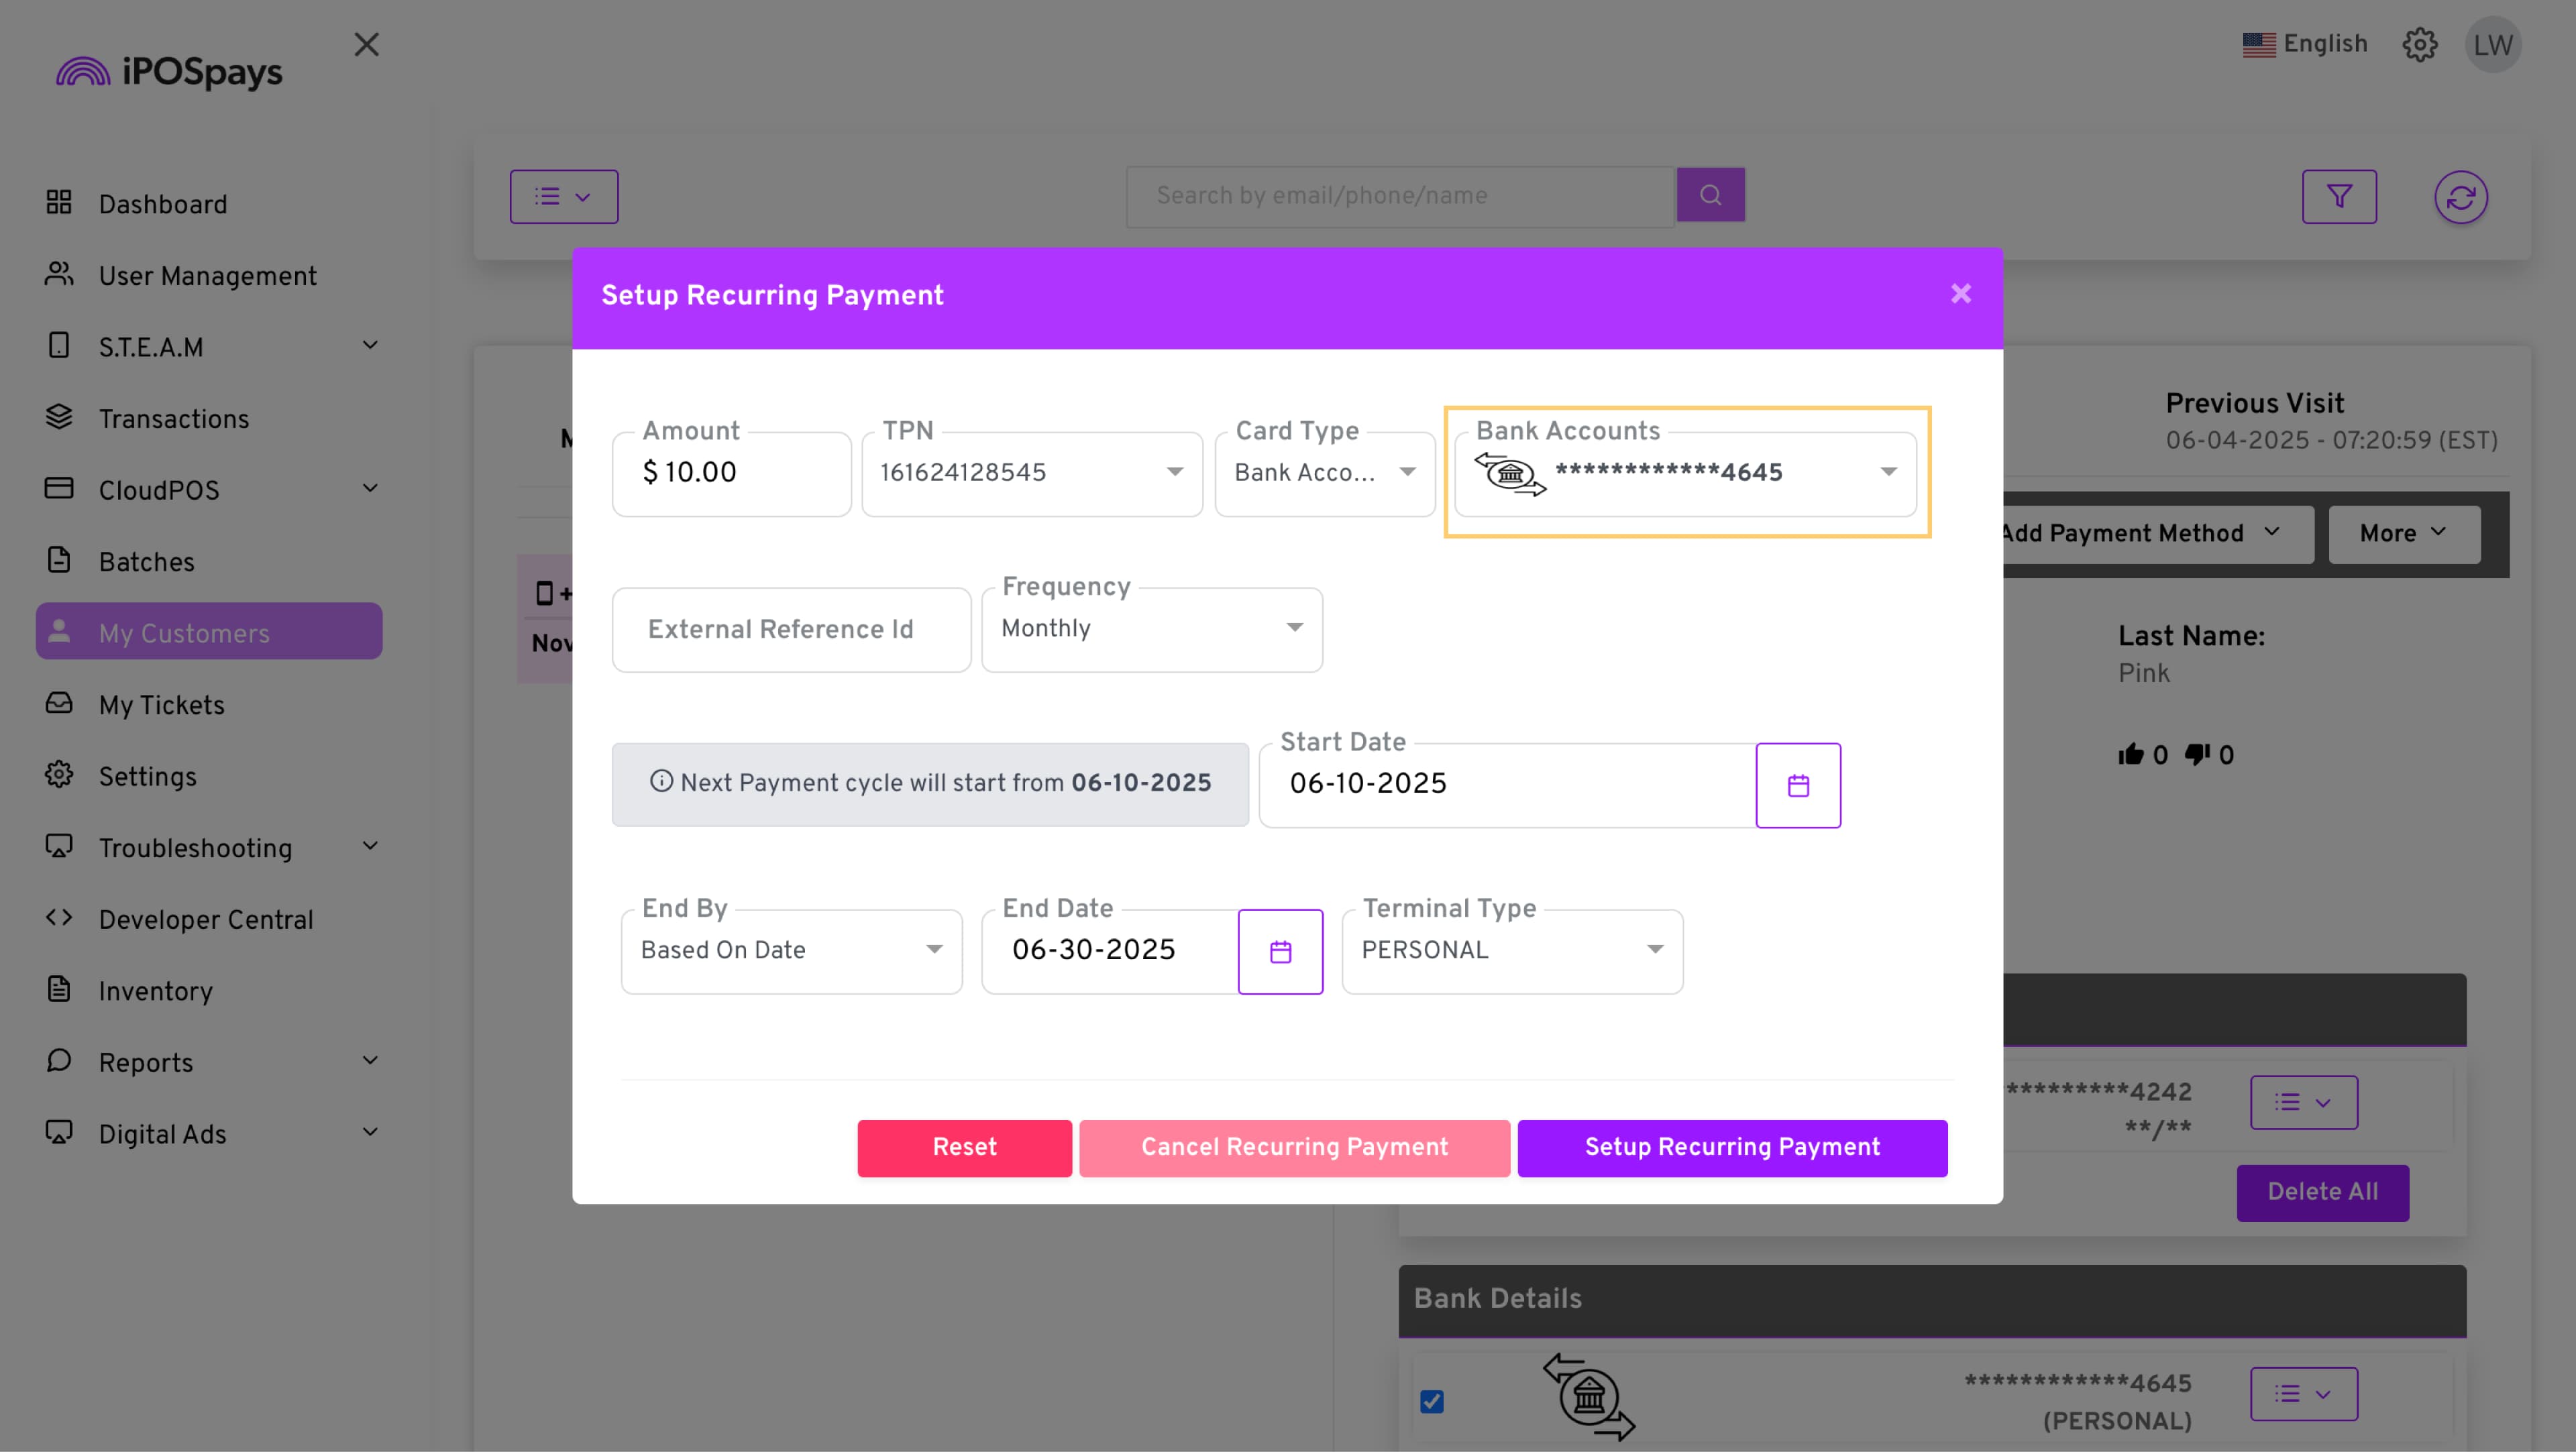
- Once you finish the setup, the customer’s tokenized bank details will be used as the payment method for the recurring payment.
How to Edit
-
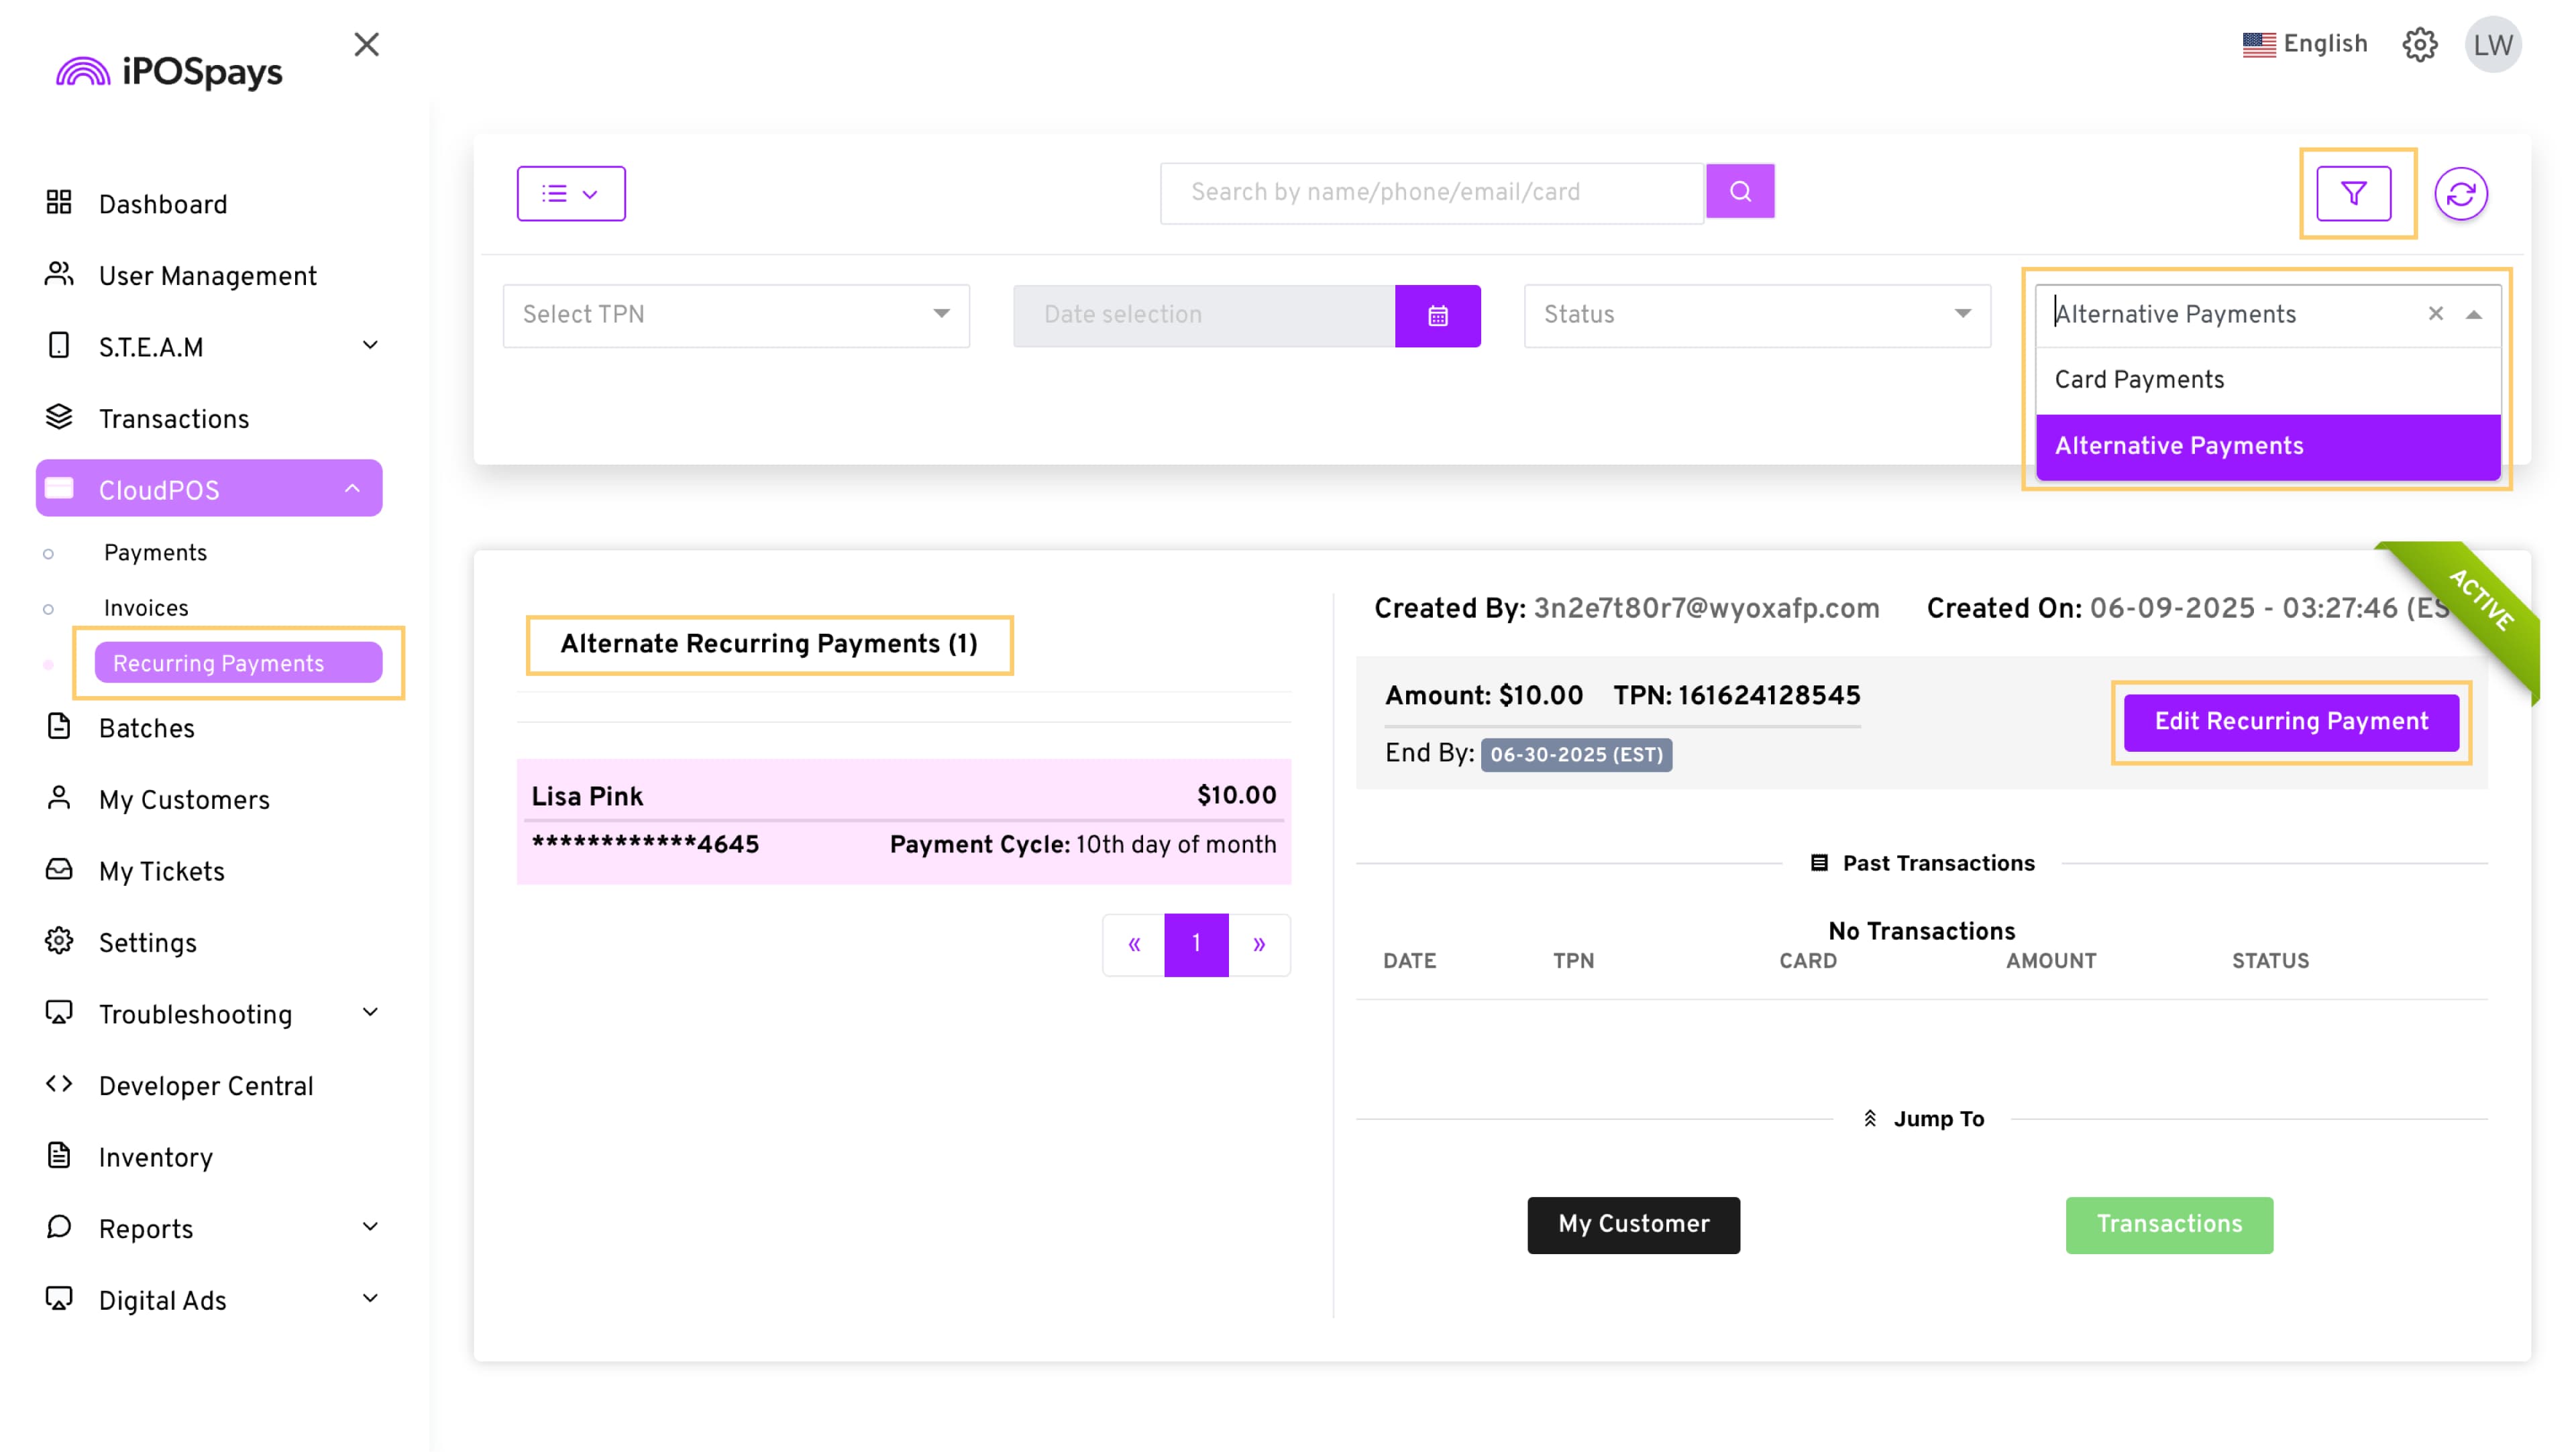
Go to CloudPOS → Recurring Payments → Filter icon → Choose Alternative Payments from the Payments drop-down menu.
-
Select the recurring payment → Edit Recurring Payment.
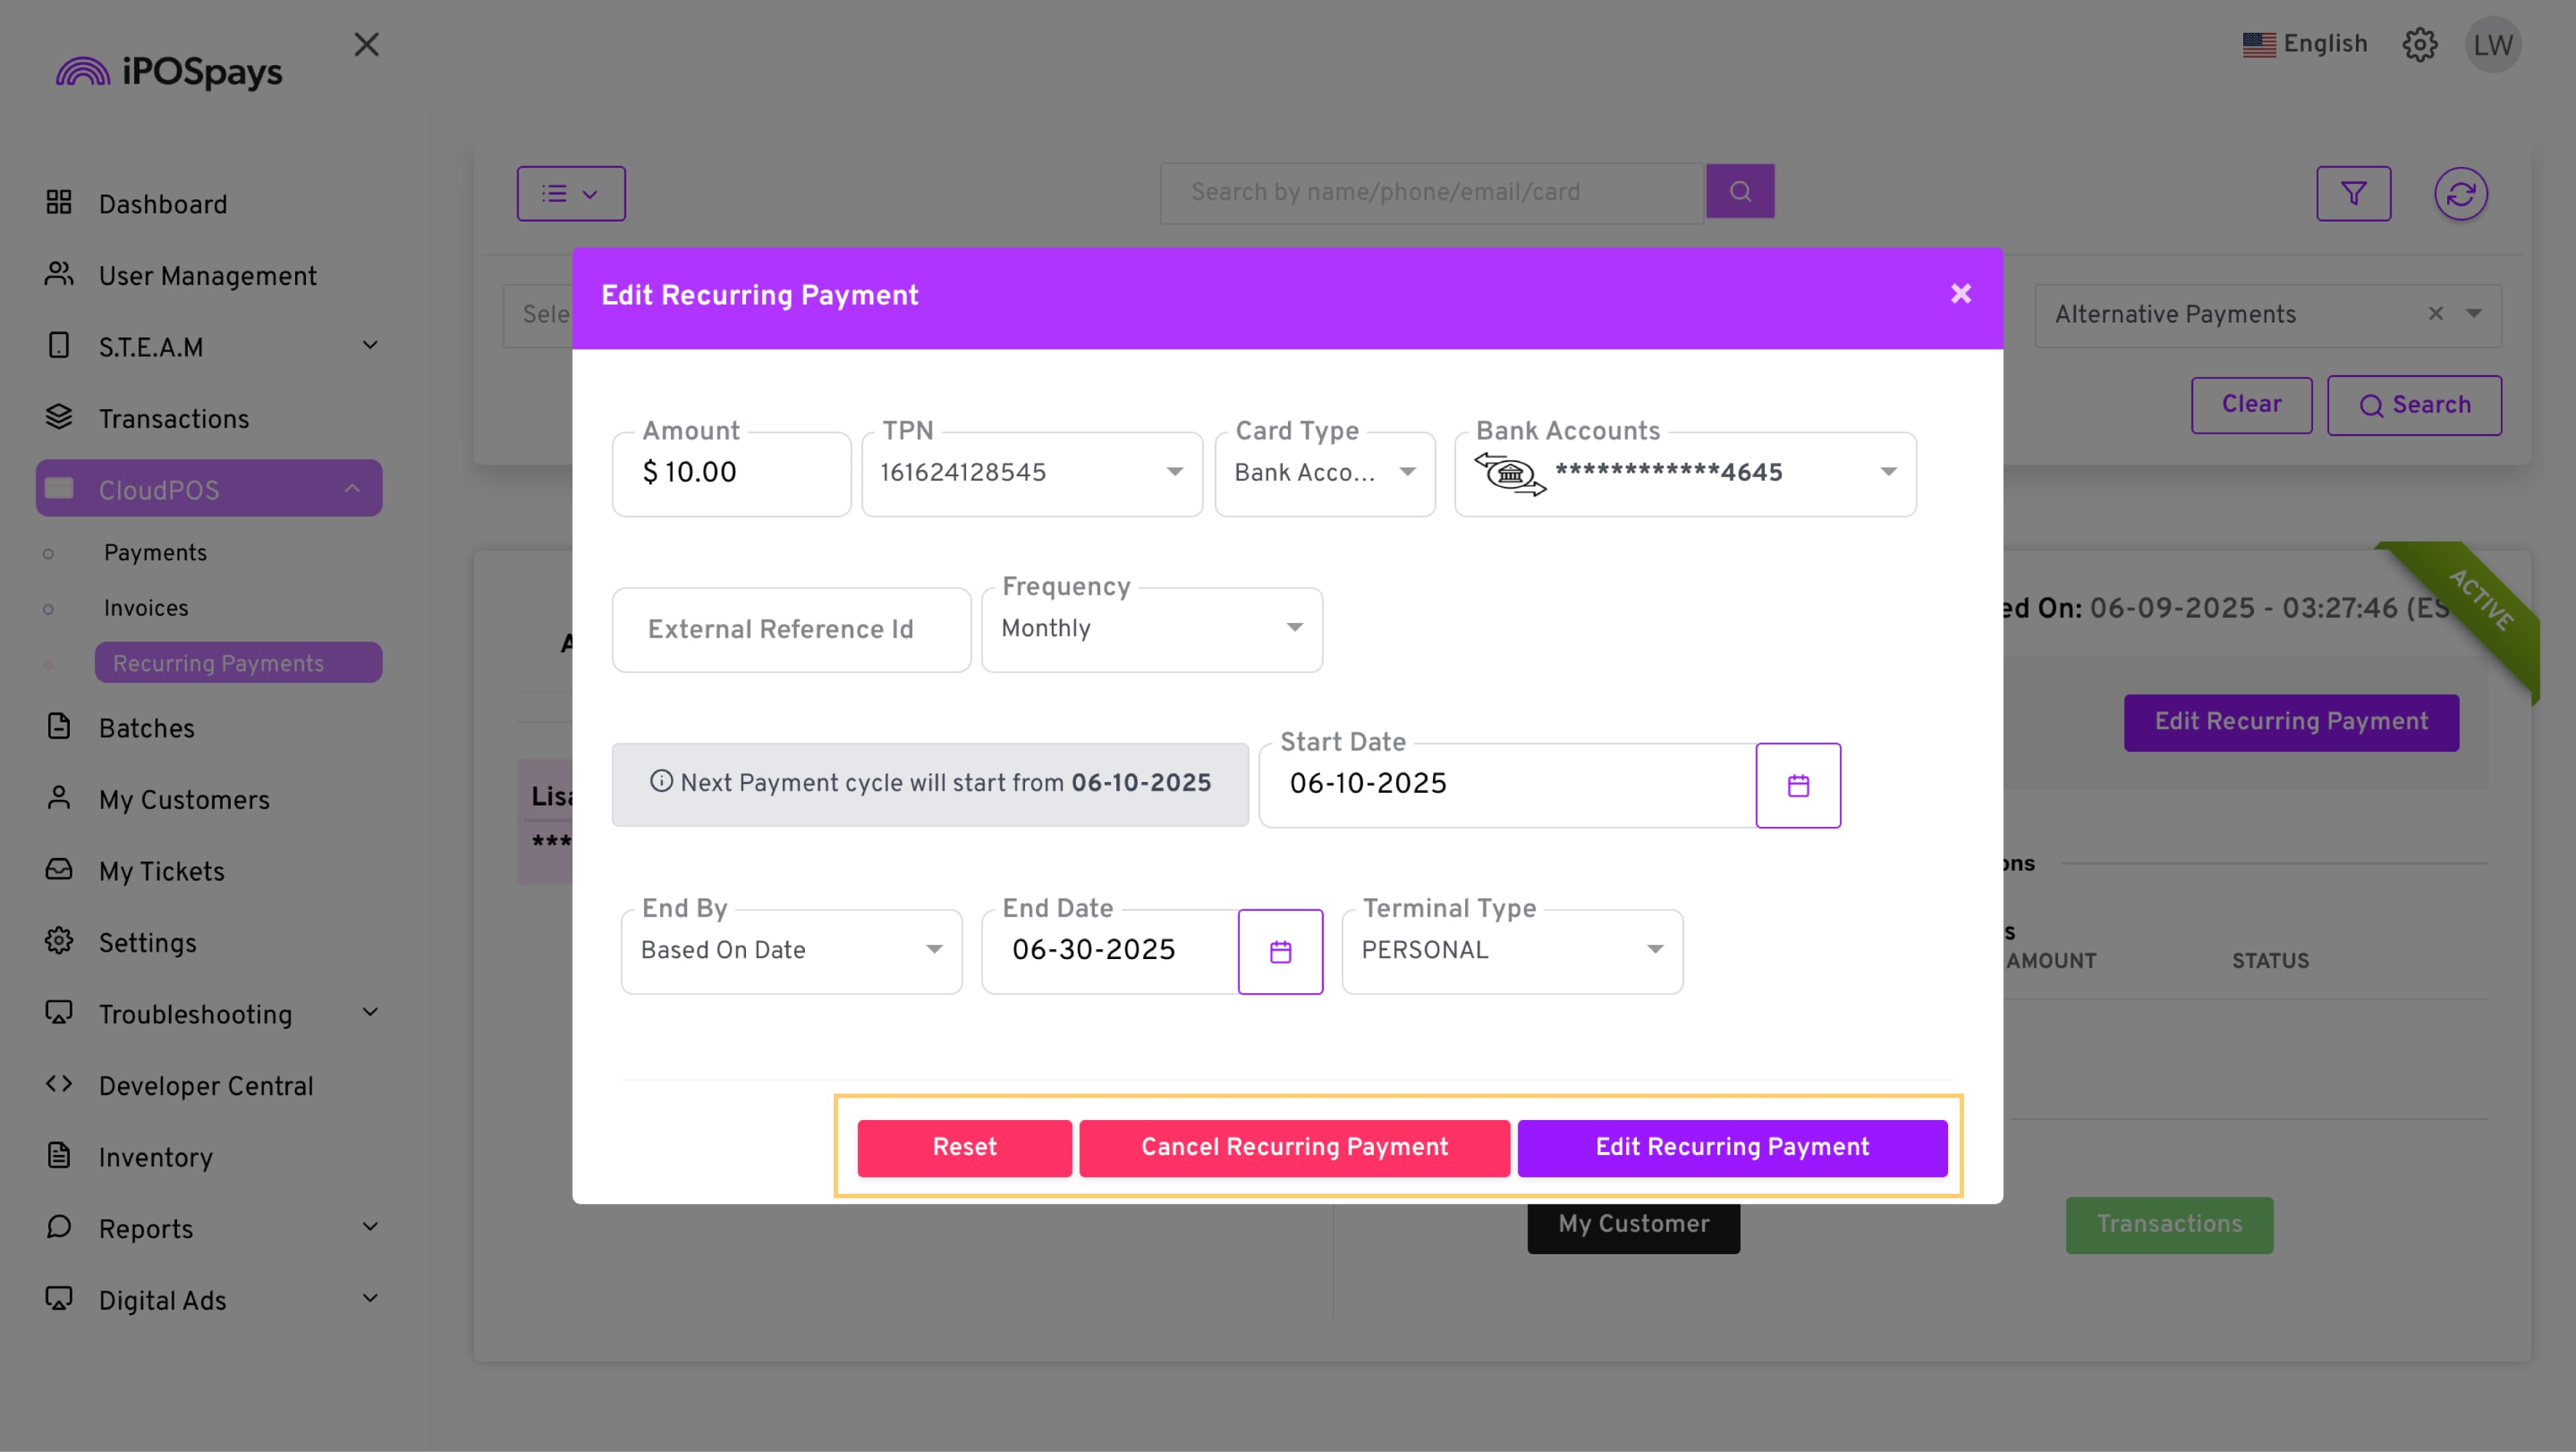
- Edit the recurring payment and you can choose to Reset, Cancel, or click Edit Recurring Payment to save the changes you just made.
How to Delete
-
Go to the My Customers module → use the search box to find and select the customer.
-
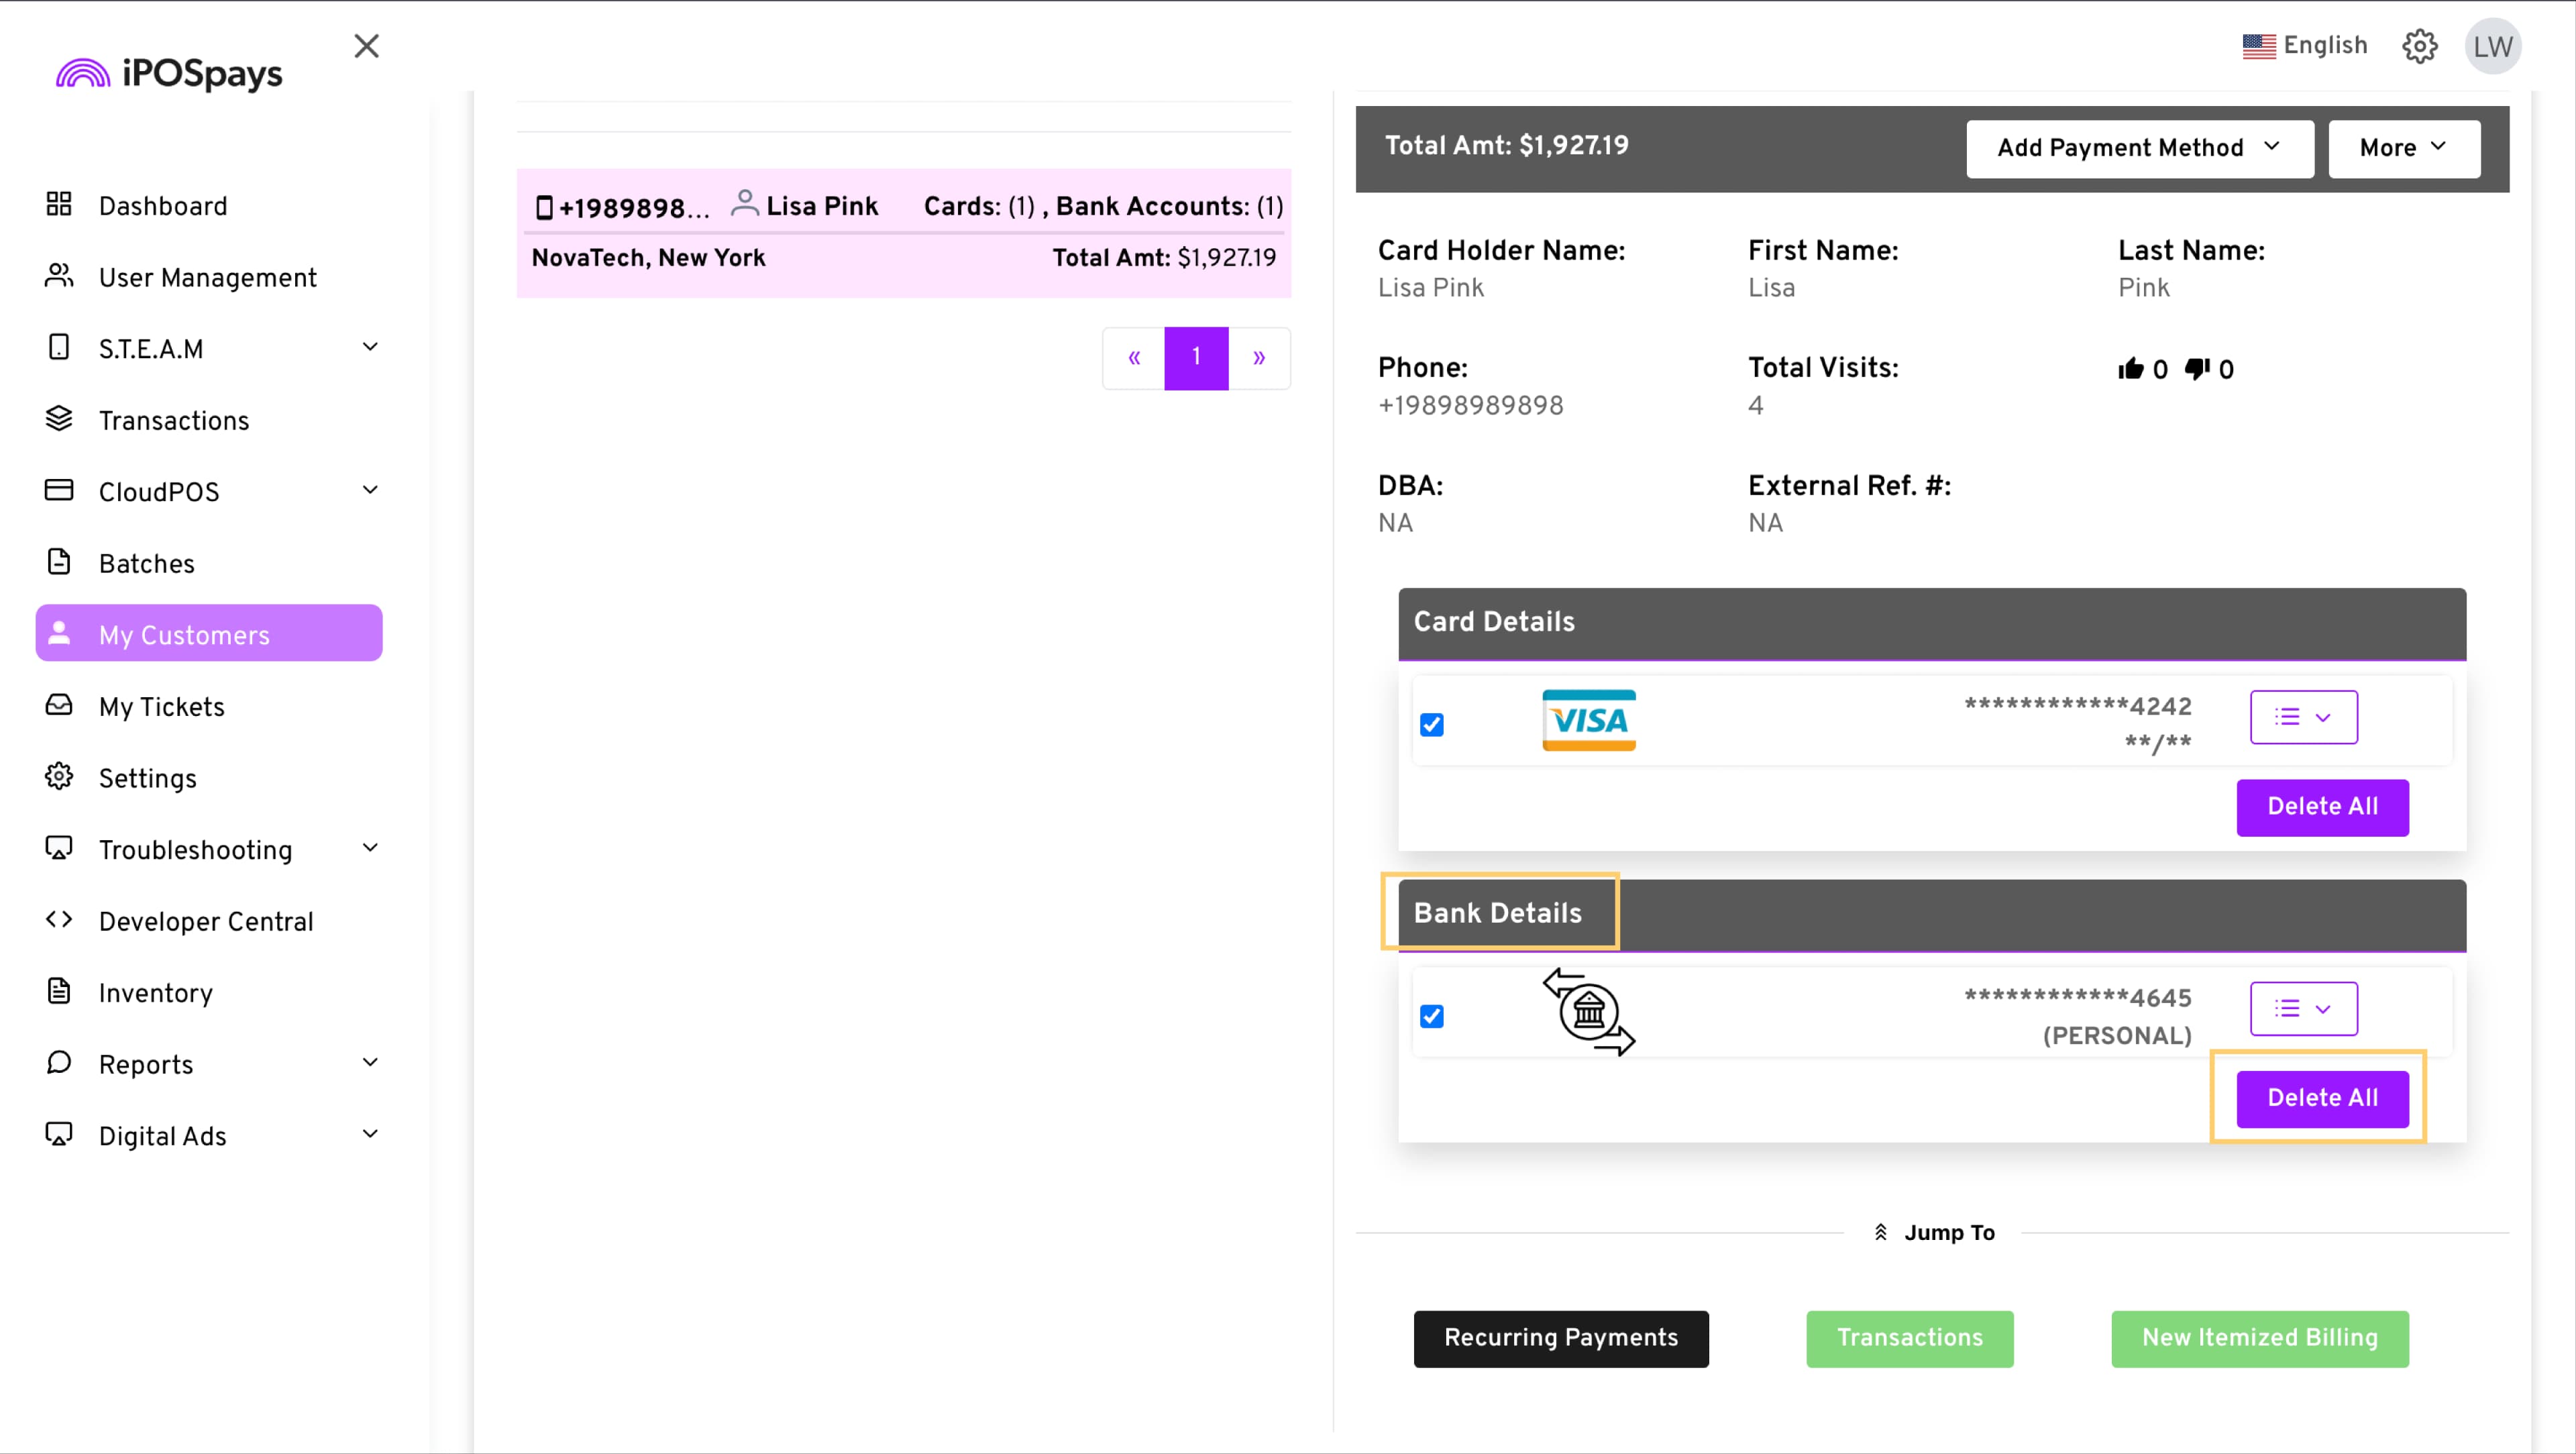
On the bottom right side of their profile, click on menu → Delete All.